Watermarking feature guide
Watermarking is the process of inserting digital "fingerprints" into different instances of audio tracks. This makes it easier to trace leaked Tracks back to the individual recipients they were shared with.
At a glance
The watermarking feature is available as a paid add-on to any DISCO subscription. Watermarking is done at the Playlist level (meaning you have to watermark entire Playlists, not individual Tracks in your DISCO). Once a Playlist is watermarked, it will have a blue W label.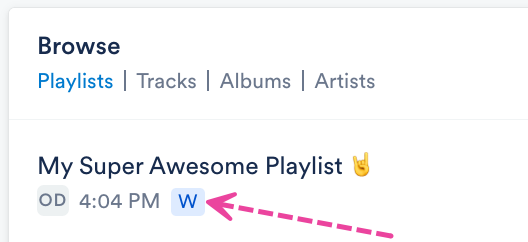
Adding Watermarking to your DISCO subscription
You can do this from your account settings:
- In the top-right corner of your DISCO, open Settings (the person icon) and select Settings and Account.
- Under Workspace Settings, select Billing & Subscriptions.
- Locate the Add Ons section and scroll to Watermarking.
- Select an option from the Playlists drop-down:
- 1 watermarked playlist ($29 per month)
- 3 watermarked playlists ($69 per month)
- Unlimited watermarked playlists ($129 per month)
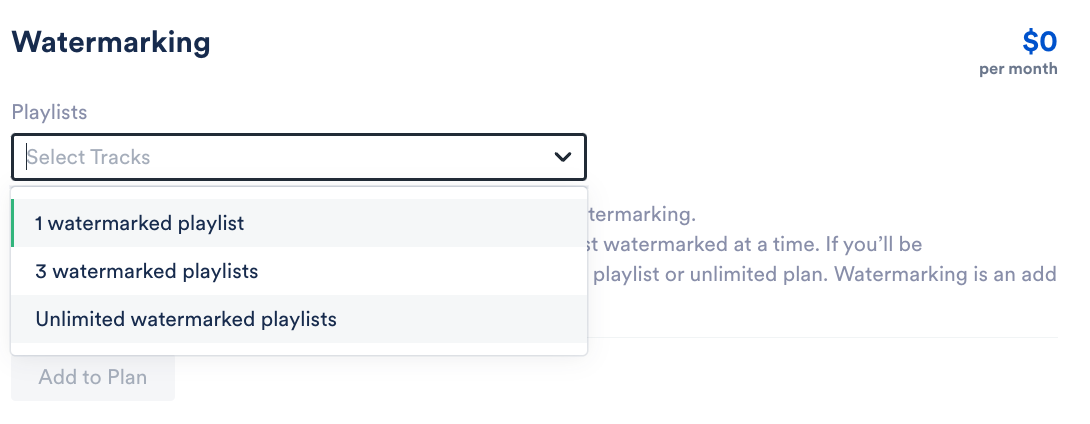
- Click the Add to Plan button.
Removing Watermarking from your DISCO subscription
Follow steps 1-3 in the section above, then click Cancel Watermarking.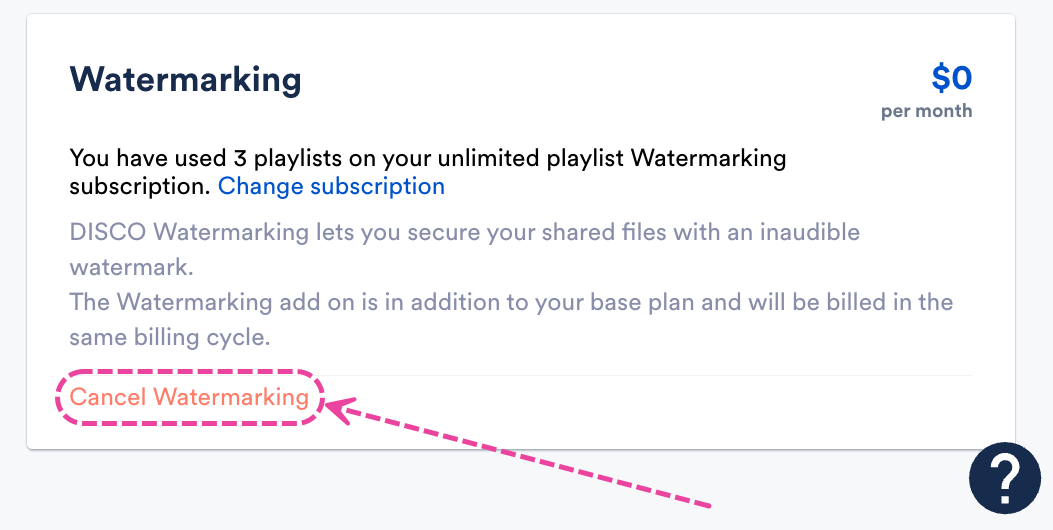
Watermarking your Playlists
There are several ways to do this. The easiest is from the Watermarking page.
If you are on the Pro plan or above, you could also do it:
From the Watermarking page
- On the left sidebar of your DISCO, under Tools, select Watermarking.
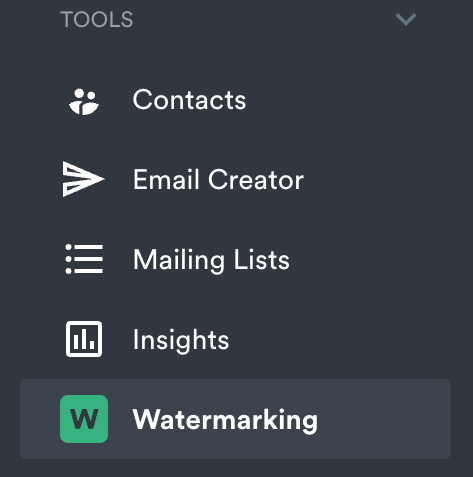
- From the Playlists tab, click the Watermark Playlist button.
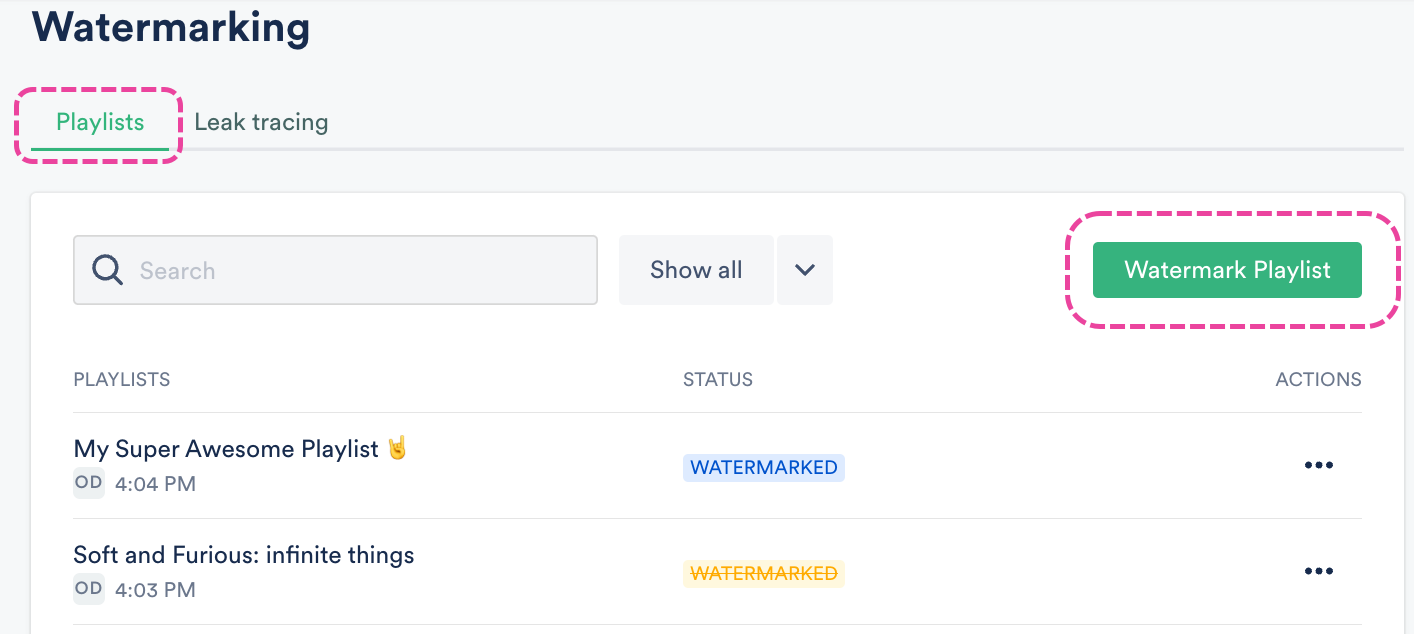
- Search for or choose a Playlist from the drop-down.
- Click the Watermark playlist button.
- In the Status column, you will see a PROCESSING label. Allow a few moments for this to process.

- Once it is done processing, the Status will change to a WATERMARKED label.

From Playlist Settings
| 📎 Note: These instructions apply to users on the DISCO Pro plan and above. |
- Open the Playlist menu (⋮) and select Playlist Settings.
- From the Playlist Info tab, under Security Settings, set the Watermark playlist toggle to ON.
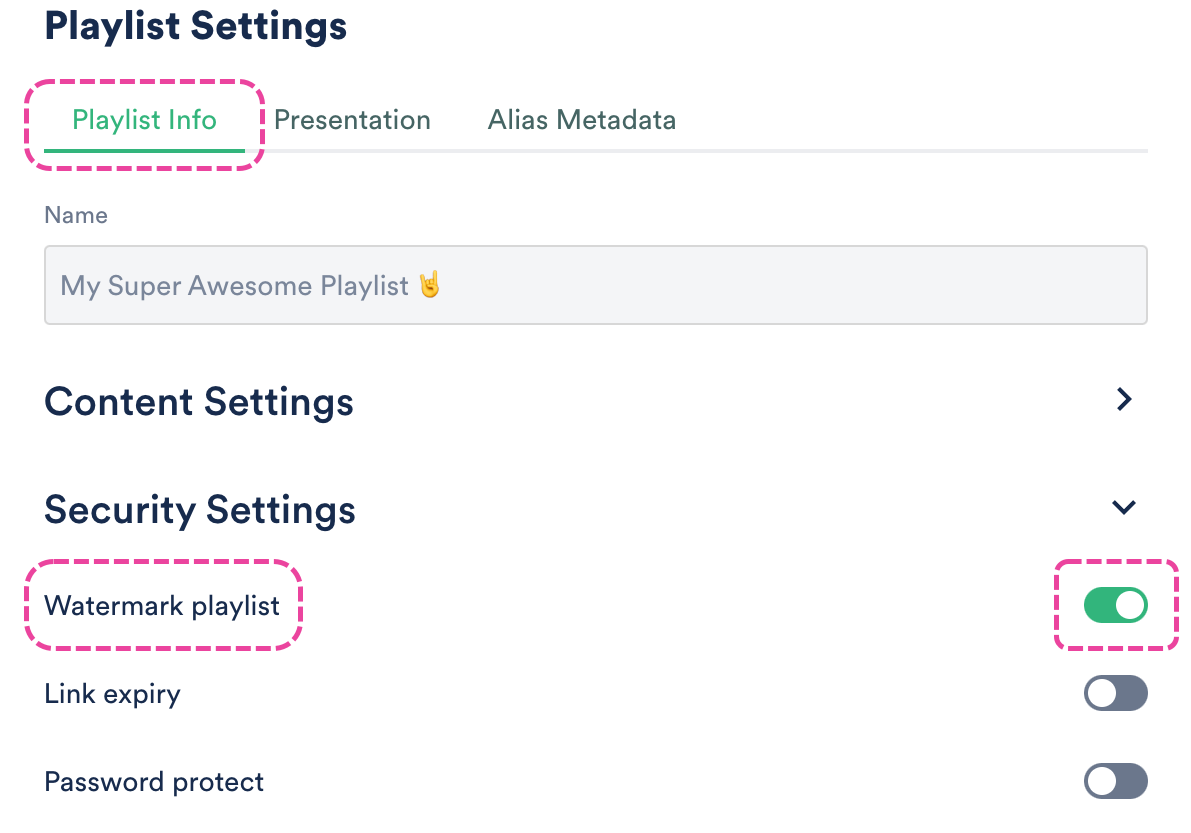
- Click the Save Playlist button.
You will see P and PROCESSING labels on the Playlist indicating the Watermarking is in progress. Allow a few moments for this to process.

Once it is done processing, the Playlist will have W and WATERMARKED labels.

When editing a Playlist
| 📎 Note: These instructions apply to users on the DISCO Pro plan and above. |
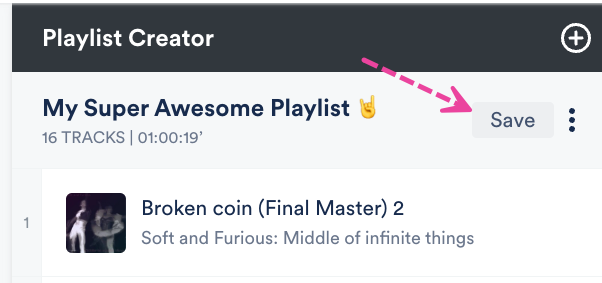
- Open the Playlist menu (⋮) and select Edit playlist.
- In the Playlist Creator, click the Save button.
- In the Save Playlist menu, from the Playlist Info tab, under Security Settings, set the Watermark playlist toggle to ON.
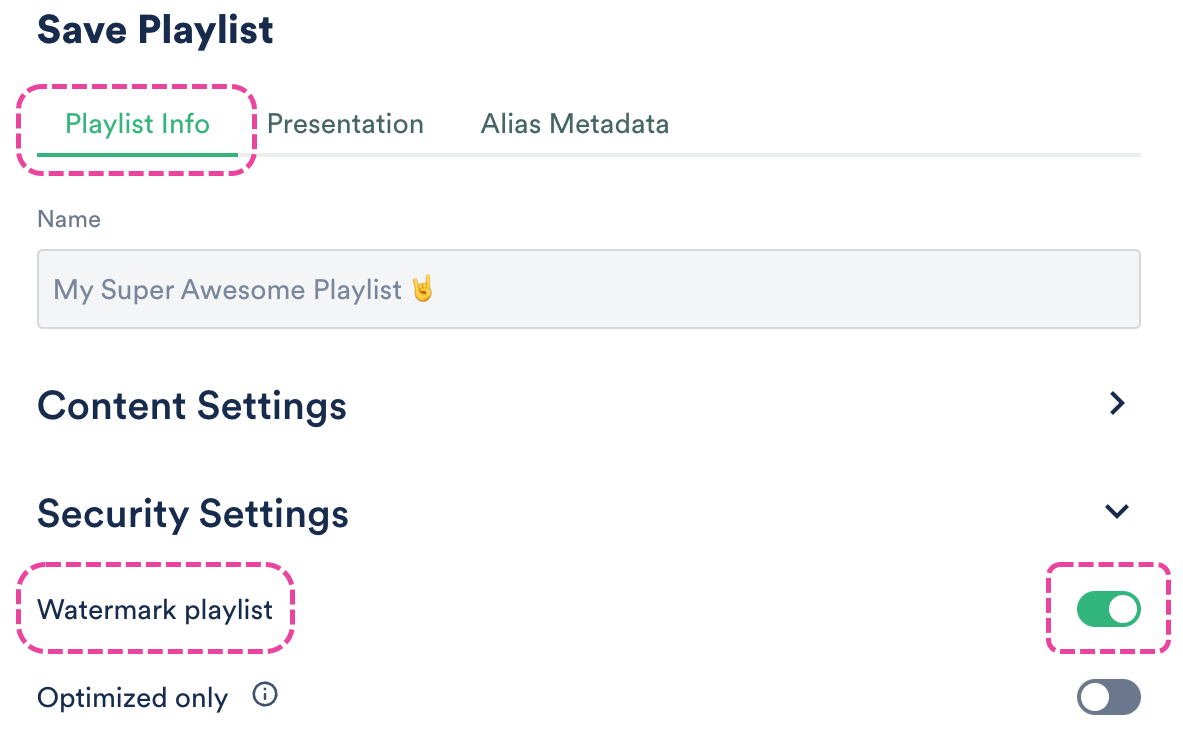
- Click the Save Playlist button.
You will see P and PROCESSING labels on the Playlist indicating the Watermarking is in progress. Allow a few moments for this to process.

Once it is done processing, the Playlist will have blue W and WATERMARKED labels.

When sharing a Playlist
| 📎 Note: These instructions apply to users on the DISCO Pro plan and above. |
- Open the Playlist menu (⋮) and select Share.
- From the Security tab, set the Watermark playlist toggle to ON.
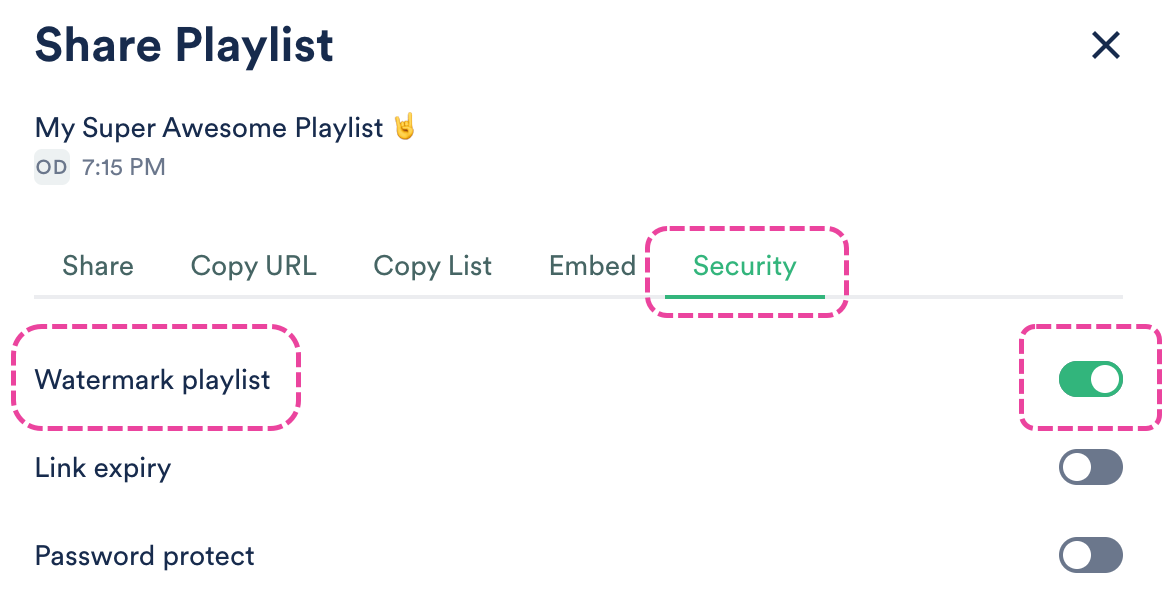
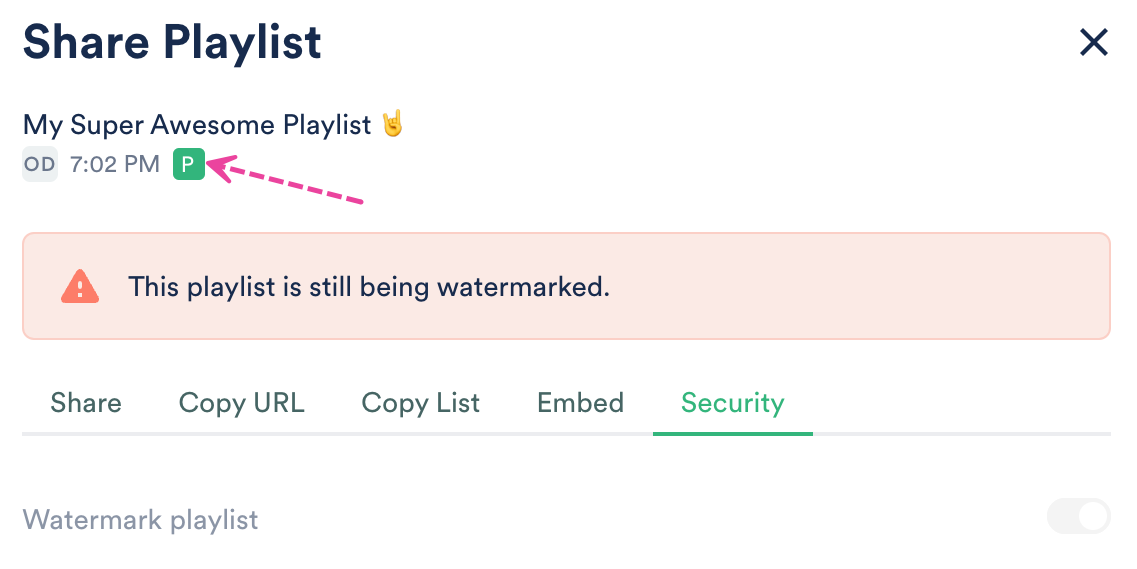
- You will see a P label indicating the Watermarking is in progress. Allow a few moments for this to process.
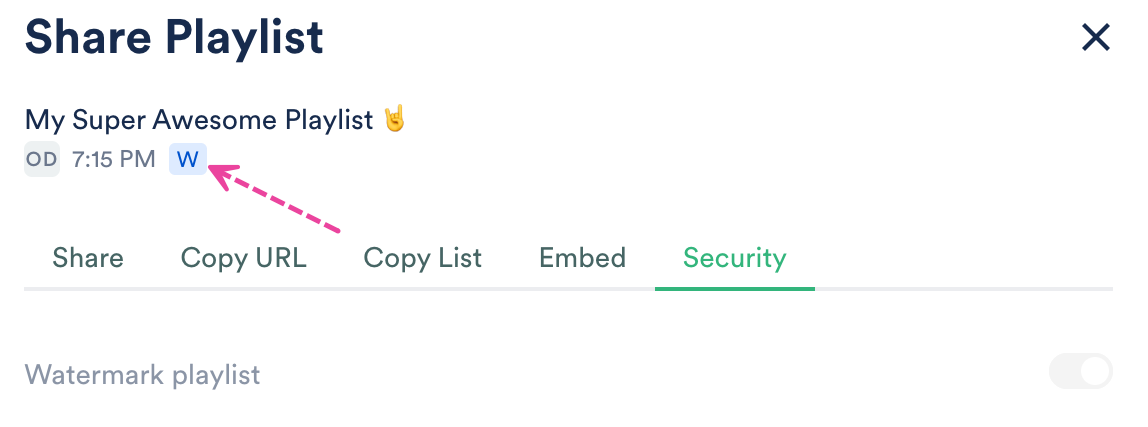
- Once it is done processing, the Playlist will have a W label.
Removing Watermarking from your Playlists
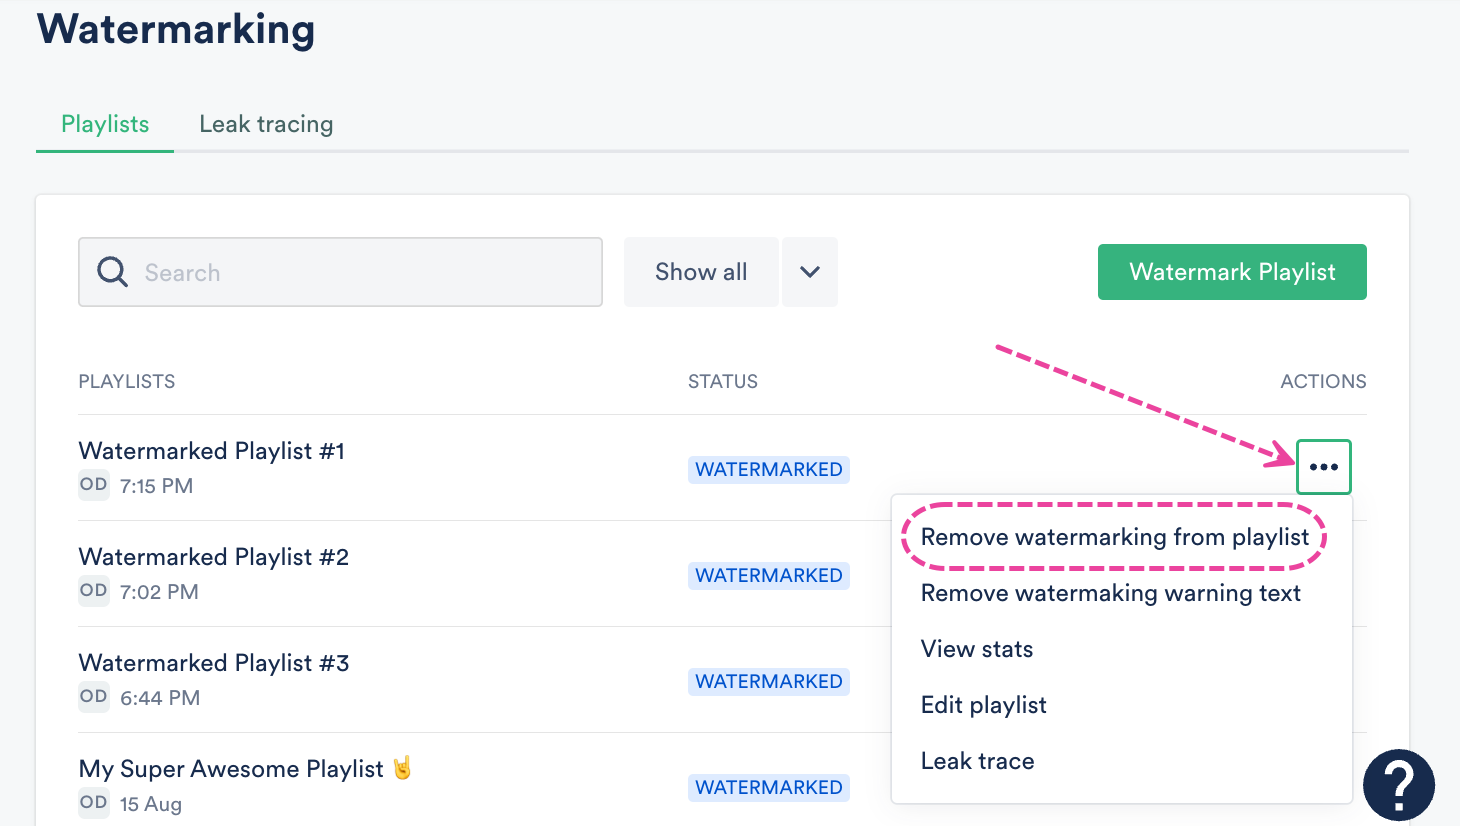
- On the left sidebar of your DISCO, under Tools, select Watermarking.
- From the Playlists tab, open the ACTIONS (…) menu next to the Playlist and select Remove watermarking from playlist.
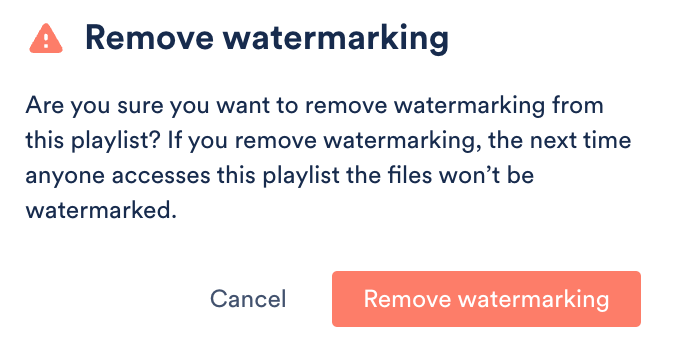
- A warning message will appear. If you're sure, click the Remove watermarking button.
- The Status will change to a label with the word
WATERMARKEDstruck through to indicate the watermarking has been removed.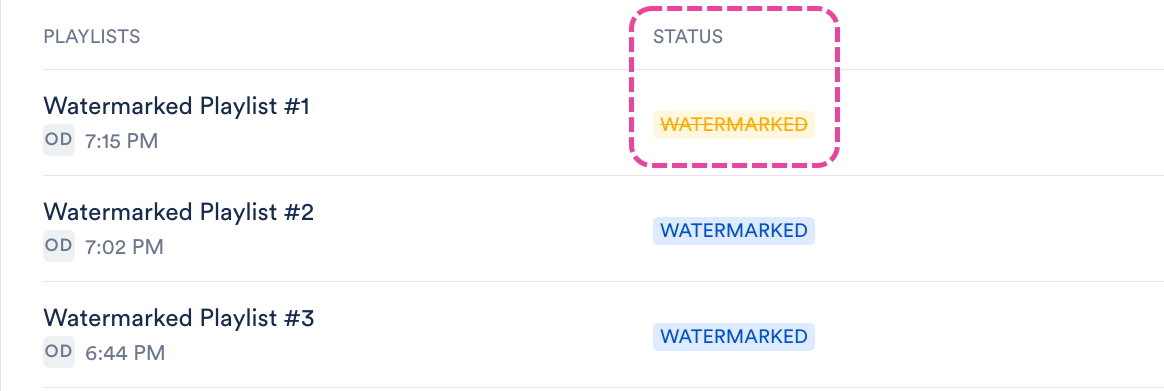
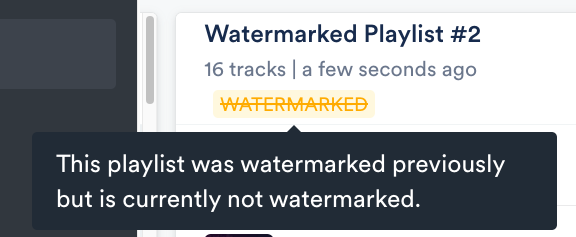
Alternatively, users on the Pro plan or above can do this from the Playlist Settings or the Save Playlist menu by setting the Watermark playlist toggle to OFF.
Sharing Watermarked Playlists
All the standard methods for sharing Playlists in DISCO can be used for Watermarked Playlists. However, to trace leaks back to individual recipients, you'll need to choose one of these two Playlist share methods: Email playlist directly or Assign a URL to a contact.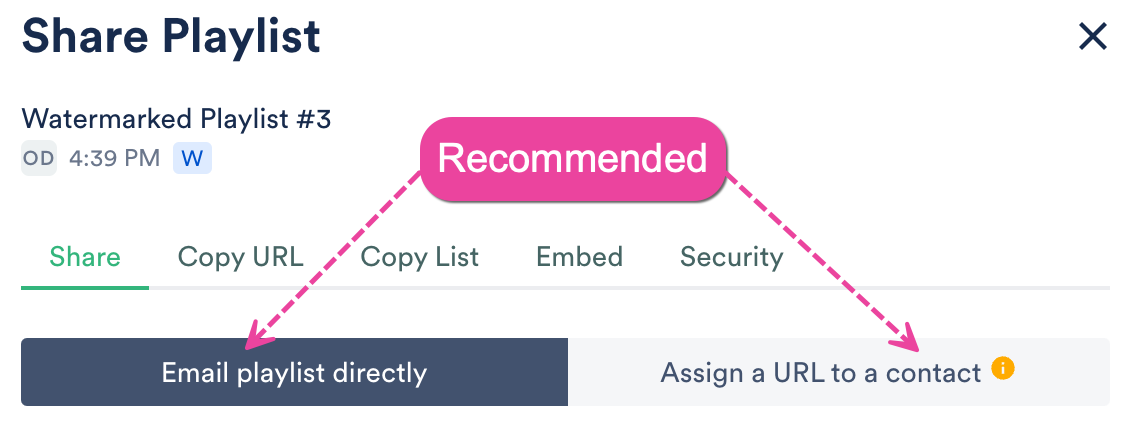
❗️ Important: If you choose one of the Copy URL options, you won't be able to trace leaks.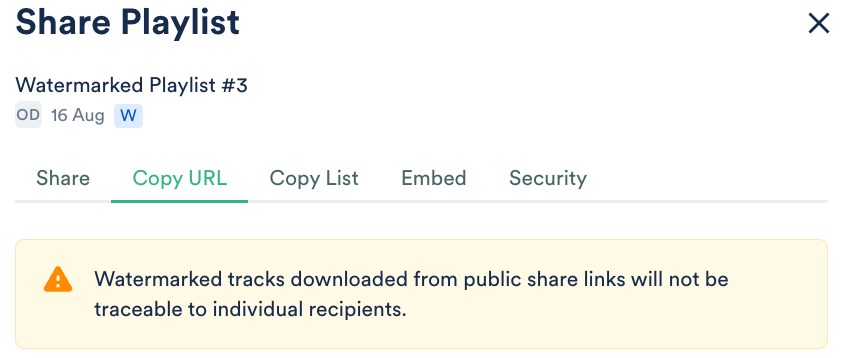 |
When you share a Watermarked Playlist using either the Email playlist directly or Assign a URL to a contact share method, unique Watermarks are assigned to each recipient for leak tracing.
💡 Tip: When sharing a Watermarked Playlist with a large group of recipients, use the Email Creator. Unique Watermarks will be assigned to each Contact in the campaign. |
Adding and removing Watermarking warning text on Playlists
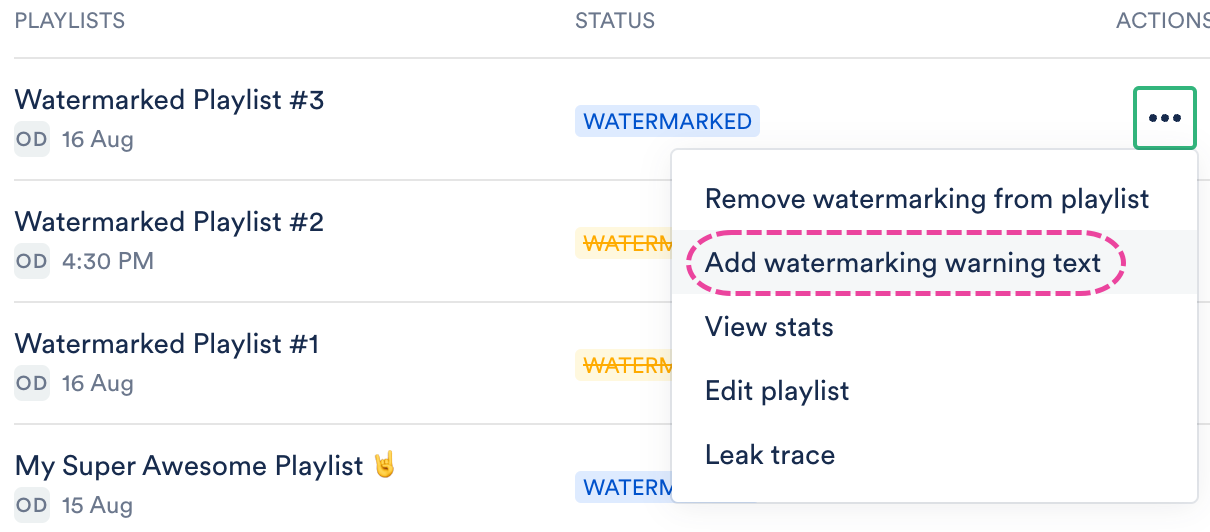
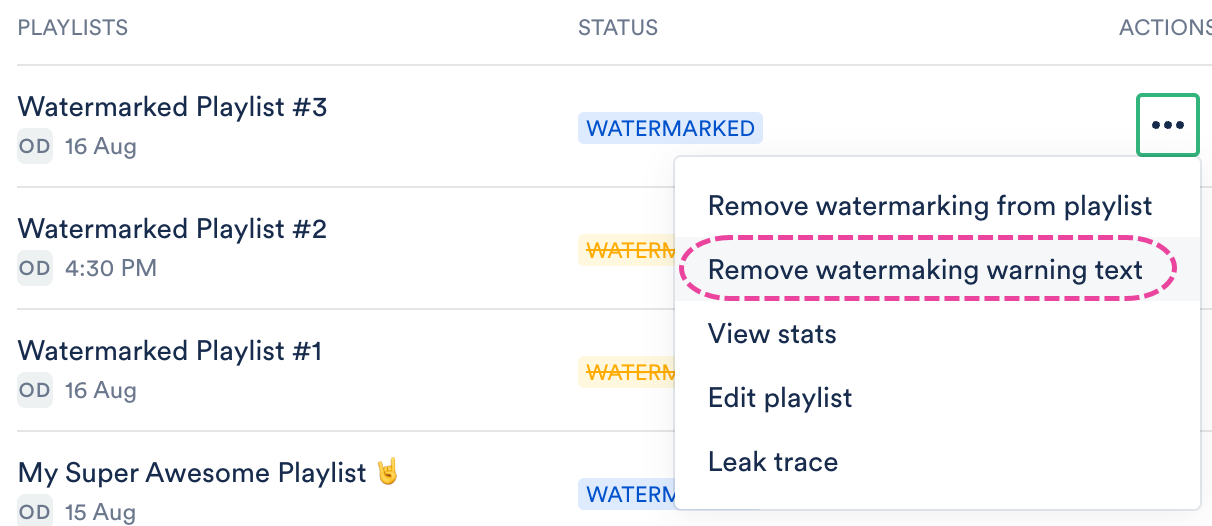
You have the option to have Watermarking warning text appear on your Playlists to discourage recipients from sharing them with others.
To add or remove this:
- On the left sidebar of your DISCO, under Tools, select Watermarking.
- From the Playlists tab, open the ACTIONS (…) menu next to the Playlist and select Add watermarking warning text or Remove watermarking warning text.
Tracing leaks
To trace a leak, you will first need to download the file from the source where it was leaked. Then follow these steps in your DISCO:
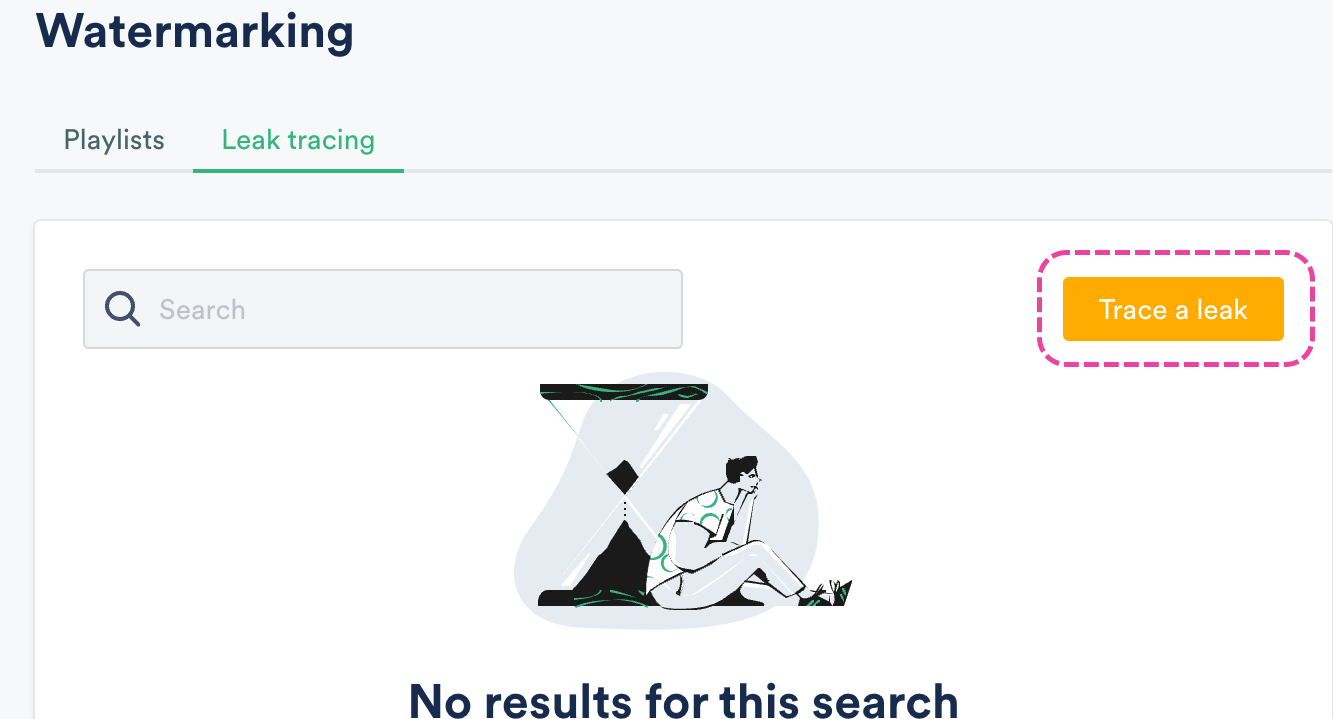
- On the left sidebar, under Tools, select Watermarking.
- From the Leak tracing tab, click the Trace a leak button.
- Upload the leaked file and click the Submit button.
 A message will appear to confirm your leak trace has been submitted and the Track will appear in the Leak tracing list with a Status of Processing.
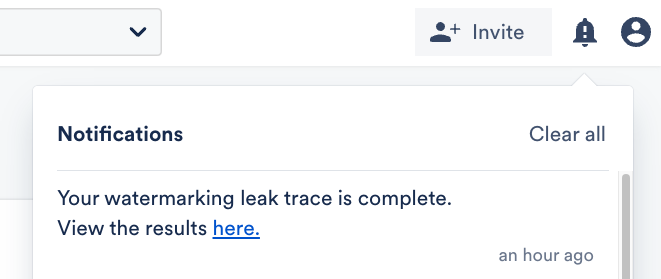
- After a few moments, the status will change to Completed. You will receive a Notification in your DISCO as well.
- From the Leak tracing list you can see:
- the Track and Playlist names
- the recipient(s) it was Shared With
- the user in your DISCO it was Shared By
- when the leak was reported and who reported it
- the status of the leak trace

