
Using the DISCO Bulk Uploader tool
The DISCO Bulk Uploader tool is a great option for uploading a large amount of Tracks (100+) into your DISCO. It's especially useful when uploading your music collection for the first time!
At a glance
The DISCO Bulk Uploader tool is a desktop application that you can download for free. Once you've downloaded the app, you can access it from within your DISCO.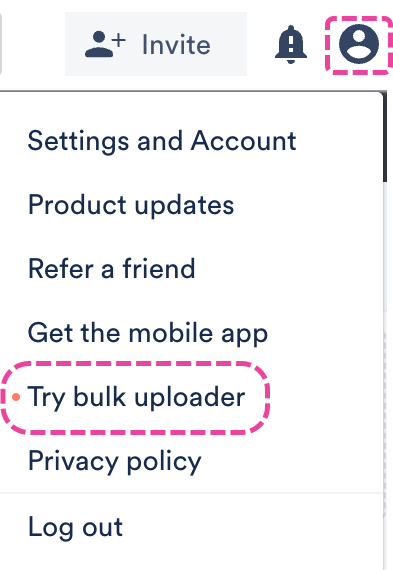
Uploading files with the Bulk Uploader
- In the top-right corner of your DISCO, open Settings (the person icon) and select Try bulk uploader.
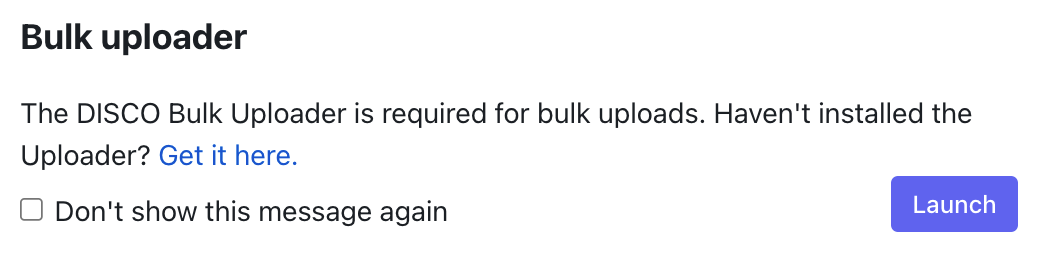
- This will prompt you to either install the Bulk Uploader app, or if you have it installed already, click the Launch button.
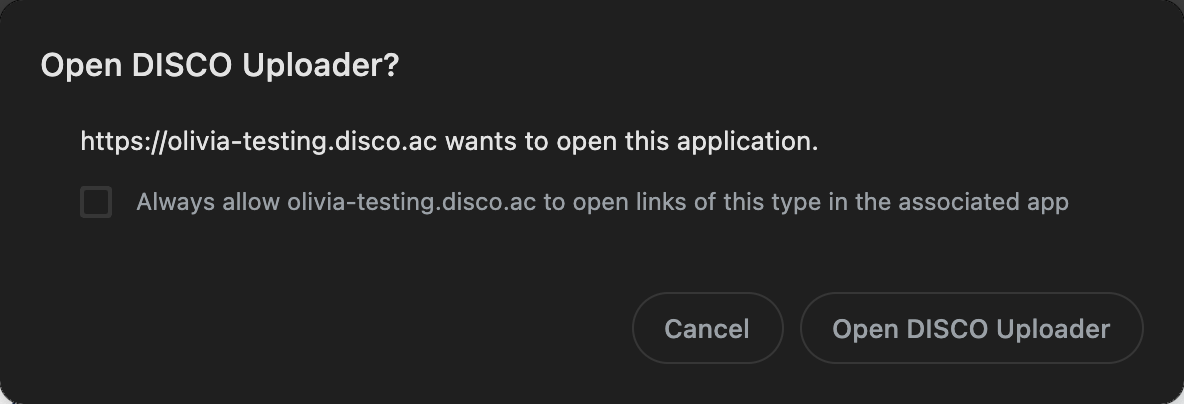
- Your browser may display a message, similar to the one below, asking for permission to open the Bulk Uploader. If you see this, be sure to allow it by clicking Open DISCO Uploader or whichever option is available in your browser (the screenshot below is from Google Chrome).
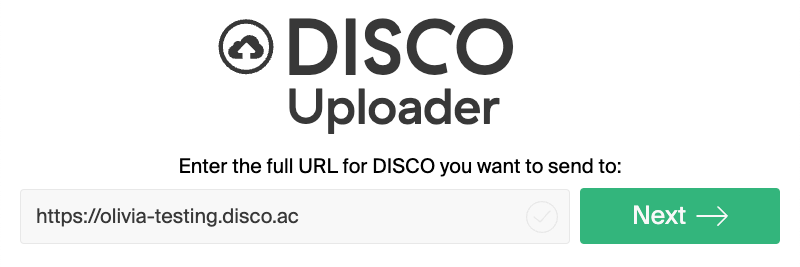
- The Bulk Uploader will open in a new window. Enter your full DISCO URL (e.g., https://mycompany.disco.ac) and click the Next button.
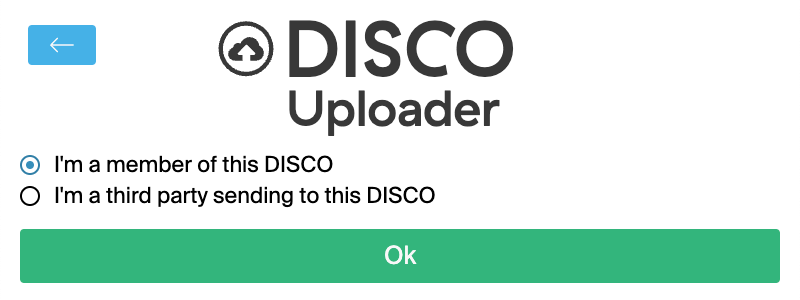
- Select the radio button for I'm a member of this DISCO and click the Ok button.
- Enter your DISCO username and password and click the Login button.
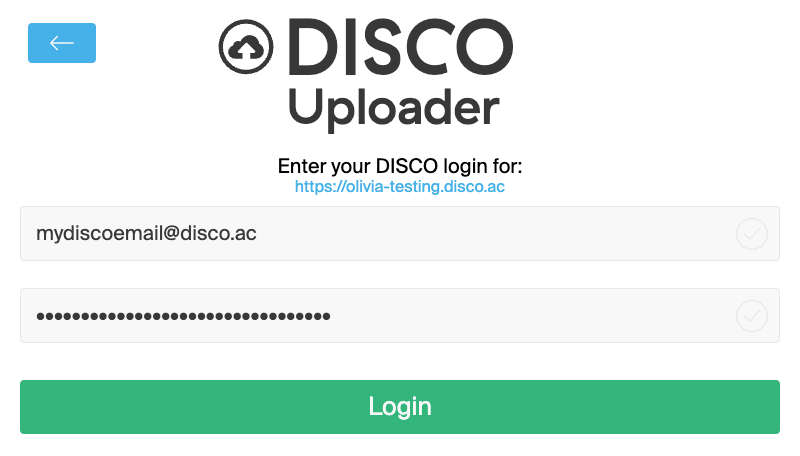
📎 Note: Your username is the email address associated with your DISCO account. - If you have Multi-factor Authentication (MFA) enabled on your DISCO account, you'll be prompted to enter the code, and then click the Login button.
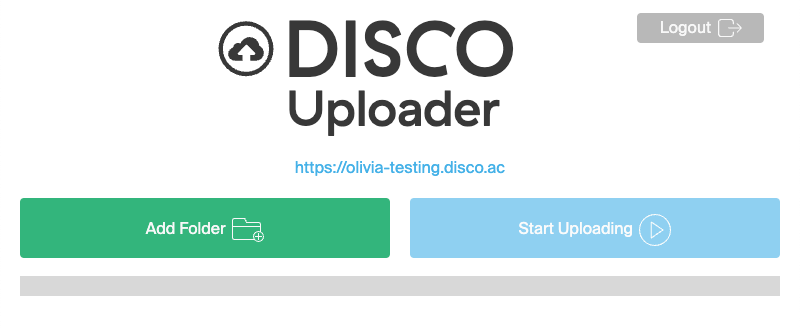
- Once you’ve logged in, click the Add folder button to select a folder to upload from your computer into your DISCO.
- This will open the file manager program on your computer. Select the desired folder and click Open, or whichever option is available.
📎 Note: All the files in this folder and any subfolders within it will be uploaded to your DISCO. Jump to this section for tips on selecting the right folders in your filesystem. 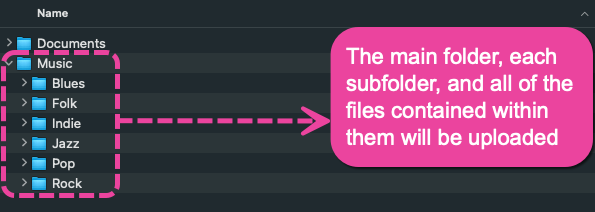
- The Uploader will analyze the files before starting the upload.

- Once the files are analyzed, they will begin uploading.
💡 Tip: You can add additional folders to your upload queue at any time by clicking the Add Folder button again. |
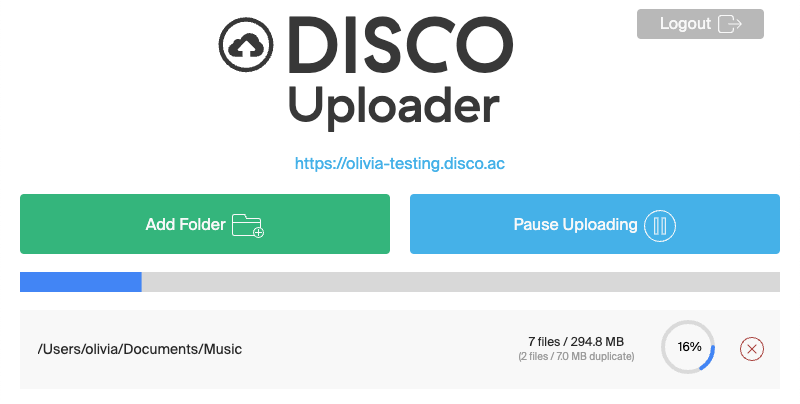
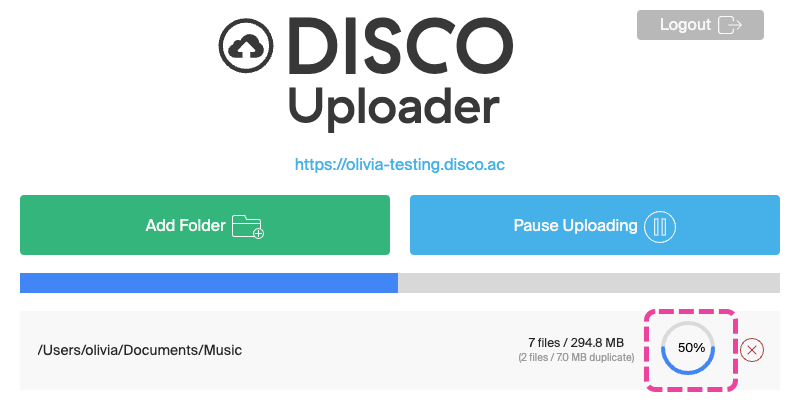
Monitoring upload progress
A blue progress bar will appear and the upload progress will be indicated by a percentage:
Once the upload is complete, the indicator will show 100% and the red X will be replaced with a green check mark ✓: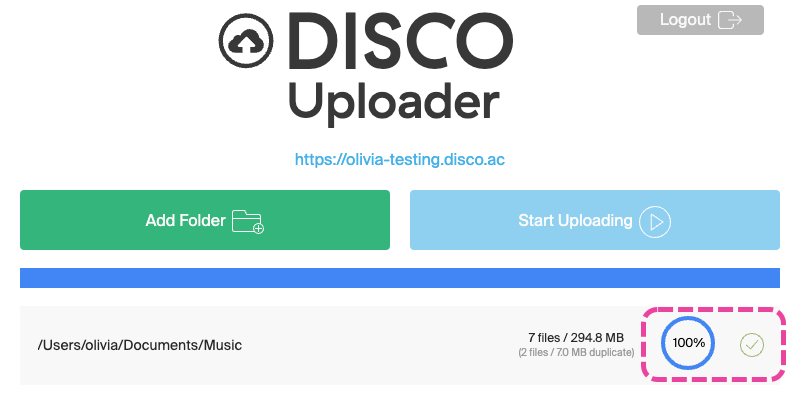
❗️ Important:
|
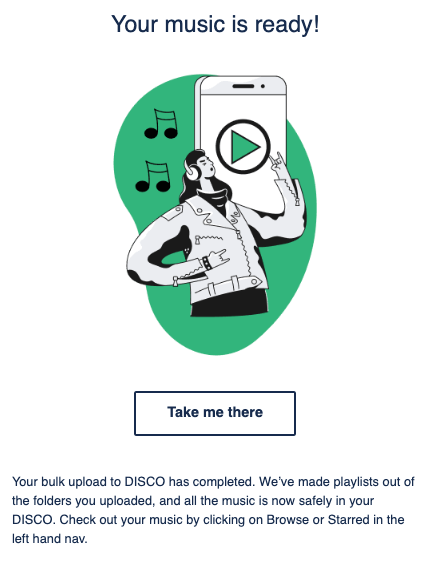
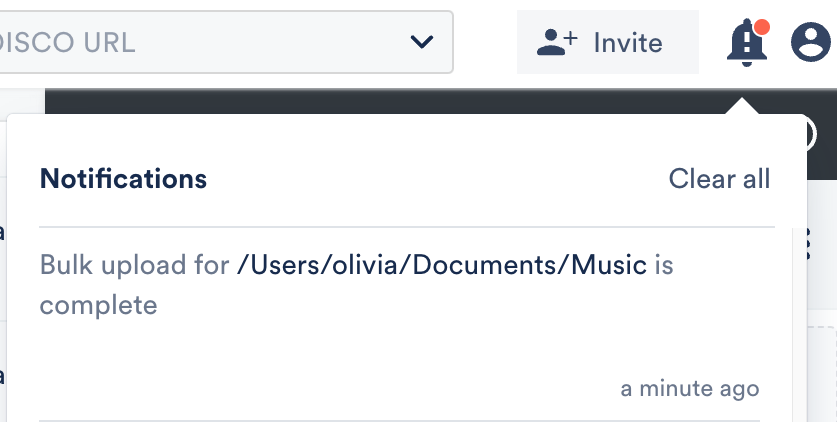
You will also receive an email from no-reply@disco.ac as well as a bell notification in the top right of your DISCO:
Viewing the files in your DISCO
The folders will be added as Playlists* in your DISCO. If you uploaded a folder containing subfolders, Playlists will only be created from the lowest-level folders.
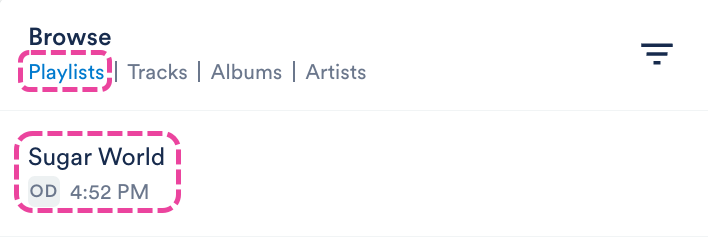
*Playlists will not be created for folders containing over 1000 tracks.
Troubleshooting issues with the Bulk Uploader
First, try these troubleshooting steps for the Bulk Uploader.
Next, reach out to our Support Team, because in some cases (if the upload wasn't cancelled on your end), we may be able to give it a nudge on our end to push it through.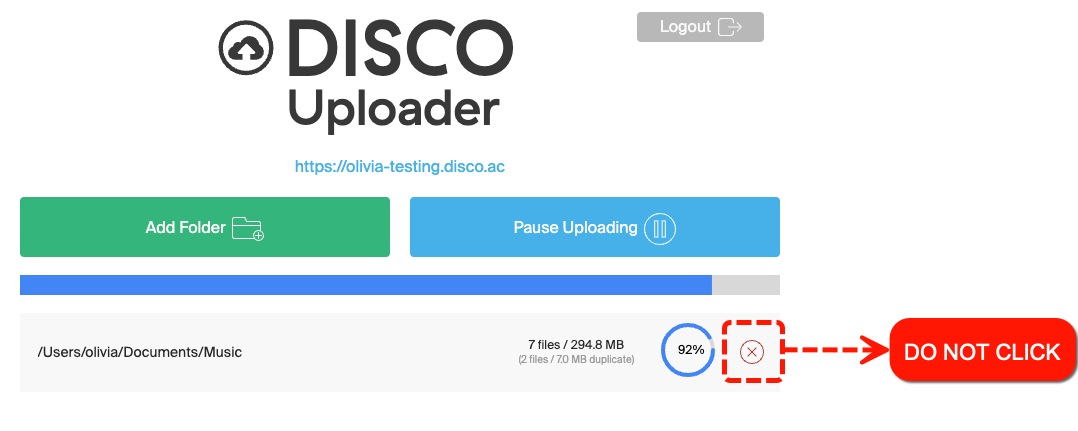
Adding folders when using the Bulk Uploader
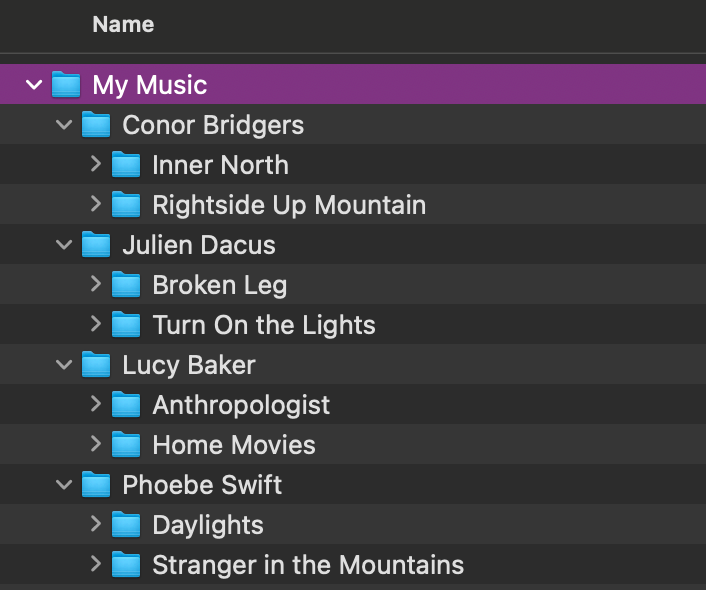
You don't have to select every individual folder you want to upload. Instead, you can select the highest-level folder that contains all the files you want to upload.
Playlists will be automatically created from your lowest-level folders (as long as they contain less than 1000 Tracks).
Example:
You want to upload your entire music collection which is stored in a folder called "My Music". That folder contains subfolders for each artist in your collection, and those subfolders contain folders for each album. In this case, the only folder you need to add is “My Music”. This will upload all files contained in each of the subfolders within the "My Music” folder, regardless of level. We should then expect to see a Playlist for each album in our test DISCO (e.g. "Inner North", "Rightside Up Mountain", etc).
Uploading tracks that have multiple formats
If you’re uploading a track in both an uncompressed format (e.g., WAV, AIFF) and a compressed format (e.g., MP3), we suggest placing them in the same lowest-level subfolder before uploading. This will result in both versions of the track being in the same playlist, which will be automatically created using the name of the subfolder.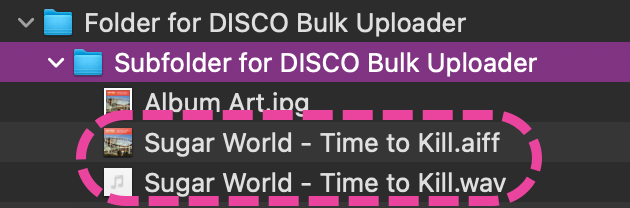
Although not required, we suggest doing this whenever possible to speed up the process of merging both formats into a single track. While you can merge tracks on your own using the merge function, we suggest reaching out to our Support team for assistance merging large numbers of tracks.