Using Email Creator
With the DISCO Email Creator, you can send emails and share music with your DISCO Contacts and Mailing Lists of any size, much like you would with tools like Mailchimp, Campaign Monitor, or Constant Contact.
At a glance
In just a few steps, you can build a great-looking email with no coding required!
Creating and duplicating emails
To create a new email:
| 💡 Tip: Before getting started, we recommend importing your mailing list. |
- On the left sidebar of your DISCO, under Tools, select Email Creator.
- In the upper-right corner of the Email Creator page, click the New email button.
- Enter an Email name (this is just for internal reference; you'll add a Subject Line and other details later on) and click the Begin button.
- Follow the step-by-step guide in the next section of this article to build and send your email.
To duplicate an existing email:
On the Email Creator page, open the Actions menu (…) to the right of the email and select Duplicate.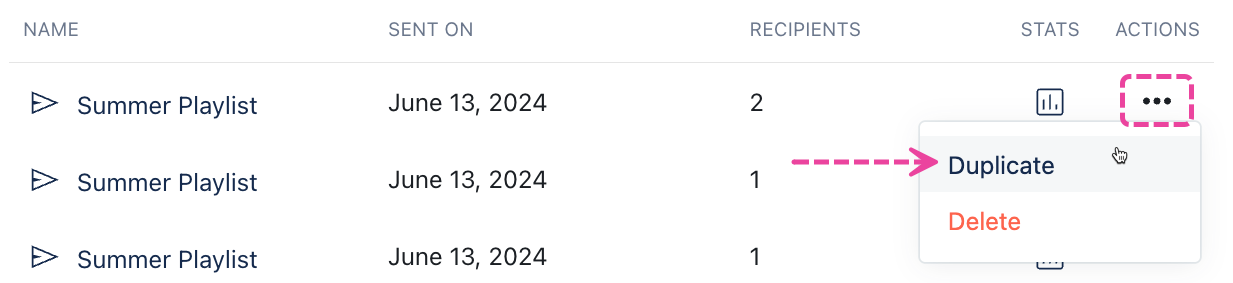
Building and sending emails
Step-by-step
Step 01: Choose Recipients
- Choose a filter.
- In a moment we will add rules, but first, use the radio buttons under the Users who match filter to select an option to govern how the rules will work.
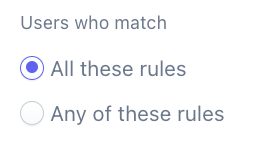
- All these rules - means that regardless of how many rules you add, recipients must satisfy all of them to receive the email.
- Any of these rules - means that regardless of how many rules you add, recipients can satisfy any of them to receive the email.
- In a moment we will add rules, but first, use the radio buttons under the Users who match filter to select an option to govern how the rules will work.
- Add rules.
- Select from the pre-set rules in the Add a rule drop-down to identify which recipient(s) the email should be sent to.

- Mailing list - allows you to select from a drop-down. Appears by default, click the X to remove if needed.
- Name, Company, Email, Location - allows you to type a partial or full value, and filter by is, is not, contains, or does not contain.
- Contact tag - allows you to type a partial or full value, and filter by is, or is not.
- Each rule supports a single value. You can add multiple different rules or multiples of the same rule.
- Select from the pre-set rules in the Add a rule drop-down to identify which recipient(s) the email should be sent to.
- Click the Next button.
Example:
We used the All these rules filter and added a Company and a Contact tag rule to send this email to contacts who both work at Dunder Mifflin Paper Co. and have a Supervisor tag.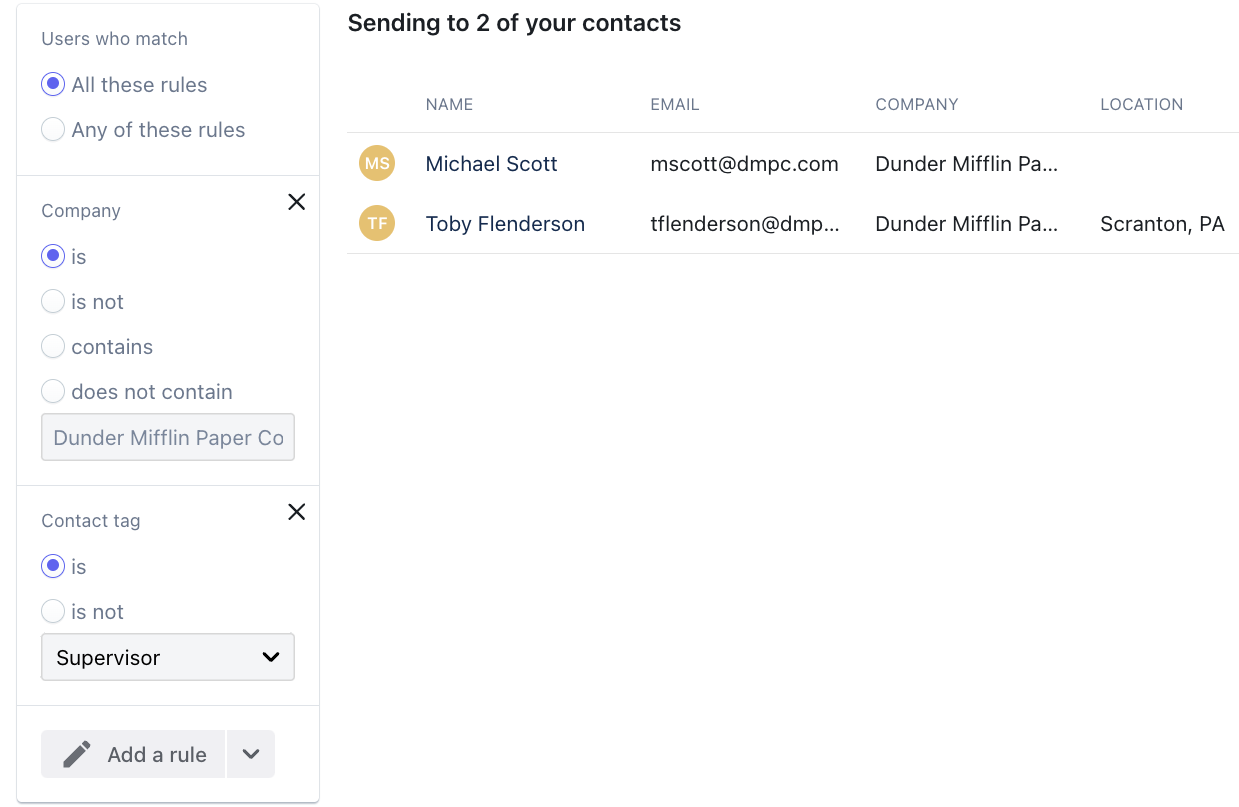
Step 02: Email Details
| 📎 Note: If you added a Mailing list rule in the previous step, some of this information may be pre-filled, but you can overwrite it if needed. |
- Fill in the fields:
- Email name - for internal reference.
- Email subject - the subject line that your contacts will see.
- Sender from address* - the email address that any replies will be sent to.
*Emails will show as partly from the email address you input in this field, but the domain will be @disco-mailer.net. Example:
If you would like to send emails from your own domain, additional setup is required. - Sender display name - the name the email will show as coming from.
- Business address - your physical business location (required per anti-spam laws).
- Click the Next button.
Example: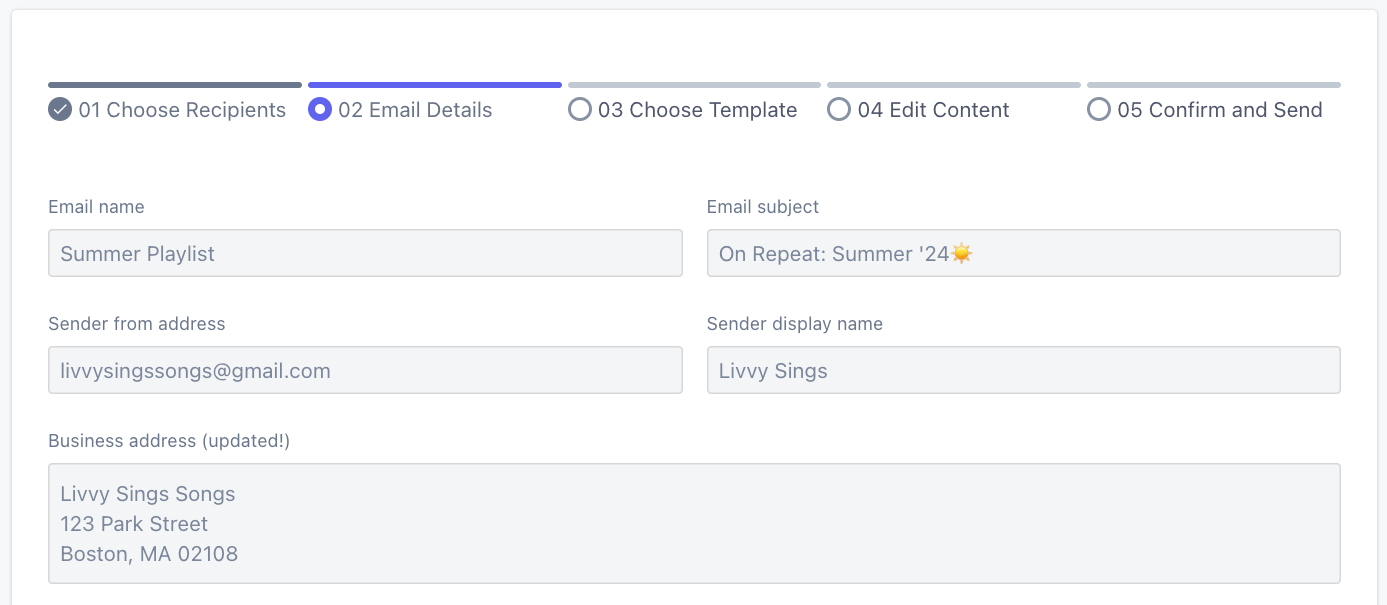
Step 03: Choose Template
| 📎 Note: If you're duplicating a previous email, this step will be skipped. |
- Choose either a 1 Column or 2 Column email template. In the next step, you can customize the content.
- Click the Next button.
Example: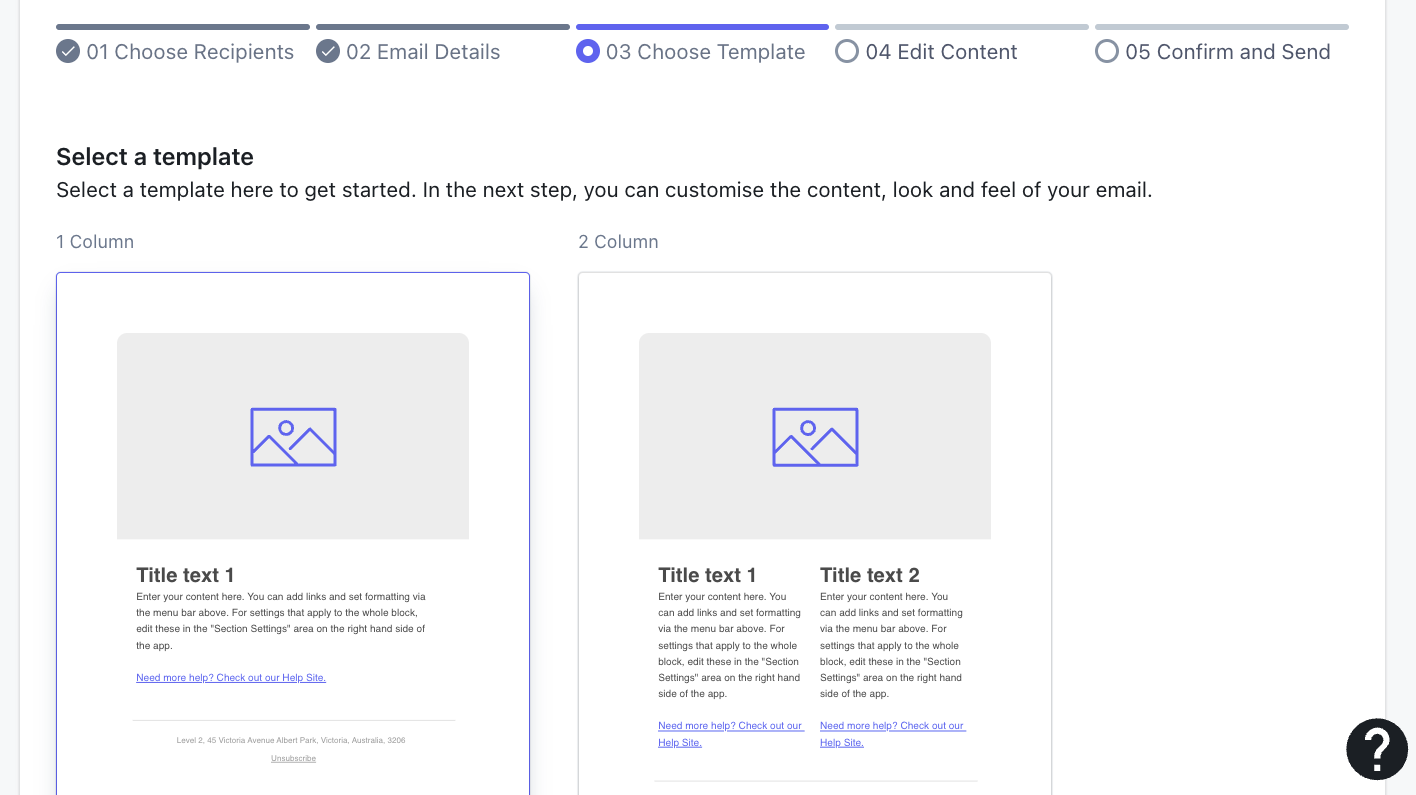
Step 04: Edit Content
💡 Tip: To go back to a previous step, click on the name of the step. |
- Under Edit & create, from the Blocks tab, drag and drop content blocks into your template. A yellow + Insert here tab will appear when you hover over a spot where it can be dropped.
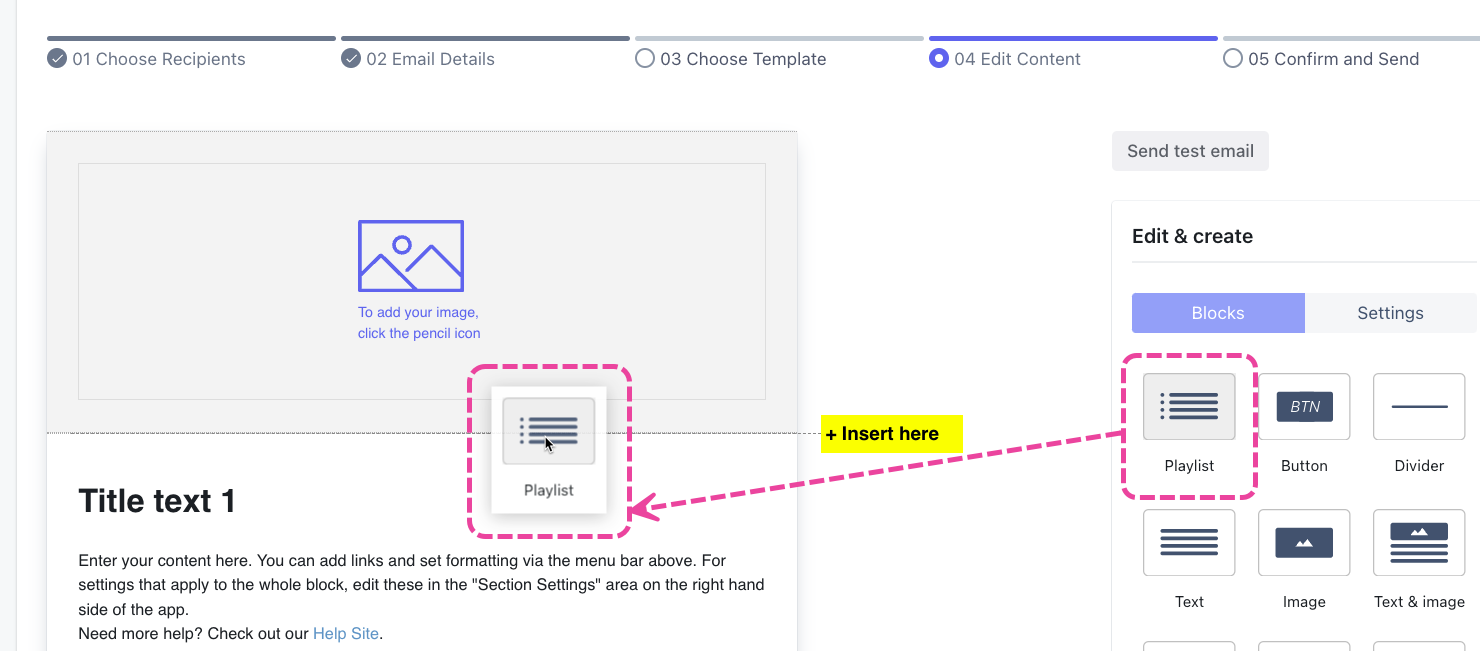
- To edit the content, or duplicate or delete the block, hover over the block.

- The edit pencil will open the Block Settings. Here you can customize the block however you like, and you will see the changes reflected in real time. Be sure to click the Save and Close button.

- Under Edit & create, from the Settings tab, you can edit settings for the entire email (e.g. background color, font, etc).
- Click the Next button.
Step 05: Confirm and Send
| 💡 Tip: Before sending, you can Send a test email from Step 04. |
- Verify that all information is correct, and the email looks the way you want.
- To send the email right away, click the Send email button. A confirmation message will appear, and if you're ready, you can click Send. To schedule the email, click Schedule later.

- You're done! 🙌
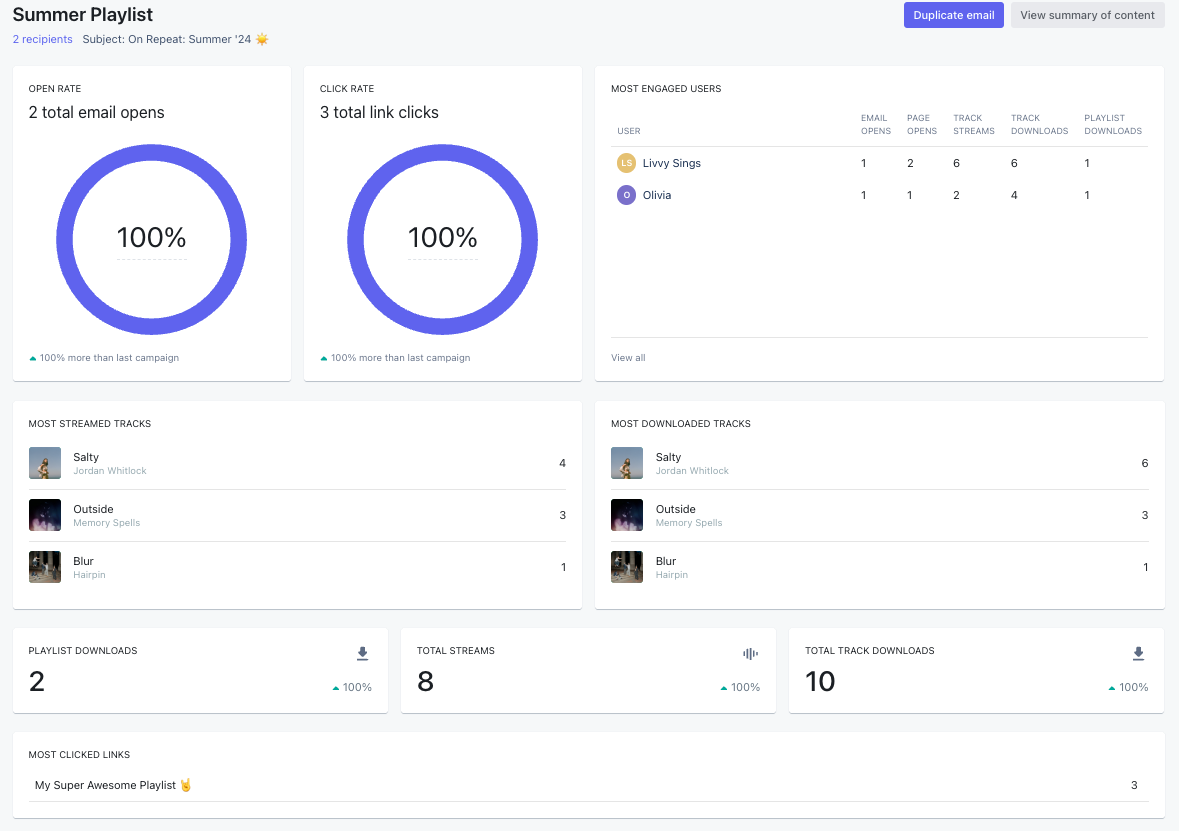
Viewing email stats
Once your email is sent, you can view in-depth stats showing how each recipient interacted with the email and its content. To view the email stats, click on the Name of the email in your Sent list, or click the View stats icon under Stats to the right of the email.

Email stats include:
- Open Rate
- Click Rate
- Most Engaged Users and individual breakdowns of their Email Opens, Page Opens, Track Streams, Track Downloads, and Playlist Downloads
- Most Streamed Tracks
- Most Downloaded Tracks
- Playlist Downloads
- Total Streams
- Total Track Downloads
- Most Clicked Links