Managing Mailing Lists
You can use Mailing Lists to organize your DISCO Contacts and choose recipients for email campaigns in our Email Creator tool.
At a glance
Mailing Lists can be managed manually or via a CSV file.
Creating a new Mailing List
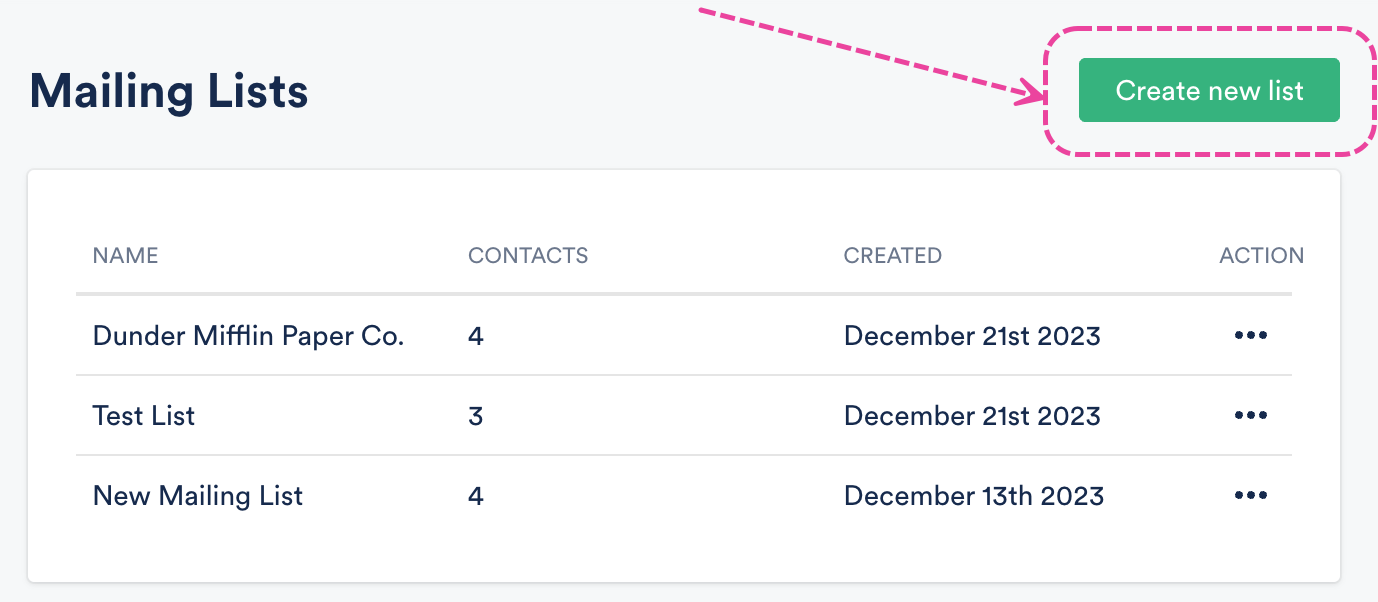
- On the left sidebar of your DISCO, under Tools, select Mailing Lists.
- In the top-right corner, click the Create new list button.
- In the Create Mailing List window, add a Mailing list name. The Sender display name, Sender from address, and Business address will be pre-filled from what appears in your account settings, but you can edit these.
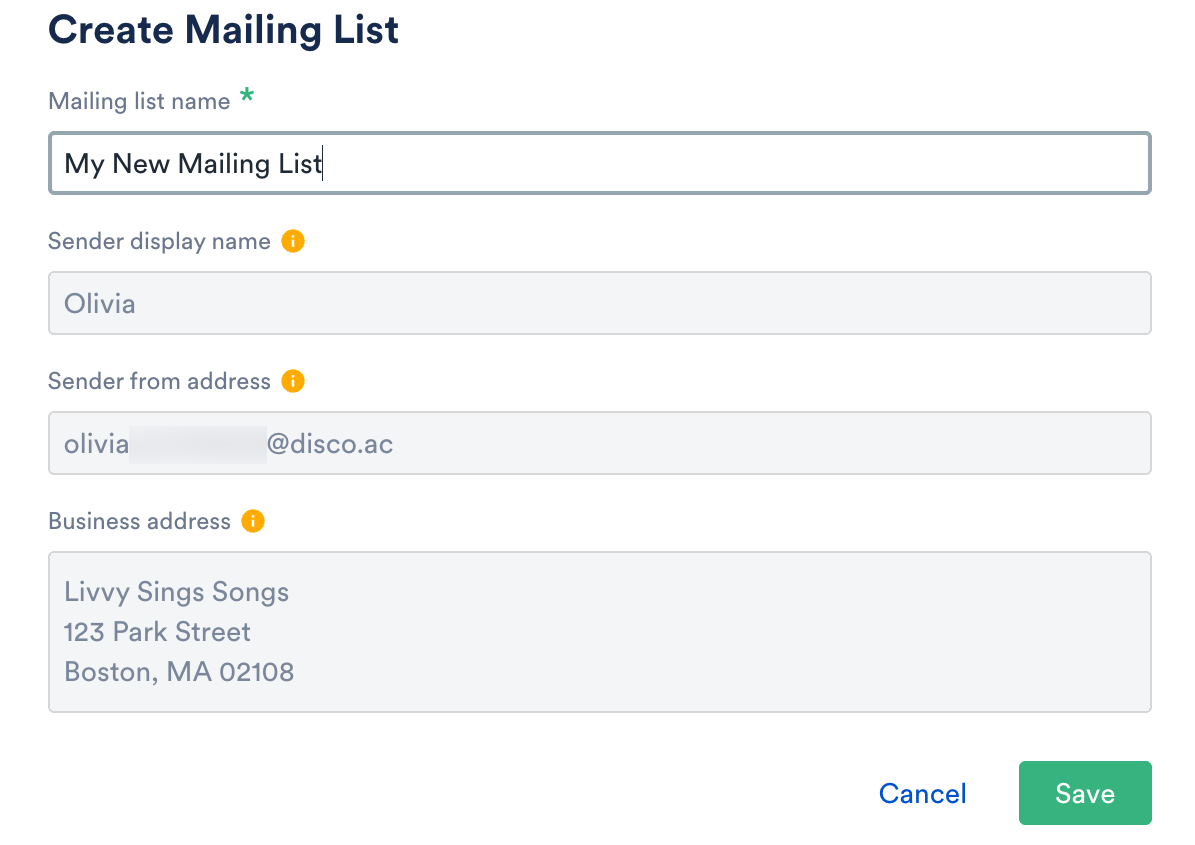
📎 Note: The Business address is required for anti-spam laws. - Click the Save button.
- Next, you'll need to add Contacts to your Mailing List.
Adding Contacts to Mailing Lists
There are a few ways to do this:
Adding existing DISCO Contacts to a Mailing List
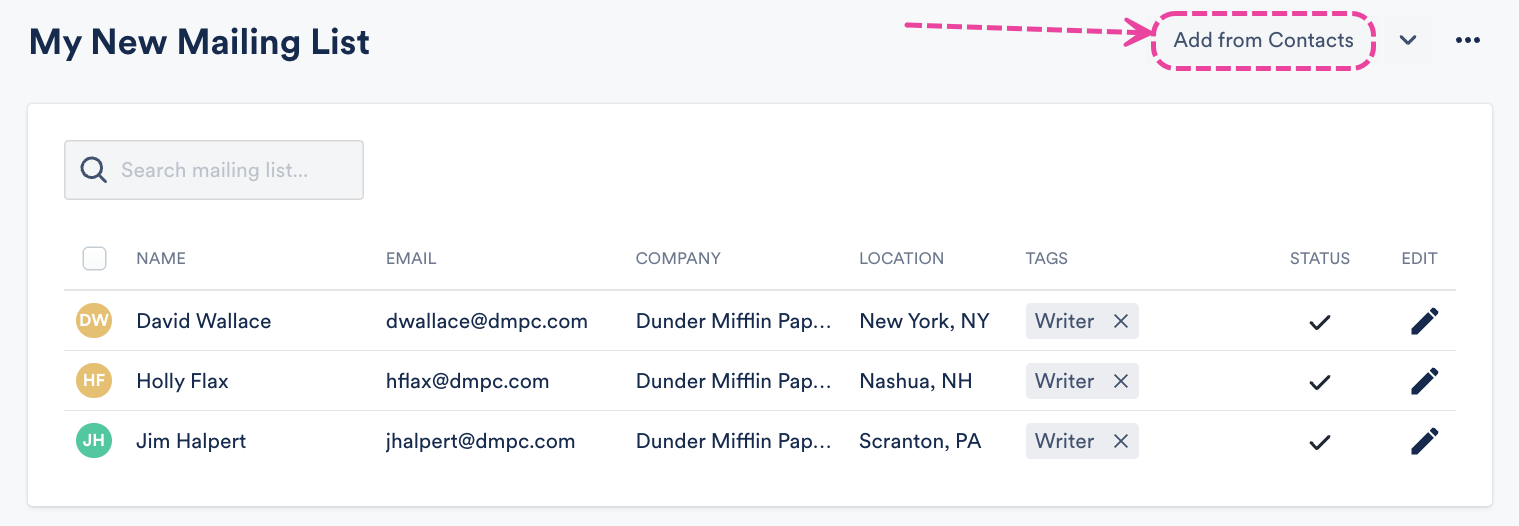
- From the Mailing Lists page, open the Action menu (…) to the right of the Mailing List and select Add from Contacts.
 Alternatively, from the Mailing Lists page, click on the name of the Mailing List to open it, and click the Add from Contacts button.
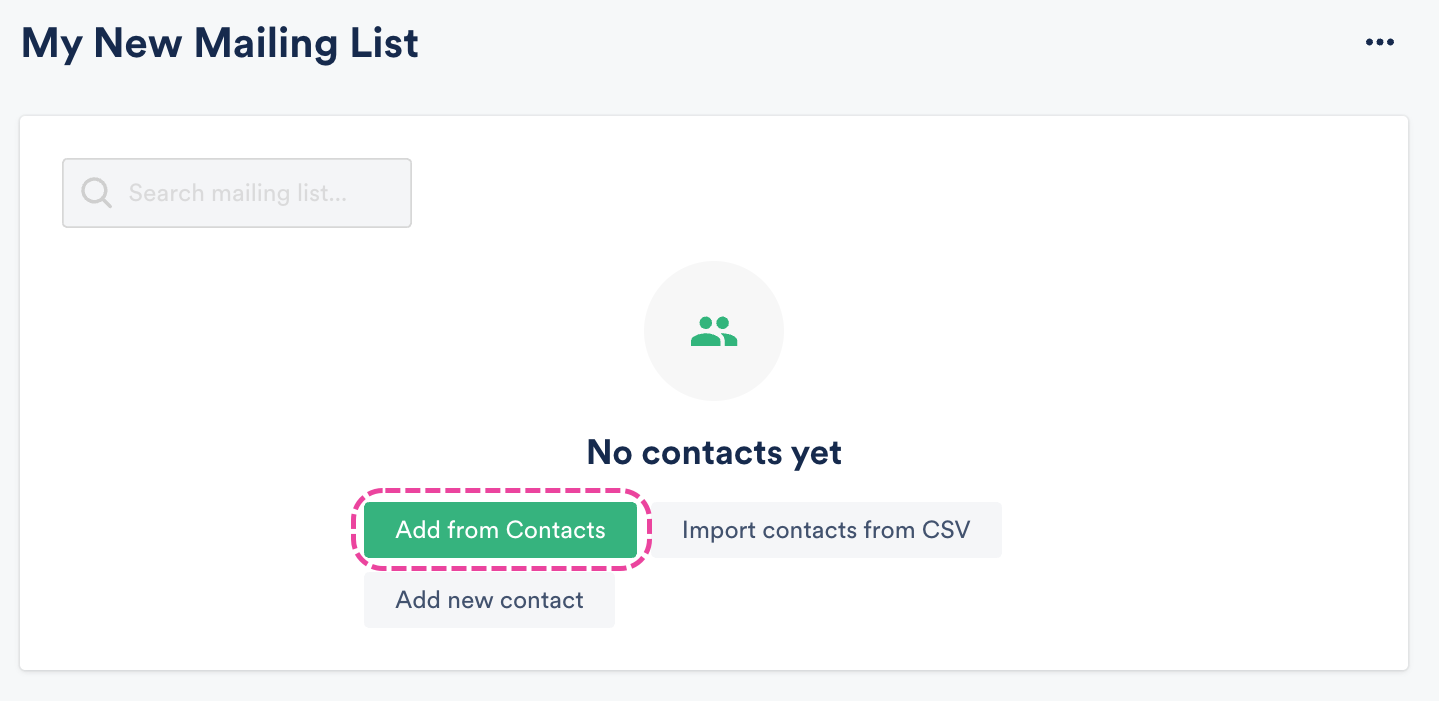
- Hover your cursor to the left of the Contact Name(s) and check the box(es) for each Contact you'd like to add. Then click the Add to list button in the top-right.
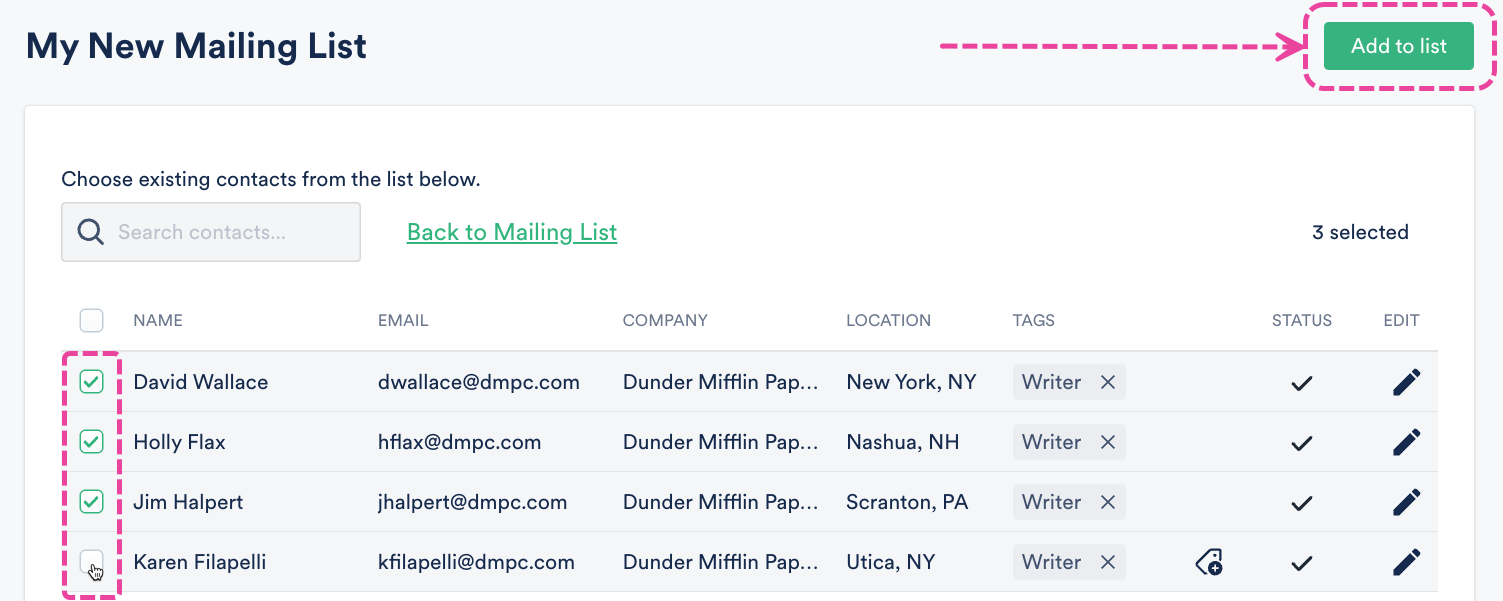
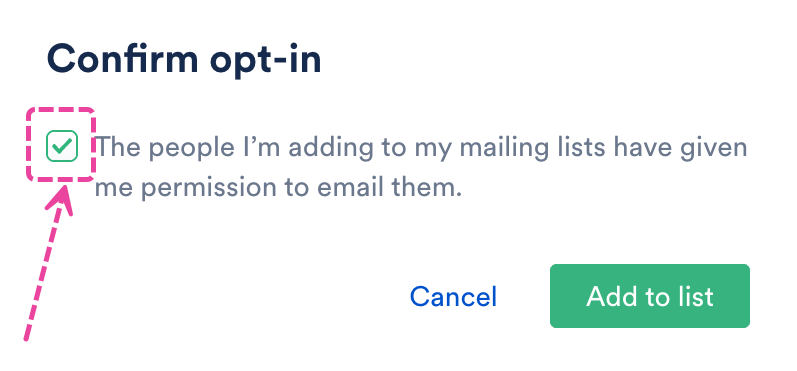
- In the Confirm opt-in window, check the box to confirm you have permission to email these Contacts (required). Then click the Add to list button.
Adding new Contacts to a Mailing List
- From the Mailing Lists page, open the Action menu (…) to the right of the Mailing List and select Add new Contact.
 Alternatively, from the Mailing Lists page, click on the name of the Mailing List to open it, and click the Add new Contact button.
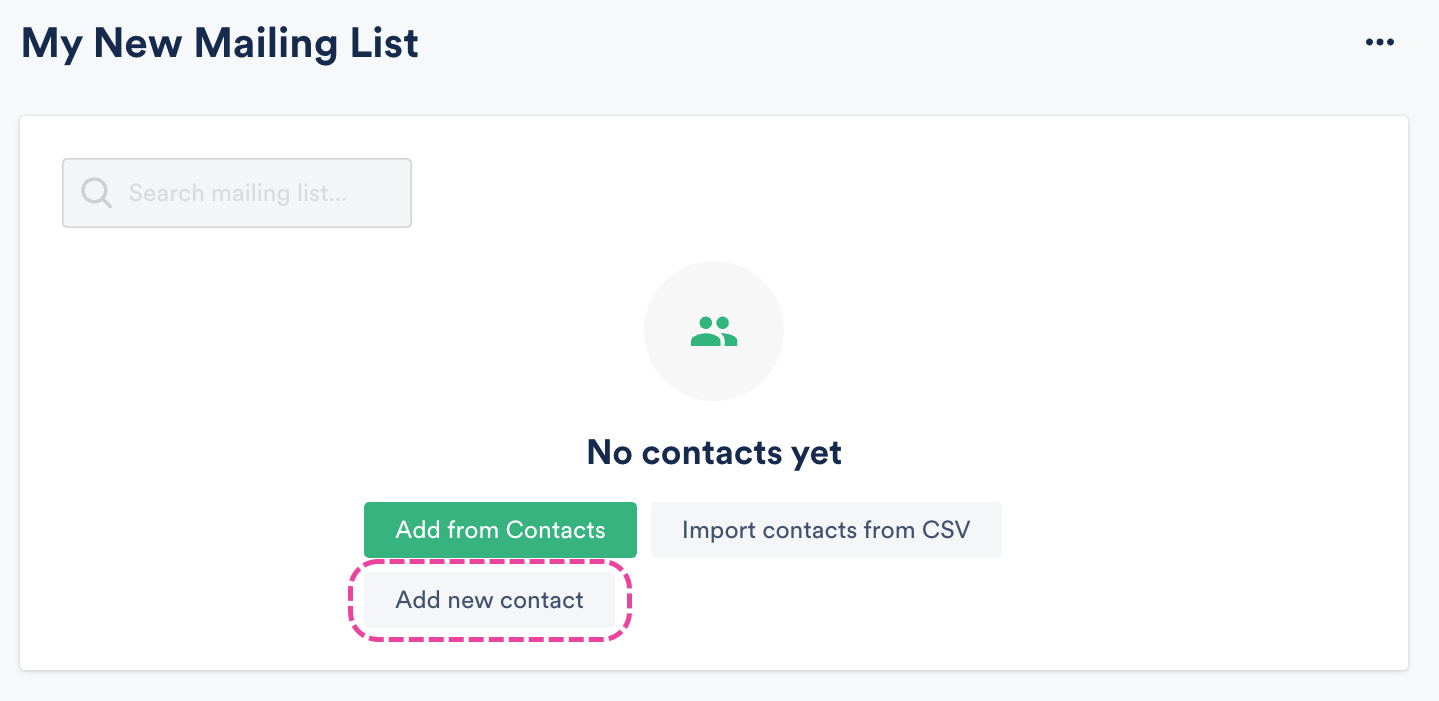
- Follow the process outlined in this section of this article (in steps 3-5) to add a new Contact.
- From your new Mailing list page, click the Add from Contacts button.
- From the section above, follow steps 2-3 to add an existing Contact to your Mailing List.
Importing a Mailing List into DISCO
To do this, you'll need an existing spreadsheet in CSV format of all your contacts for your Mailing List. You can either create a new CSV outside of DISCO (using Excel, Google Sheets, etc.) and manually add Contacts to it, or you may be able to export one from another mailing service or your own database.
Once you have a CSV file, review this section of this article to ensure your CSV has all of the required columns and information for import.
Once you've confirmed your file is ready for import, follow these steps:
- From the Mailing Lists page, open the Action menu (…) to the right of the Mailing List and select Import contacts from CSV.
 Alternatively, from the Mailing Lists page, click on the name of the Mailing List to open it, and click the Import contacts from CSV button.
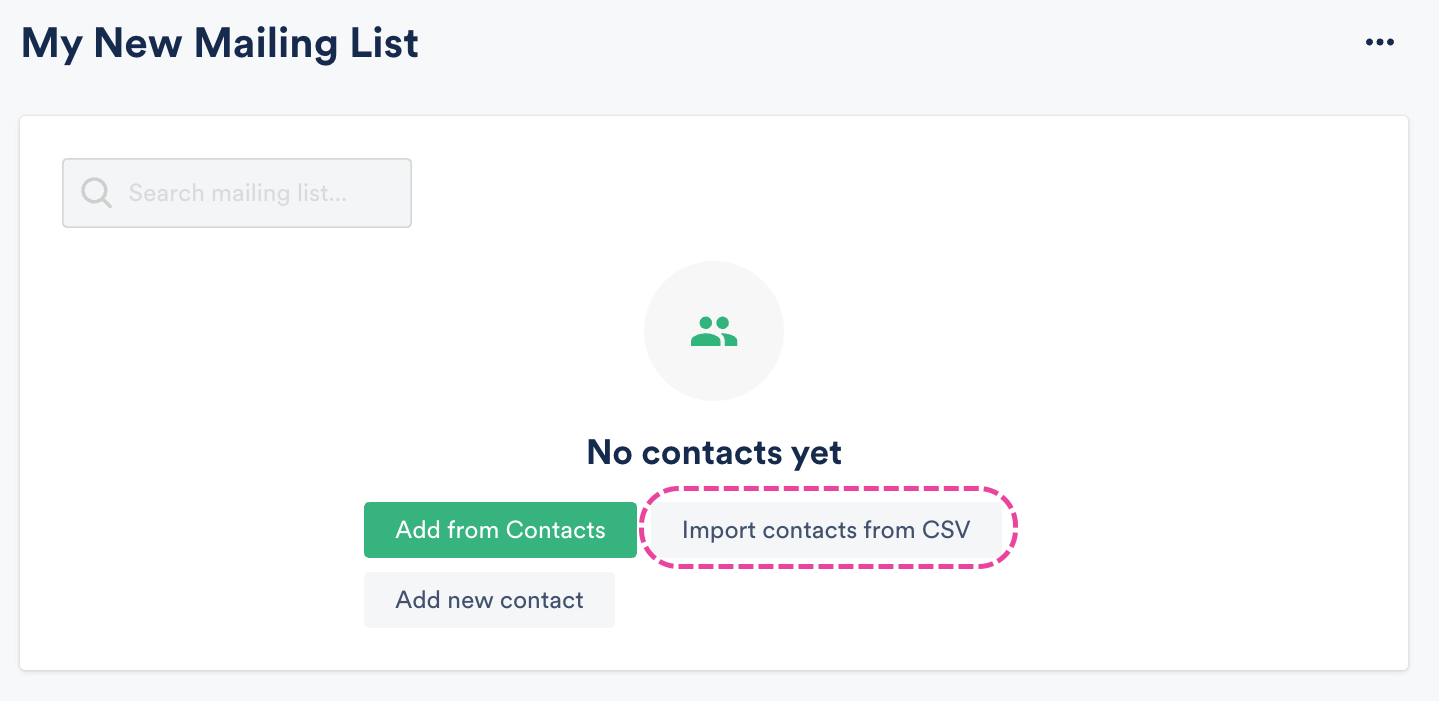
- Follow the process outlined in this section of this article (steps 3-6) to import your Mailing List.
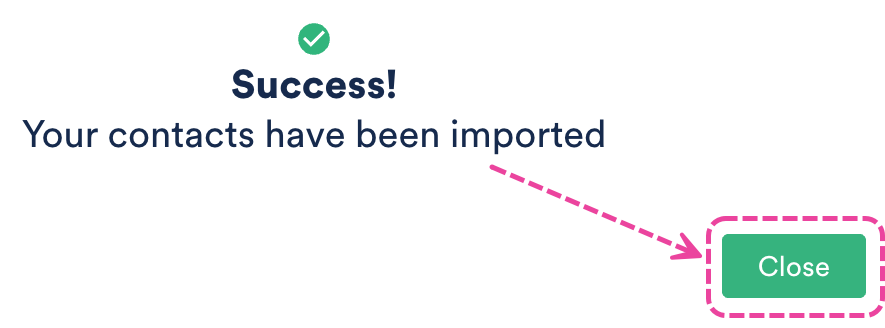
- Once your Contacts have been successfully imported, click the Close button.
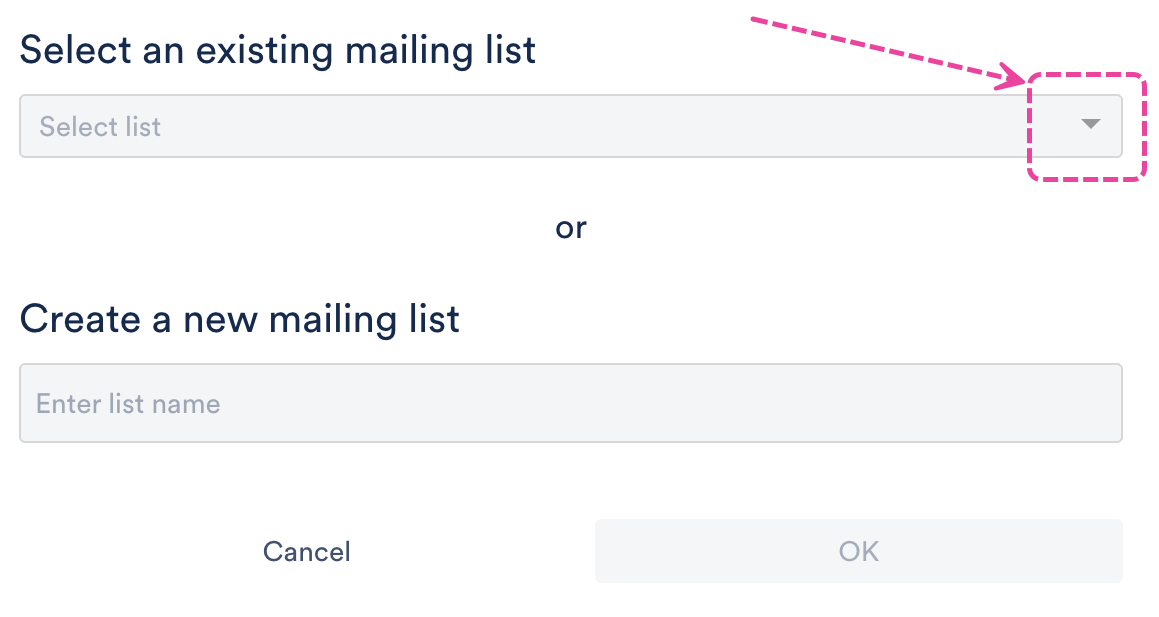
- Select your existing mailing list from the drop-down and click the OK button.
Deleting Mailing Lists
There are two ways to do this.
Method 1:
- On the left sidebar of your DISCO, under Tools, select Mailing Lists.
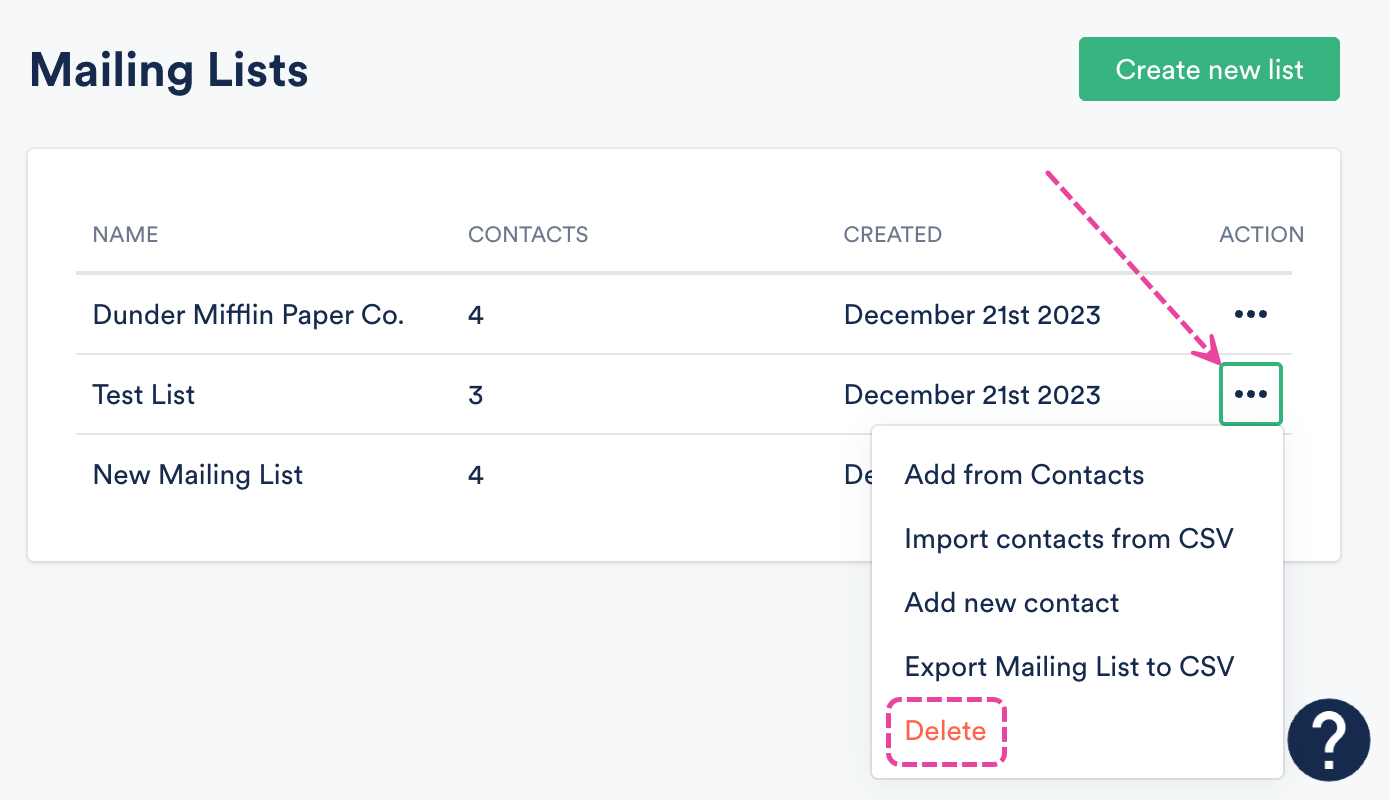
- From the Mailing Lists page, open the Action menu (…) to the right of the Mailing List.
- Select Delete.
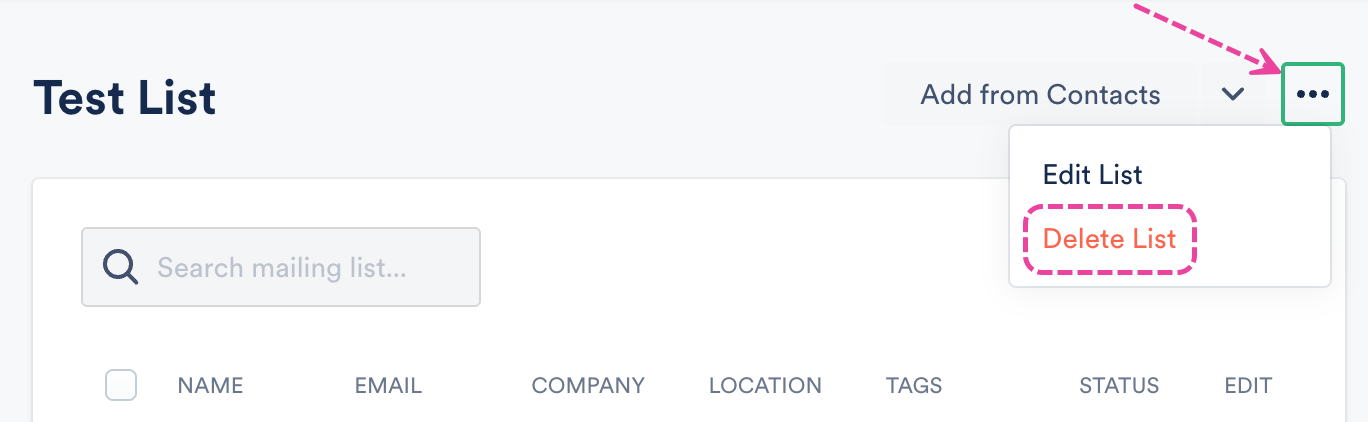
Method 2:
- On the left sidebar of your DISCO, under Tools, select Mailing Lists.
- From the Mailing Lists page, click on the name of the Mailing List to open it.
- Open the ellipses menu (…) in the top-right corner.
- Select Delete List.
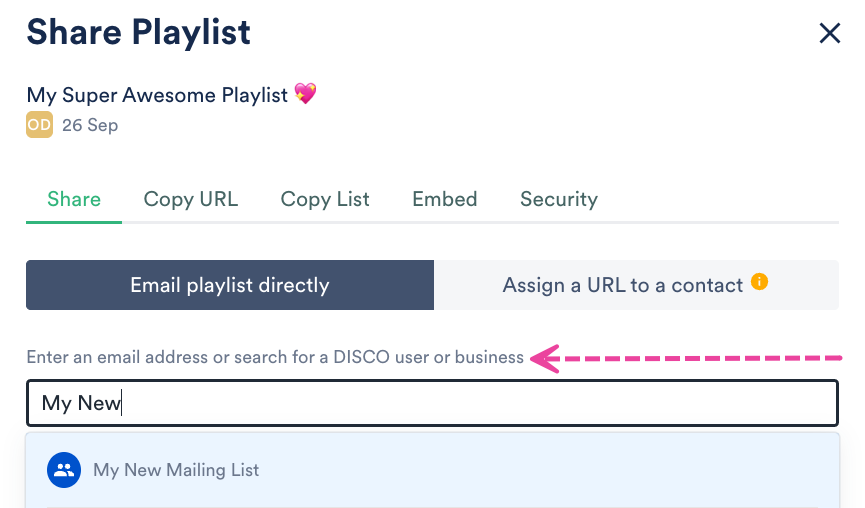
Sharing content to a Mailing List
You can create an email campaign in the Email Creator and select the Mailing List as a recipient, or share to your Mailing List from the Share Playlist menu by searching for the Mailing List: