
Importing and re-importing your Contacts list via CSV
You can easily add new Contacts to your DISCO via a CSV import. You can also export your existing Contacts from your DISCO to a CSV, edit them in bulk using a third-party spreadsheet program, and re-import the file into your DISCO.
At a glance
The Import option can be found from the menu (…) on the Contacts page in your DISCO.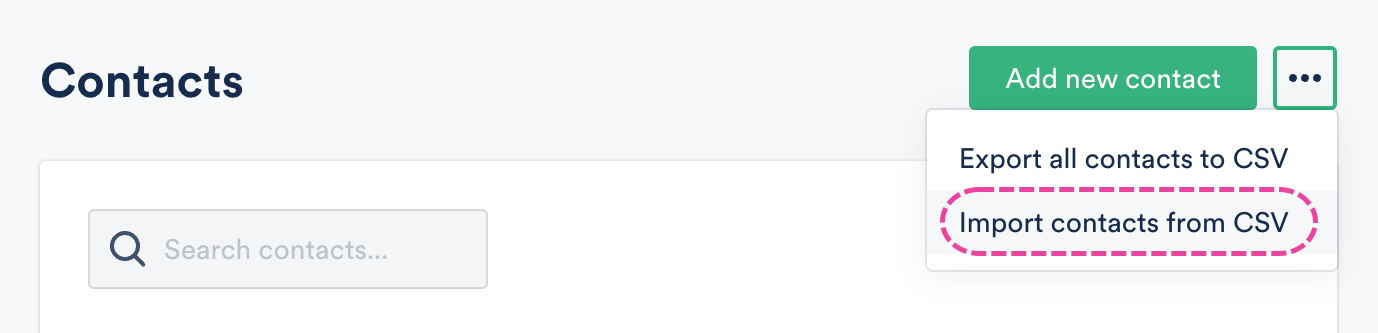
Preparing your CSV file for import
Before importing your Contacts list, ensure that your CSV file meets the following requirements:
✅ the file must be in CSV format
✅ there must be a unique email address for every Contact (no blanks!)
✅ there must be a name for every Contact (no blanks!)
Optional fields
These fields are optional, meaning you can choose to remove these columns from your file before the import if you prefer.
- Tags
- Company
- Phone
- Location
Best practices
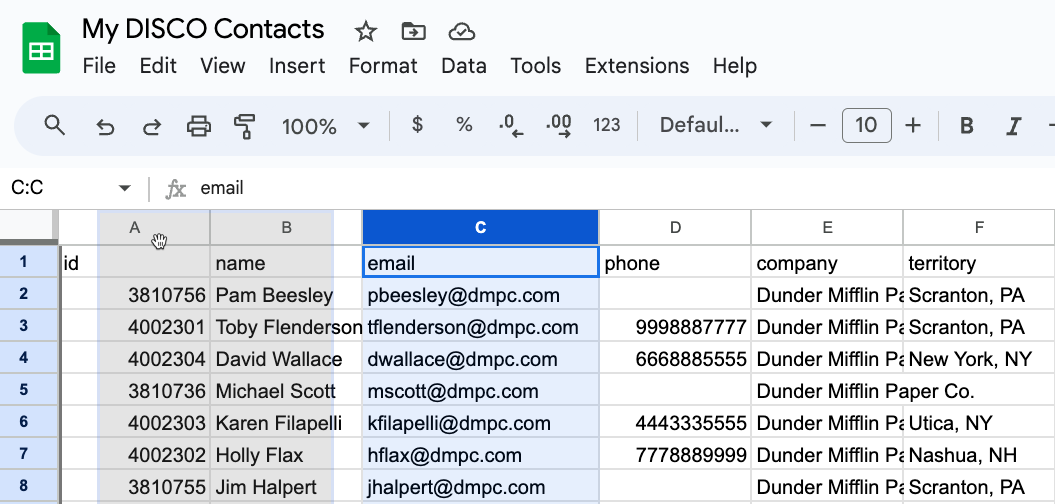
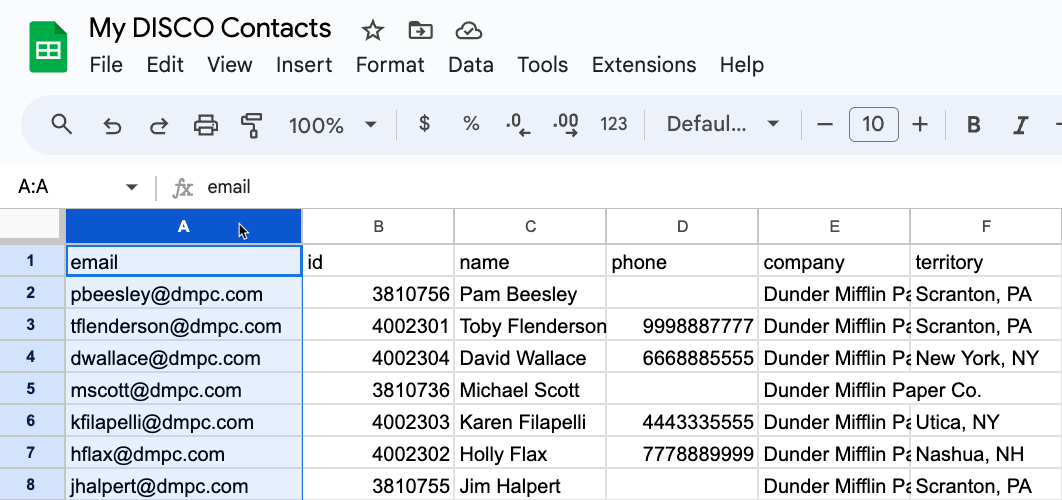
- Keep the column headers the same as they appear on your Export file, with one exception:
- Combine the First and Last Names into a single Name field to avoid errors when importing your contacts.
- Place the email column in Column A (you can click and drag the entire column to the left).
Importing your CSV file
- In your DISCO, on the left sidebar, select Contacts.
- In the top-right corner of the Contacts page, open the menu (…), and select Import contacts from CSV.
- Drag the file into the box or click to browse your computer.
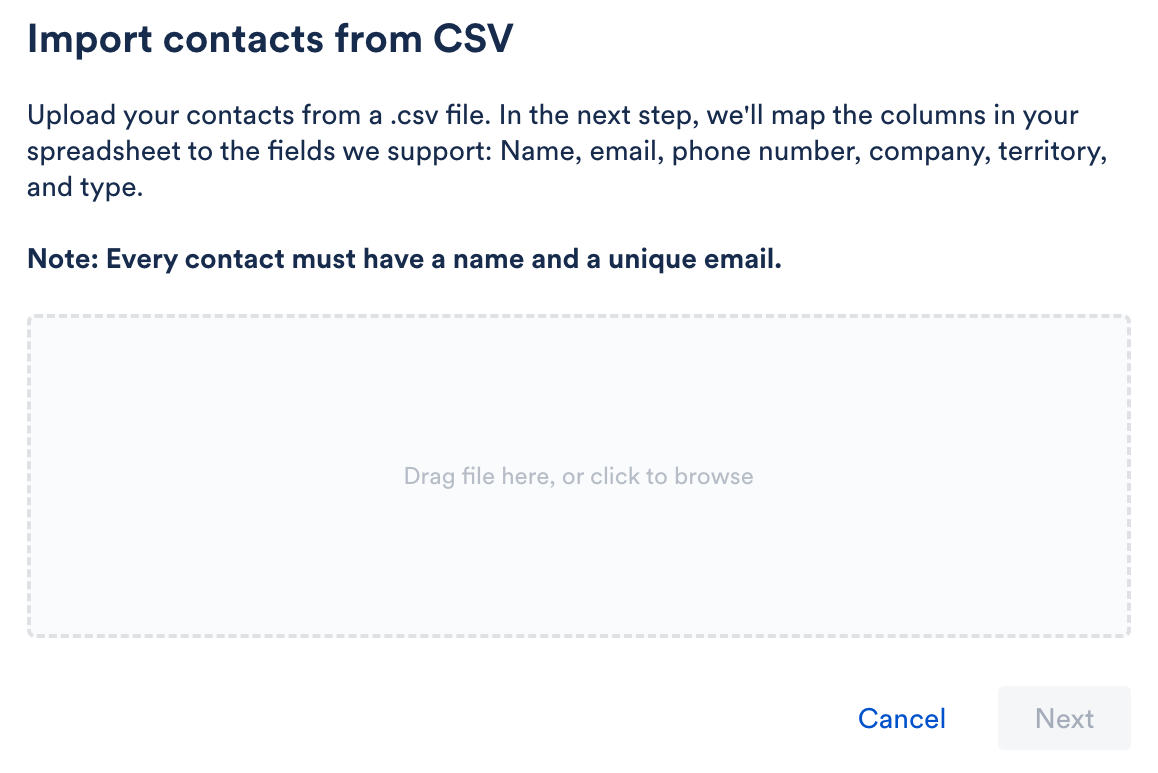
- Click the Next button.
- Map each Column from your spreadsheet to a DISCO Contact field using the drop-downs.

- Click the Import button.
Errors when importing
Specific error messages
This Import failed message will appear if you are missing any required information, such as a Name or Email.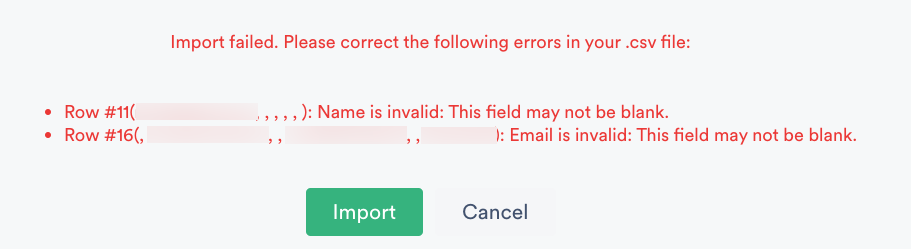
Other issues
If you encounter any other issues during the import process, we suggest importing your Contacts in smaller chunks. The exact number of Contacts you can import at once varies (based on DISCO's peak usage times*); but as a general rule, we recommend importing up to 1K contacts at a time to bypass any delays.
*You may encounter this message during peak times: This import will take us a little time to process. If the contacts don't show up in 10 minutes, please contact us.' If you see this, you will not see any errors associated with your import.