Using Track tags
You can use Track tags to make it easier to search within your DISCO and beyond.
At a glance
Track tagging is available to all DISCO users. We have pre-set Track tags to choose from, or you can create your own custom tags. You can tag your Tracks manually or via our Auto-tagging feature, which is available through our Discovery Suite add-on.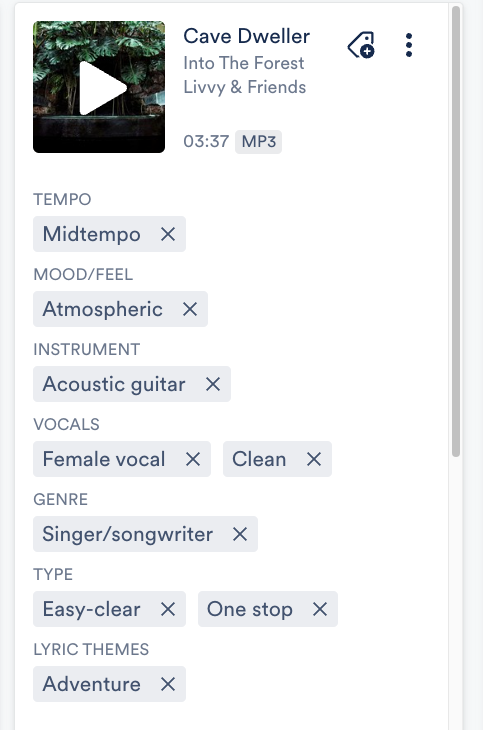
Pre-set vs. custom Track tags
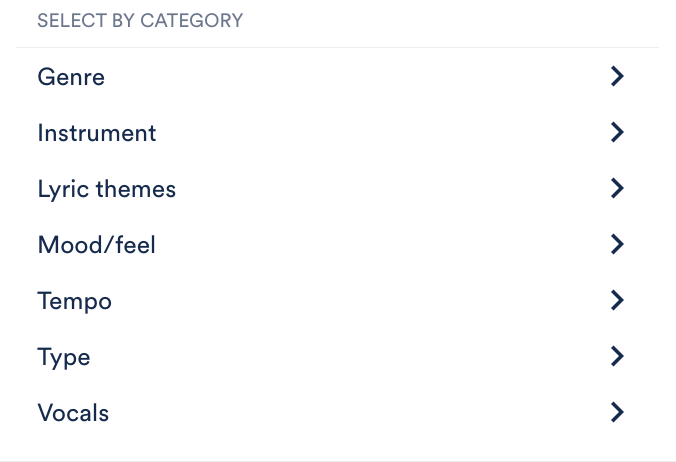
All Track tags, including both pre-set and custom, must be assigned to a Category:
- Genre
- Instrument
- Lyric themes
- Mood/feel
- Tempo
- Type (Visit this article for more information on Type tags.)
- Vocals
Pre-set Track tags
We developed over 150 pre-set Track tags by surveying the most common tags used in sync and the music industry in general, to create a consistent, universal discovery language for music, so everyone's on the same page.
Pre-set tags can be found within each Category. These tags cannot be edited or deleted.
Custom Track tags
There are two ways to create your own custom Track tags:
- when adding tags to a Track
- from your account Settings
When adding tags to a Track
- Type in the tag and click where it says (create new tag).
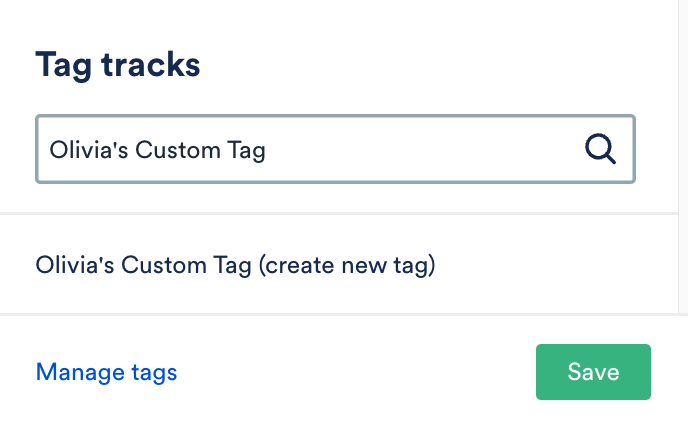
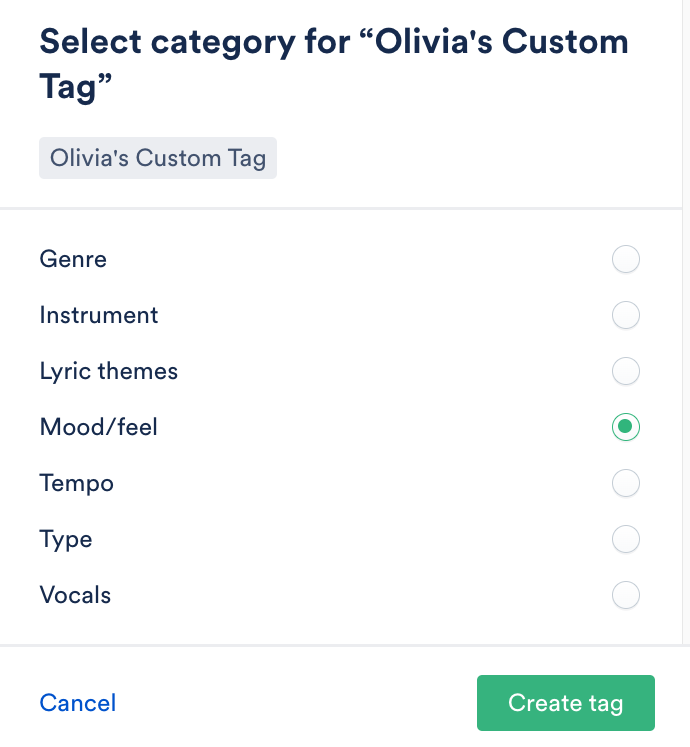
- Choose a Category and click the Create tag button.
From your account Settings
- In the top-right corner of your DISCO, open Settings (the person icon) and select Settings and Account.
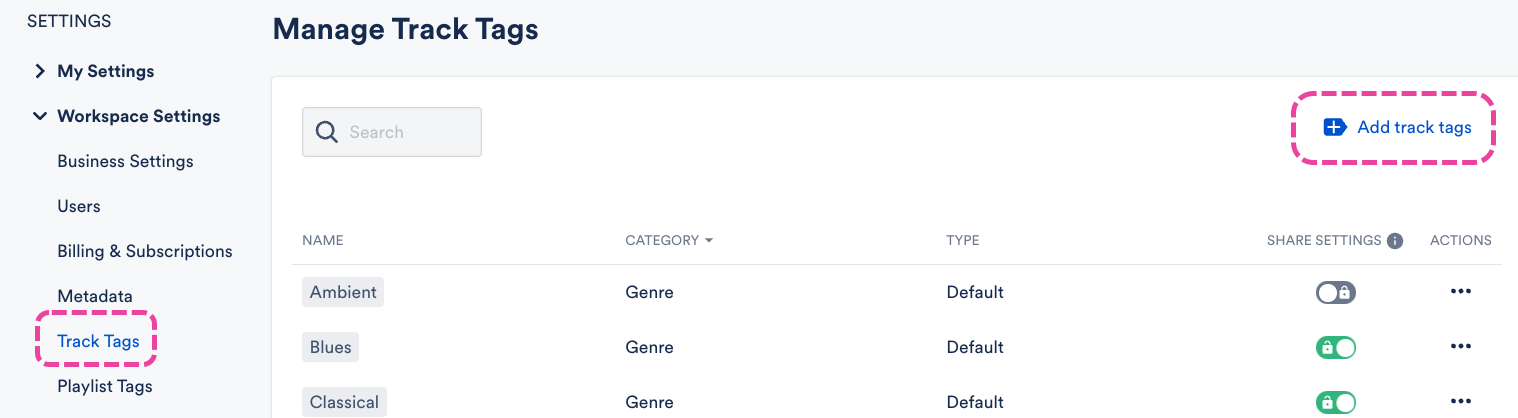
- Under Workspace Settings, select Track tags.
- Click Add track tags.
- Add a Tag name and select a Category.
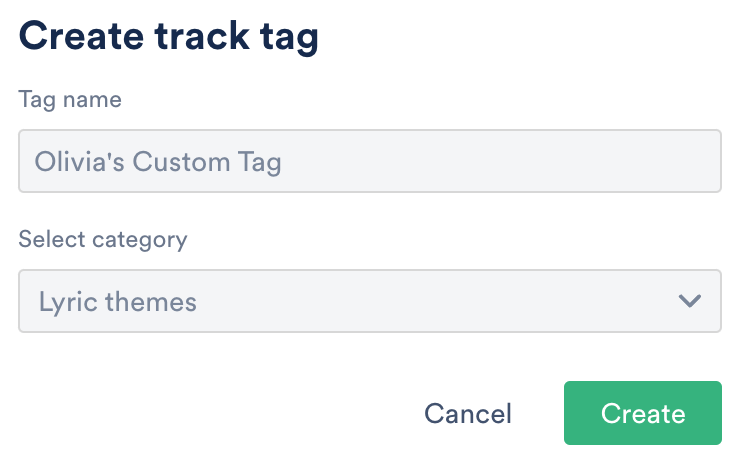
- Click the Create button.
Manually tagging individual Tracks
You can do this in a few ways:
- from the Explorer (Browse > Tracks)
- from the Track panel (Browse > Tracks > select Track)
- from the Player while streaming a Track
- from the Track Information page
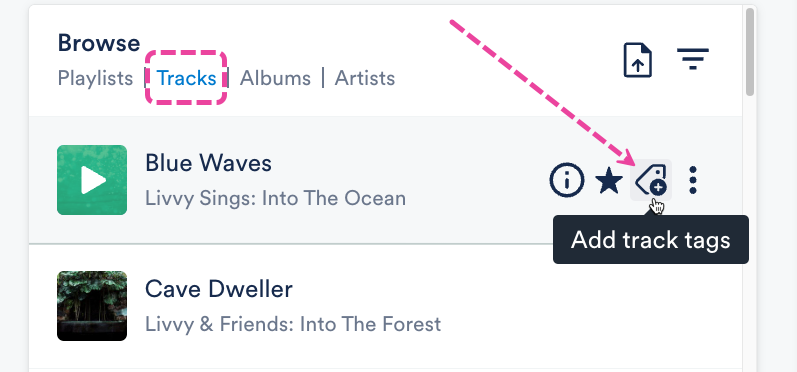
From the Explorer
- On the left sidebar of your DISCO, select Browse.
- Select the Tracks view.
- Hover your cursor over the desired Track and click the Add track tags button.
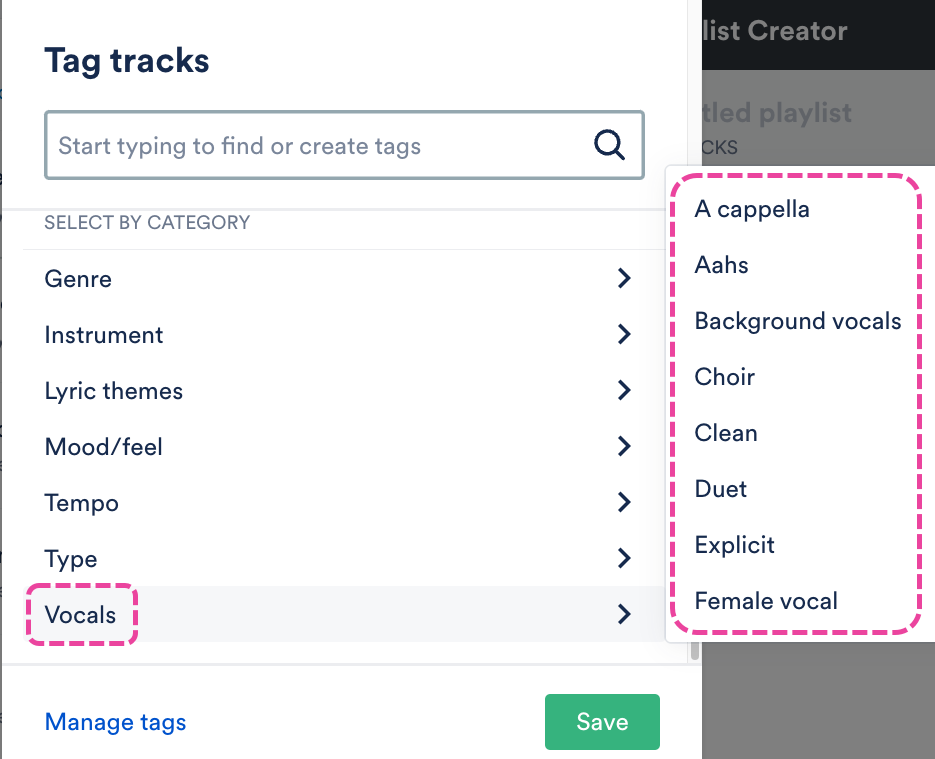
- Type to search for a pre-set tag or create a new tag. Or, select a Category, then select a tag from the list.

- Click on the tag to add it, then click the Save button.

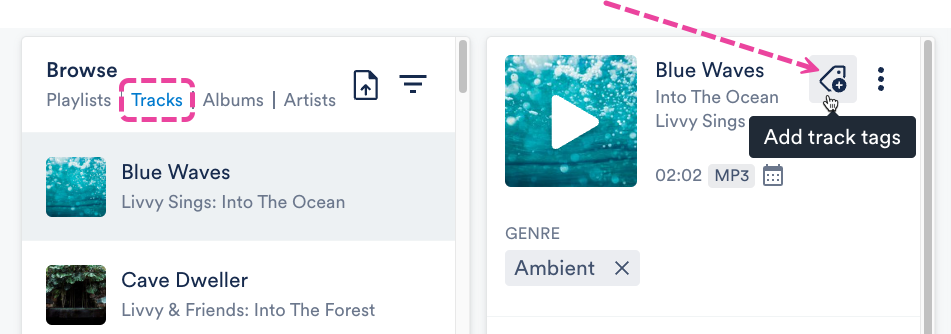
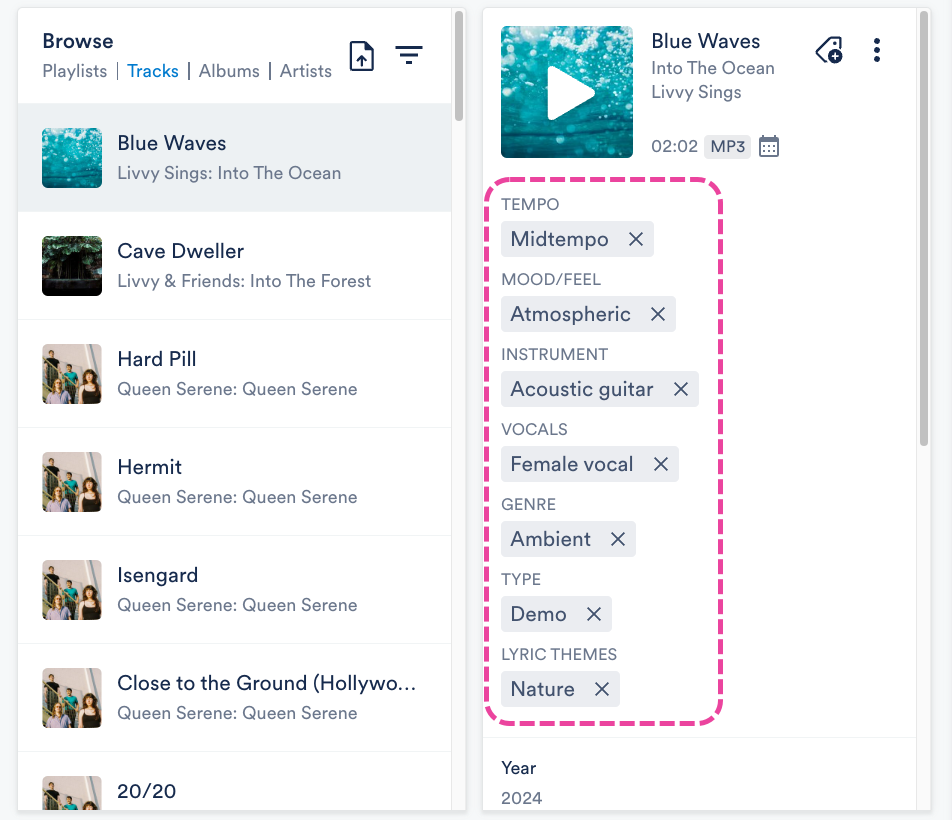
From the Track panel
- On the left sidebar of your DISCO, select Browse.
- Select the Tracks view.
- Click on the desired Track to open the Track panel.
- Click the Add track tags button.
- Type to search for a pre-set tag or create a new tag. Or, select a Category, then select a Tag from the list.
- Click on the tag to add it, then click the Save button.
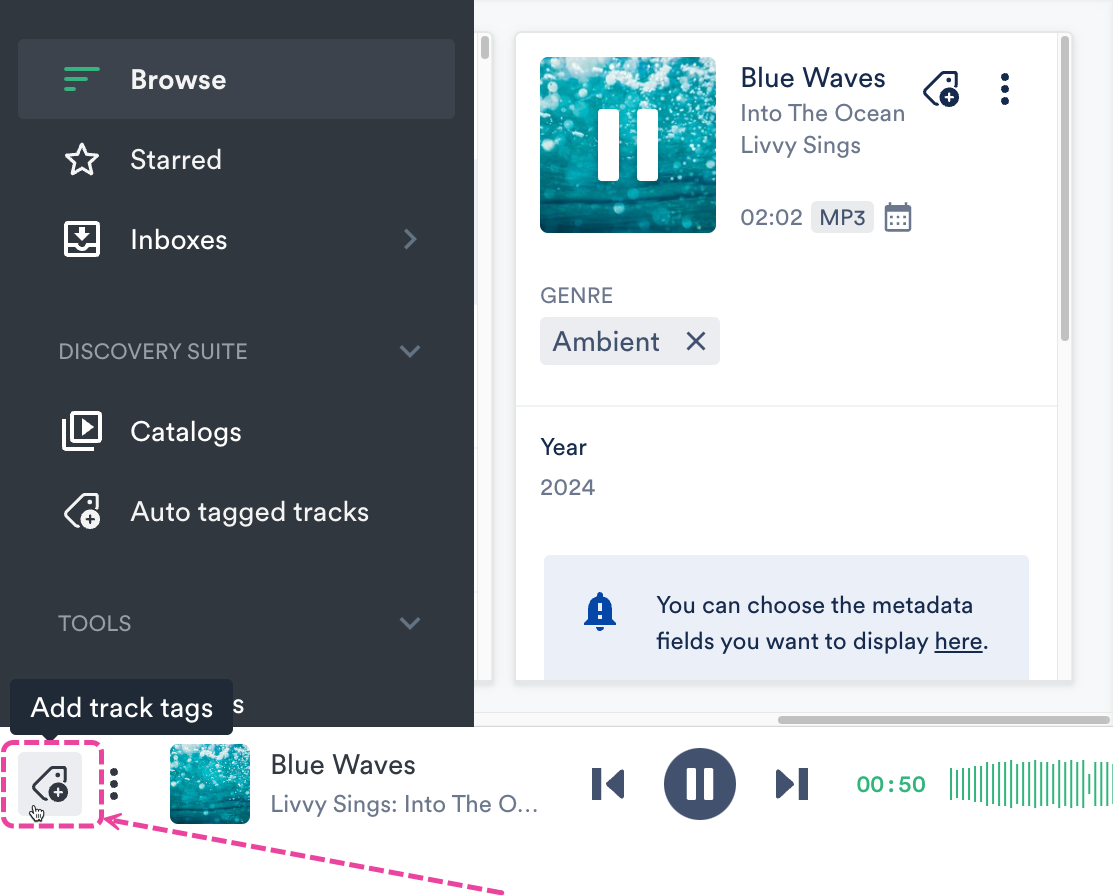
From the player
- While streaming a Track, click the Add track tags button in the Player at the bottom of your DISCO.
- Type to search for a pre-set tag or create a new tag. Or, select a Category, then select a Tag from the list.
- Click on the tag to add it, then click the Save button.
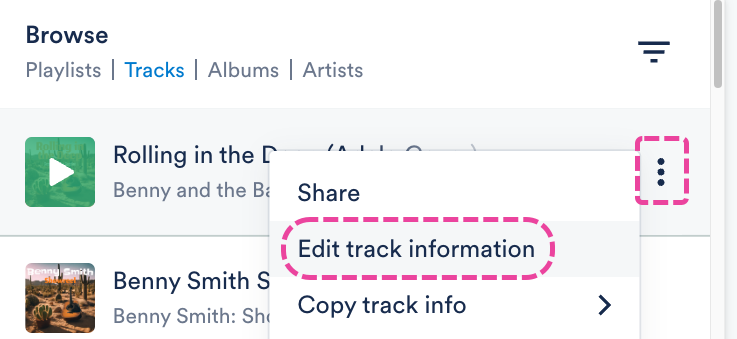
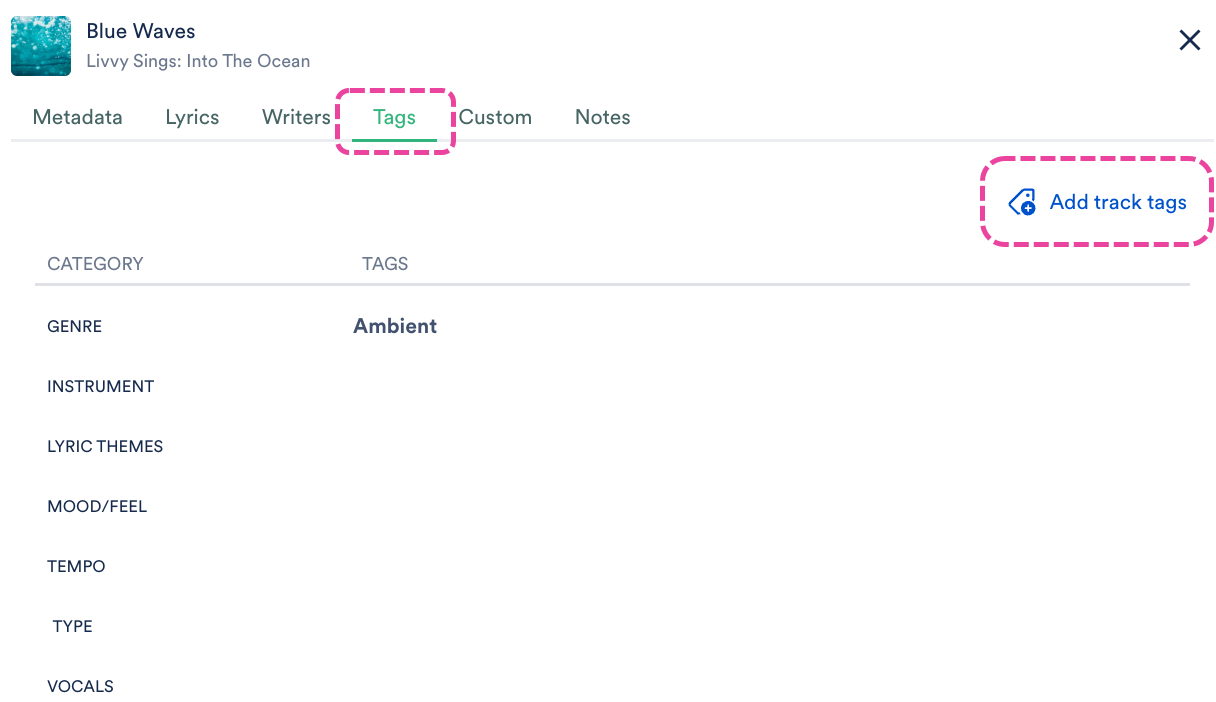
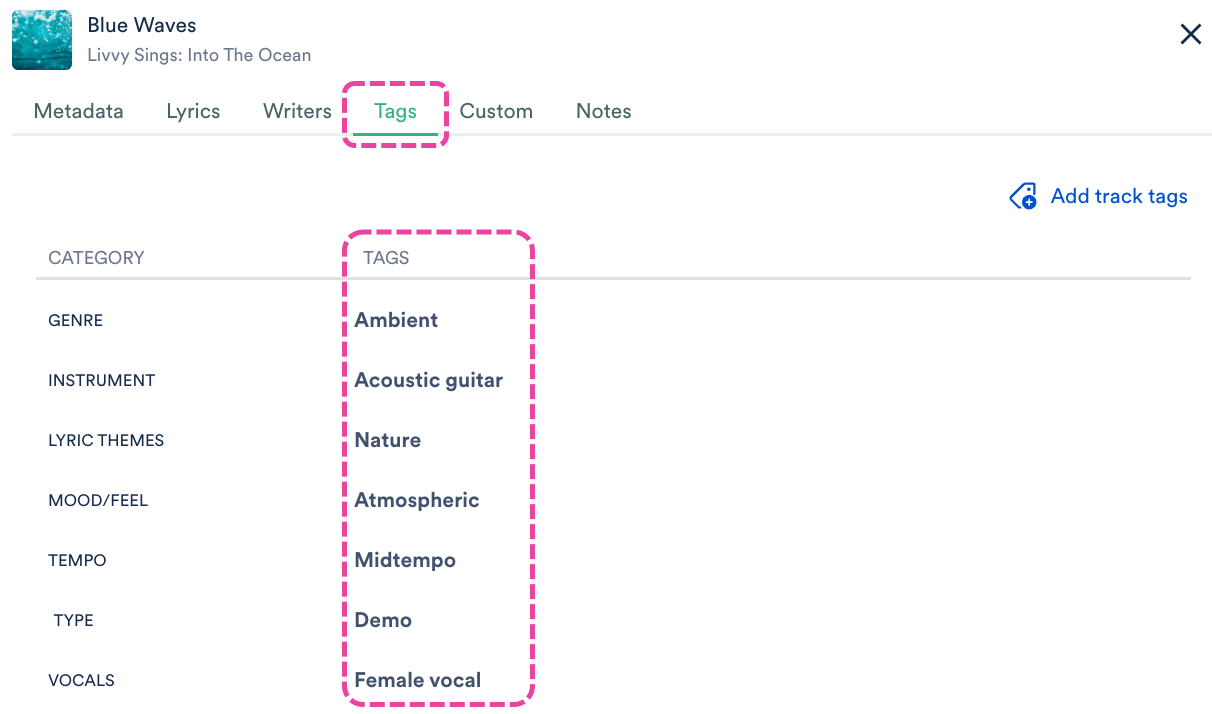
From the Track Information page
- Open the Track Menu (⋮) and select Edit track information.
- From the Tags tab, click Add track tags.
- Type to search for a pre-set tag or create a new tag. Or, select a Category, then select a Tag from the list.
- Click on the tag to add it, then click the Save button.
Manually tagging multiple Tracks
You can do this in a few ways:
- by selecting multiple specific Tracks from your Browse > Tracks view
- by editing Track Information for all Tracks within a Playlist
- by importing a CSV file
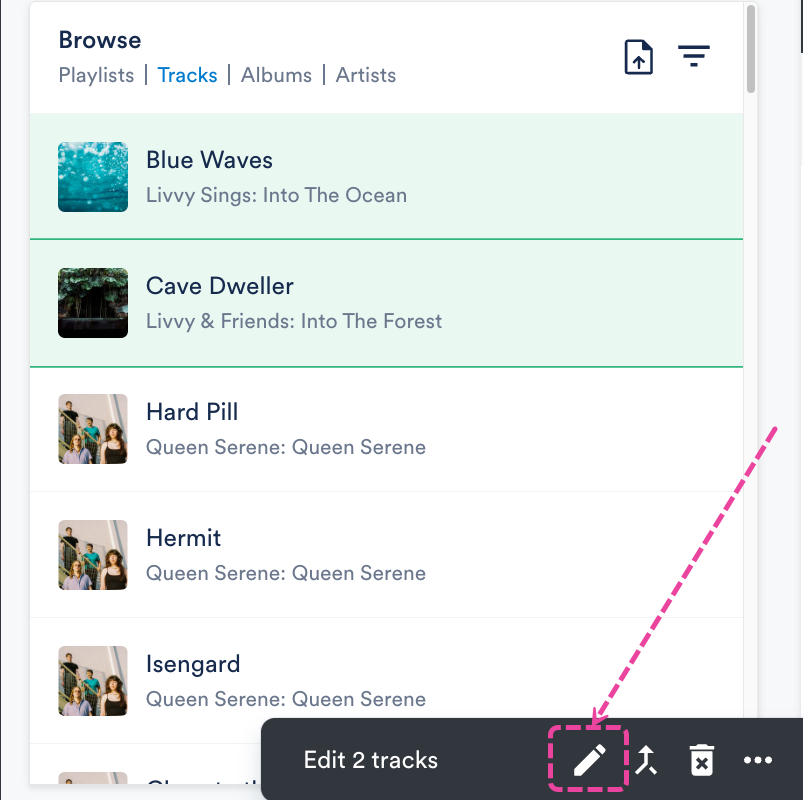
Selecting multiple specific Tracks
- Go to Browse > Tracks.
- Use multi-select to select multiple Tracks.
- Click the pencil from the menu at the bottom of the screen to Edit selected.
- From the Edit tracks window, select the Tags tab.
- Tags with a checkmark icon ✔️ are present on all of the Tracks. Tags with a dash icon — are present only on some of the Tracks.
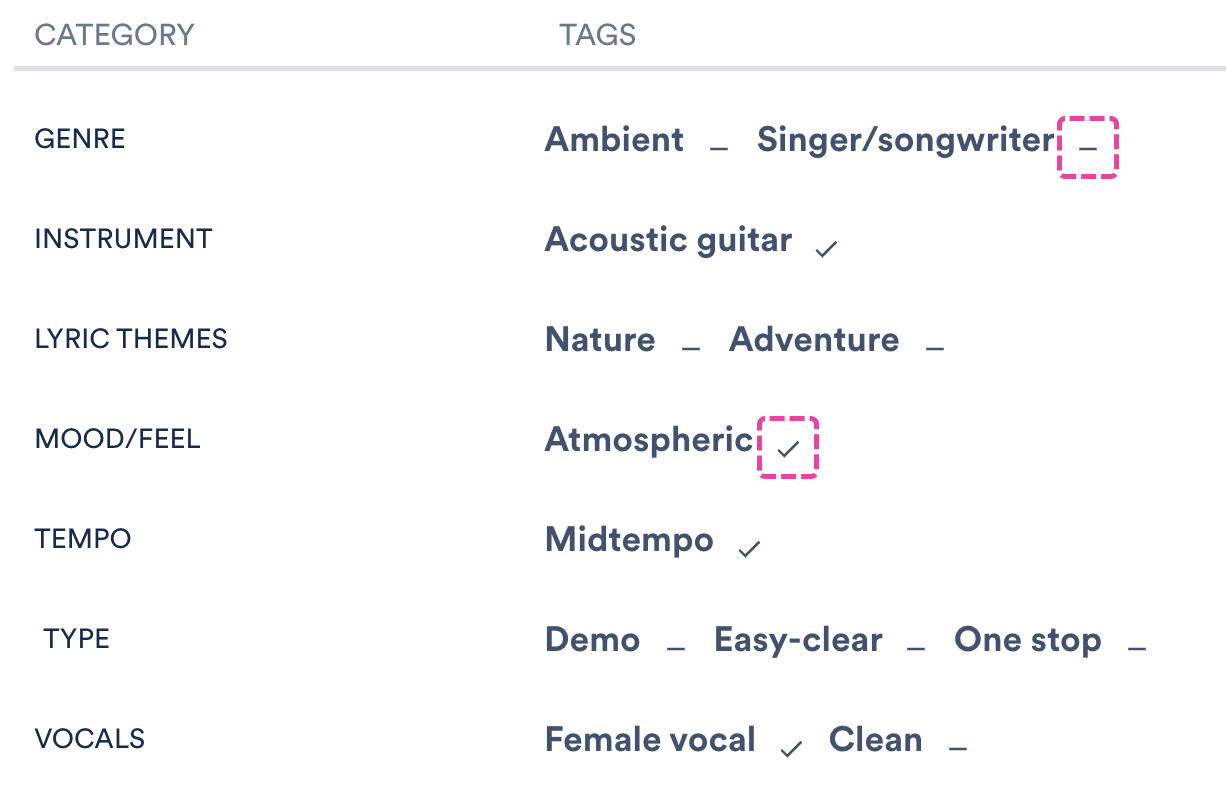
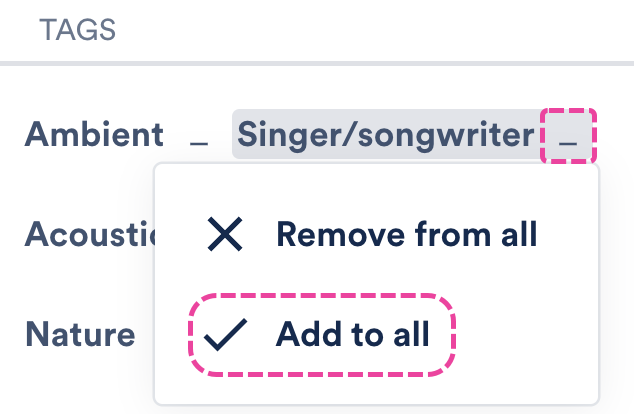
- To add a tag to all of the Tracks, click on the dash icon — next to the desired tag and select Add to all.
Editing Track Information for all Tracks within a Playlist
- Open the Playlist menu (⋮) and select Edit all track information.
- From the Edit tracks window, select the Tags tab.
- Tags with a checkmark icon ✔️ are present on all of the Tracks. Tags with a dash icon — are present only on some of the Tracks.
- To add a tag to all of the Tracks, click on the dash icon — next to the desired tag and select Add to all.
Importing a CSV file
Contact us for help with adding Track tags in bulk, or mapping a different set of Track tags (e.g. from another platform) to the DISCO pre-set Track tags.
Viewing tags on Tracks
From within your DISCO
You do this from the Track panel or the Track Information page on the Tags tab:
When Tracks are downloaded or Saved to another DISCO
DISCO Track tags are not part of the standard ID3 metadata fields, and as such are not written to Tracks when downloaded or Saved to another DISCO. However, there is a workaround for this! You can update your account Settings to have Tags written to the Comments field. To do this:
- In the top-right corner of your DISCO, open Settings (the person icon) and select Settings and Account.
- Under Workspace Settings, select Business Settings.
- Check the box to Write native tags to Comments metadata field on downloaded tracks.
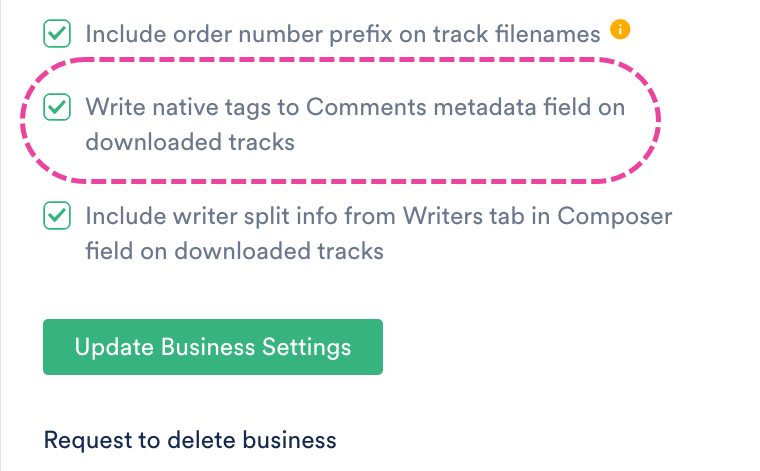
- Click the Update Business Settings button.
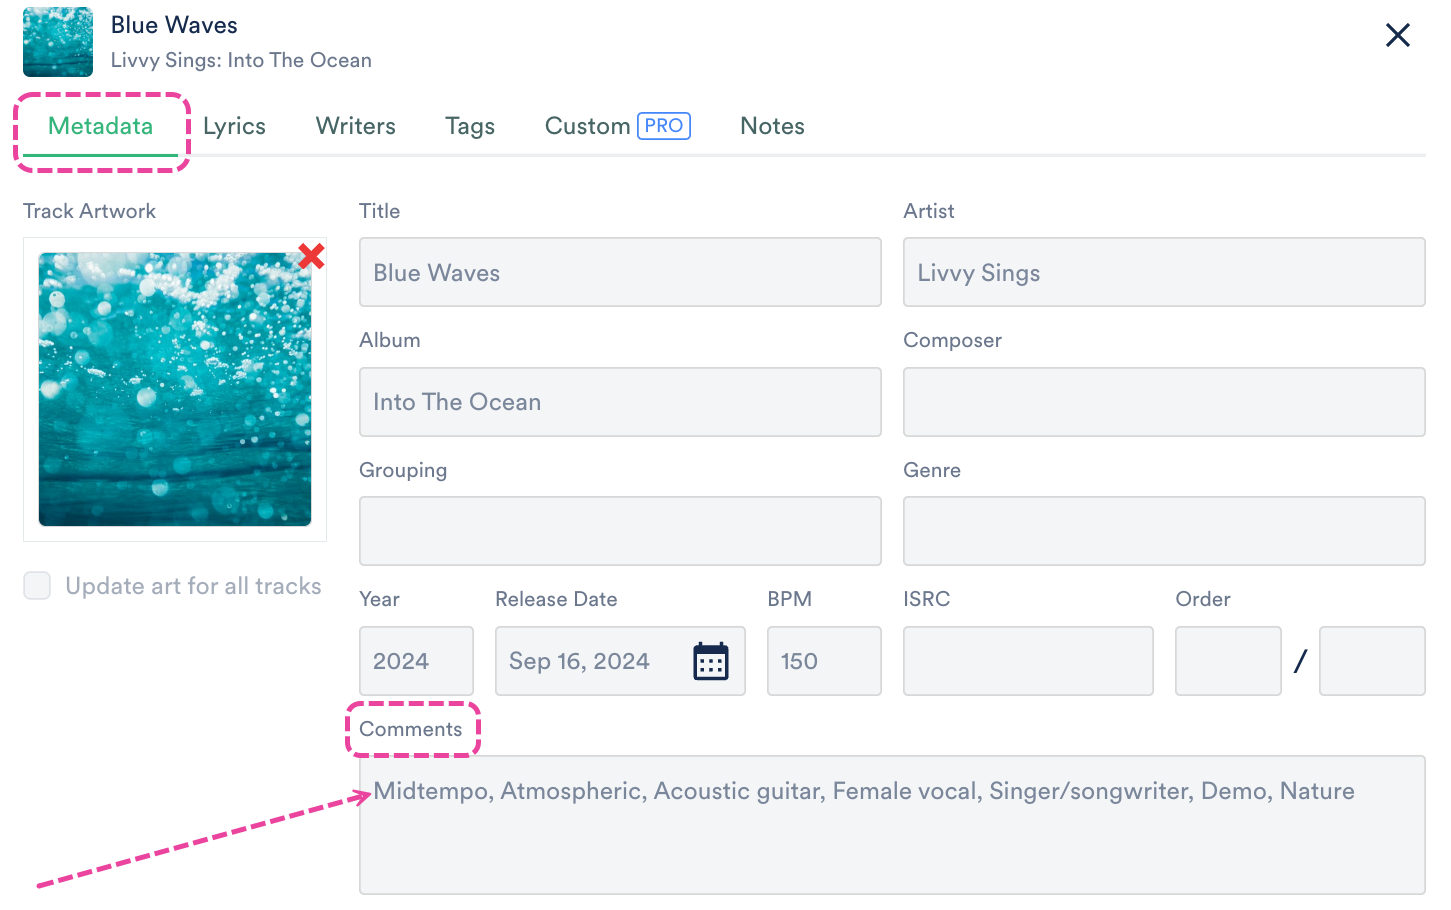
Example
This is how the Track Information appears when saved to another DISCO. The DISCO from which the Track was saved had the Setting enabled to write tags to the Comments field: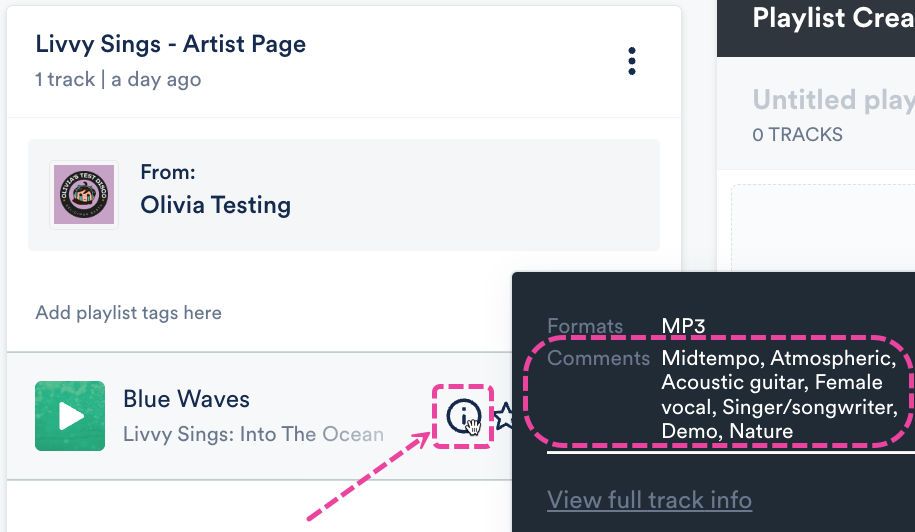
Removing manual Track tags
From individual Tracks
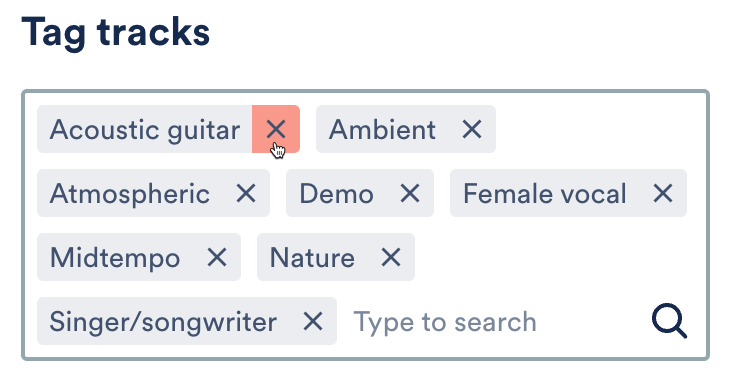
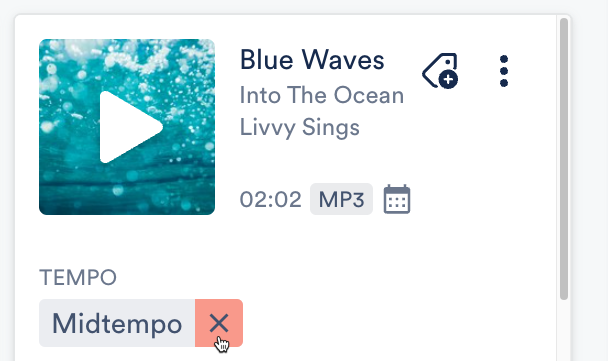
Click the X on the tag from either the Tag tracks window (after clicking Add track tags) or the Track panel.
From multiple Tracks
- Go to Browse > Tracks.
- Use multi-select to select multiple Tracks.
- Click the pencil from the menu at the bottom of the screen to Edit selected.
- From the Edit tracks window, select the Tags tab.
- Tags with a checkmark icon ✔️ are present on all of the Tracks. Tags with a dash icon — are present only on some of the Tracks.
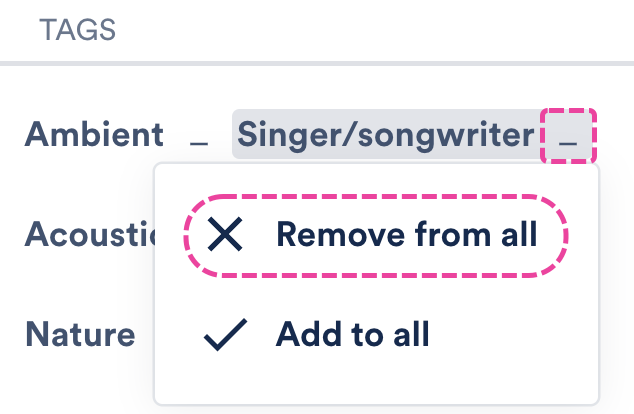
- To remove a tag to all of the Tracks, click on either the checkmark icon ✔️ or the dash icon — next to the desired tag and select Remove from all.
Searching by Track tags
When you type the name of any Track tag in the search box at the top of your DISCO, the Search Results will populate with all Tracks containing that tag.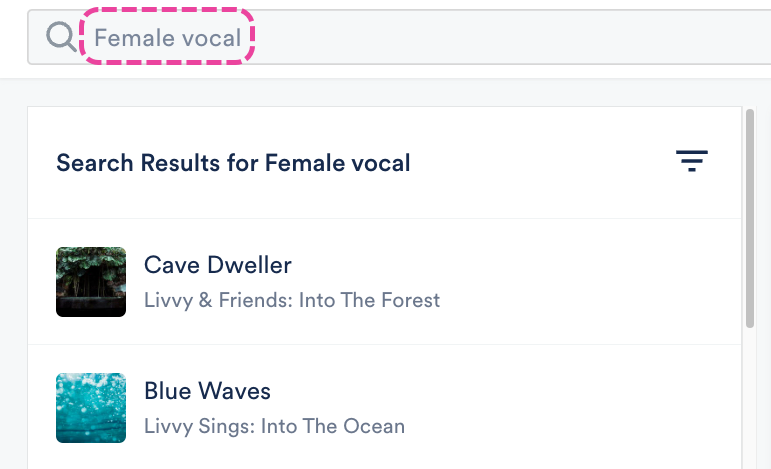
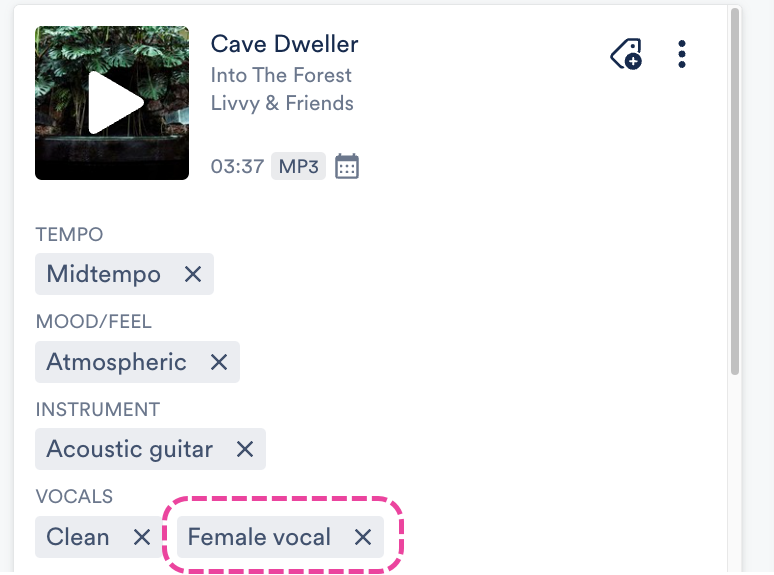
You can also click on a tag in the Track panel:
This will bring up a tag explorer view, where you can select multiple tags from a list of suggested tags to find the right track: 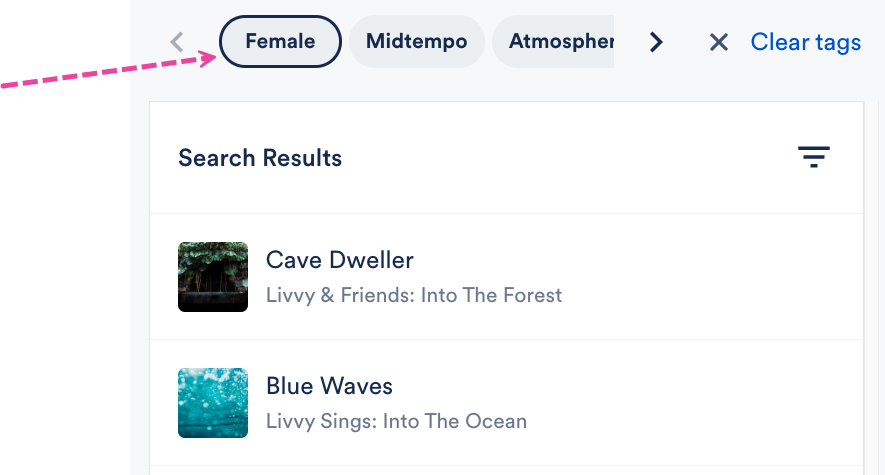
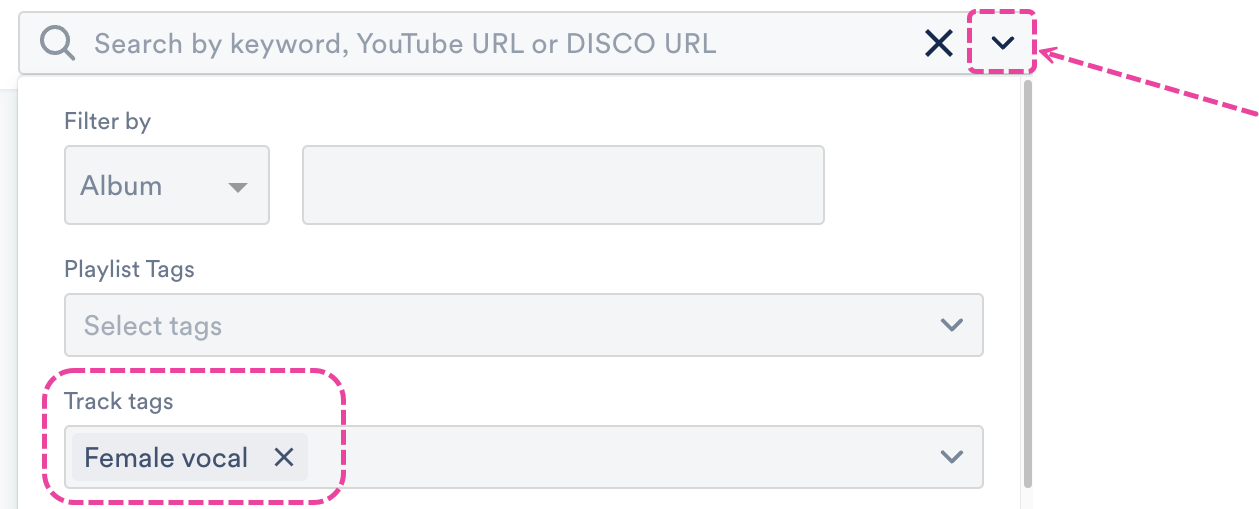
There's also a Track tags filter in the Advanced Search: