Inviting Clients to DISCO Catalogs
You can invite Clients to access your DISCO Catalog.
At a glance
This is done from within the Catalog Settings.
Before you can invite Clients to your Catalog, it must be published.
Inviting Clients to your Catalog
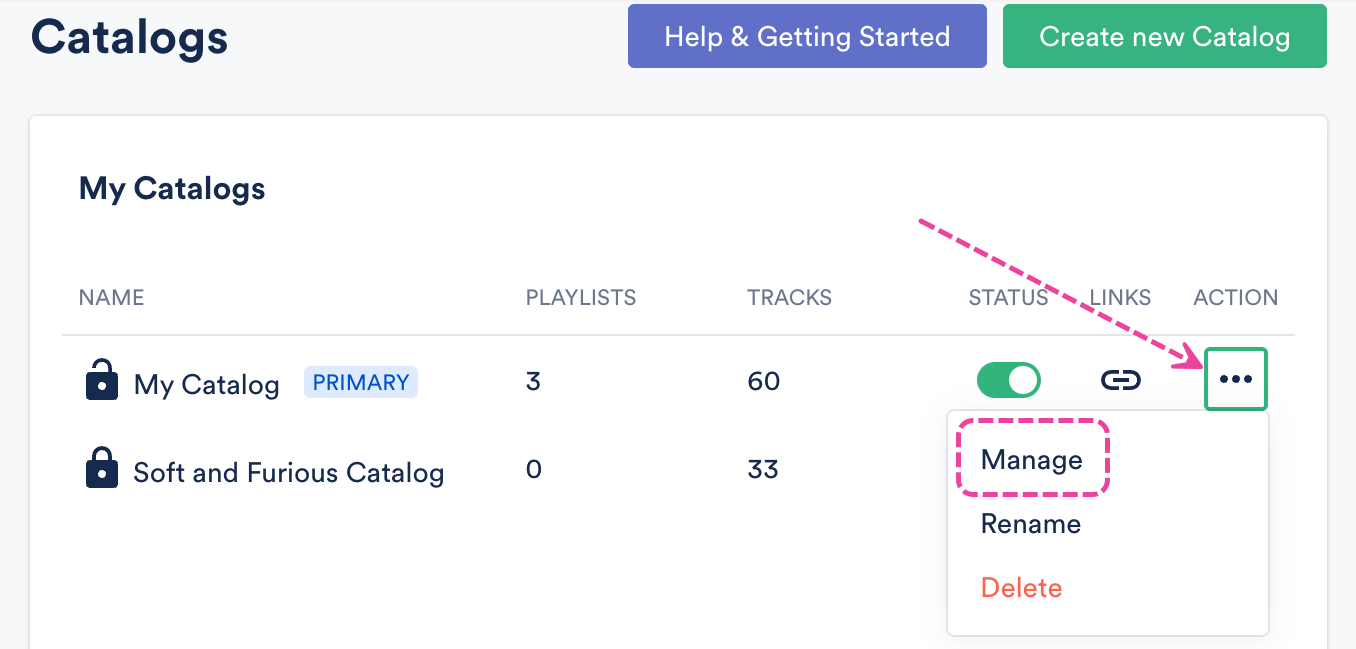
- On the left sidebar of your DISCO, under Discovery Suite, select Catalogs.
- From the Catalogs page, open the Actions menu (…) to the right of the desired Catalog and select Manage.
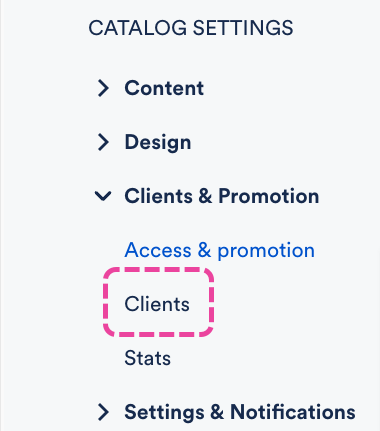
- From the Catalog Settings page, under Clients & Promotion, select Clients.
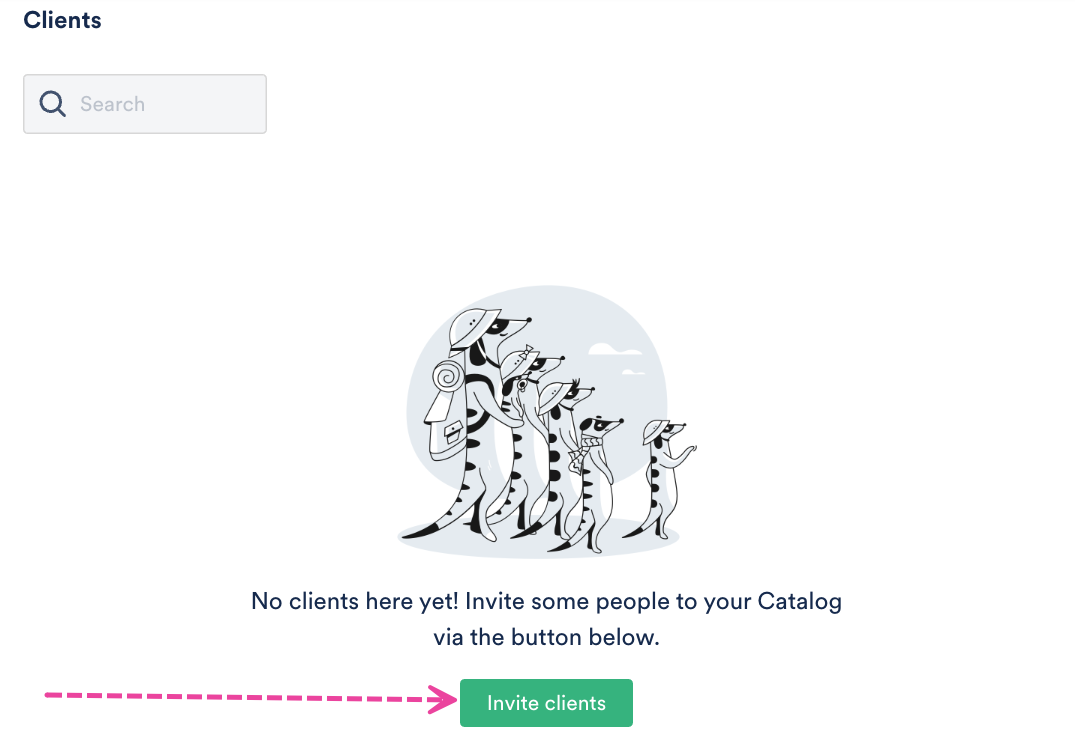
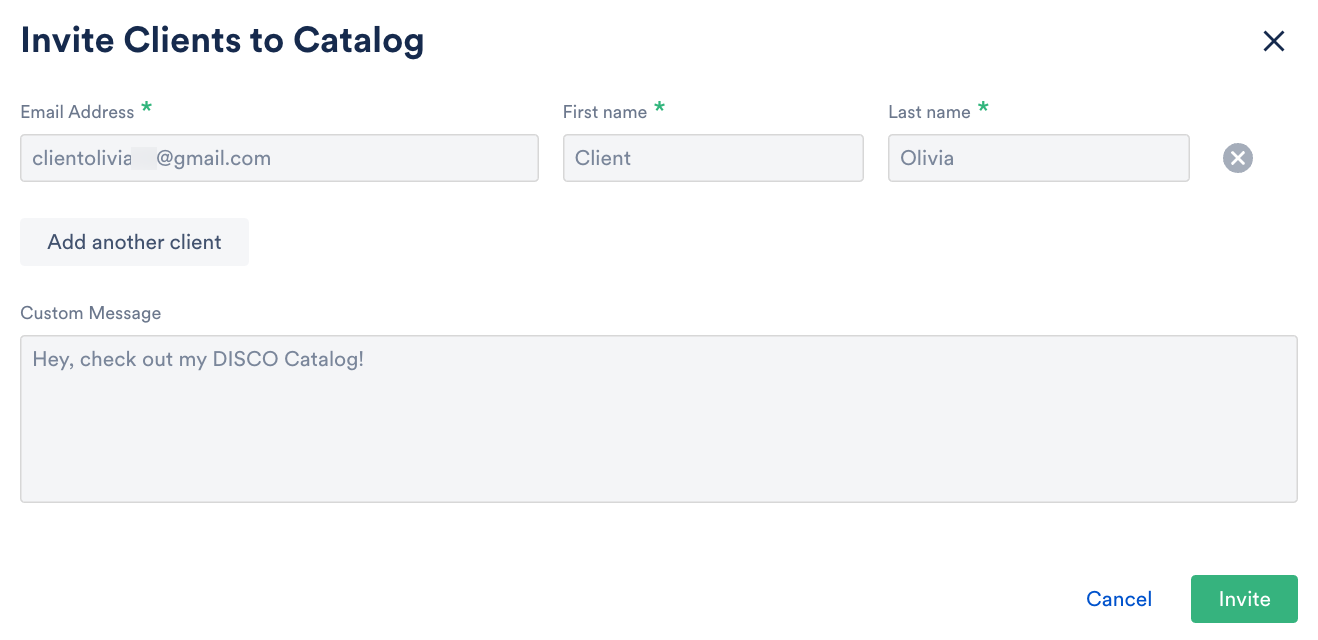
- Click the Invite clients button.
- In the Invite clients to Catalog window, enter their Email Address, First name, and Last name.
- Add a Custom Message (optional), and click the Invite button.
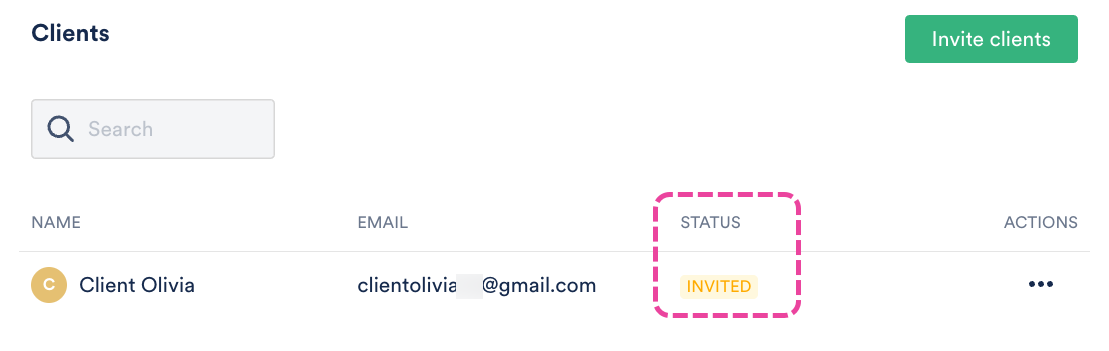
- Their name will appear on the Clients list with the Status showing Invited until they accept the invite.
Once invited, Clients will receive an email with a link to your Catalog. If they have a DISCO account, they'll be able to use that to sign in. If they don't have a DISCO account, they can create a free DISCO Catalog account to access your Catalog.
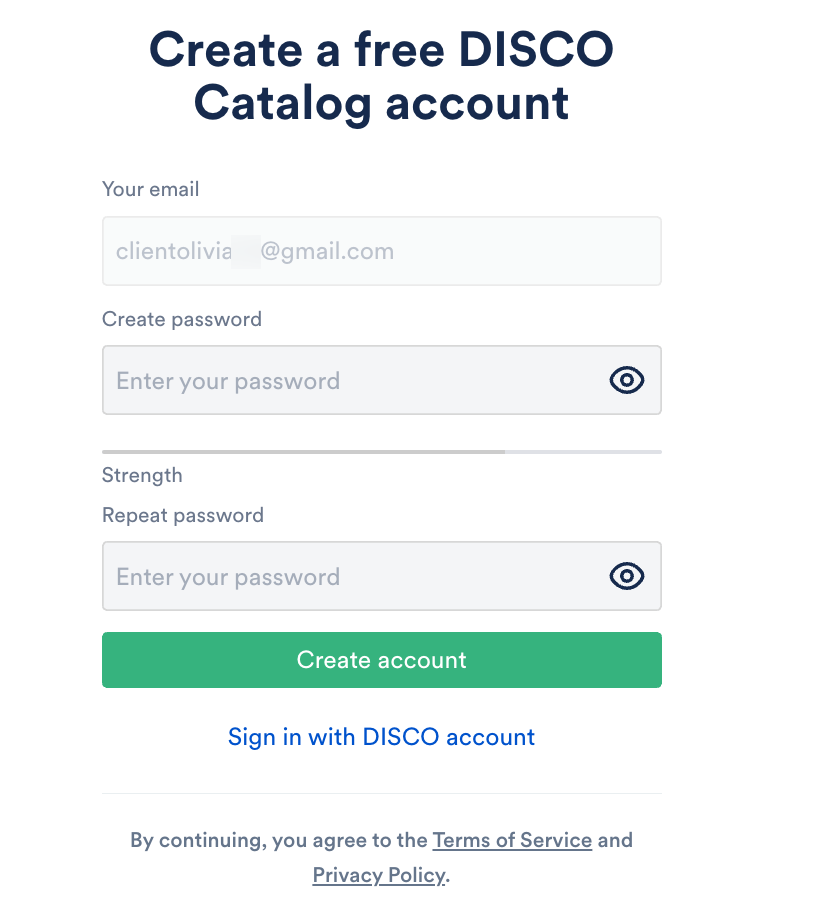
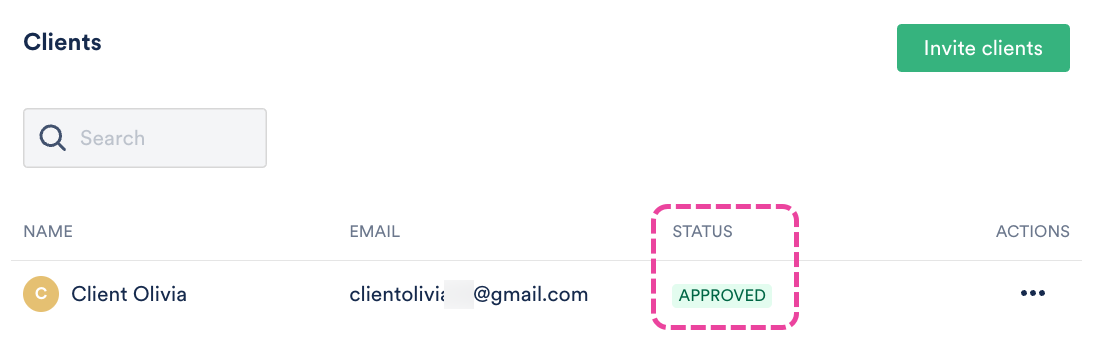
Once they log in to your Catalog, they can browse and search for content, and their status in your Catalog Settings will change from Invited to Approved:
Managing Catalog access requests
At the top section of your Catalog, you'll see an option to Copy URL for your Catalog:

If you share this link, recipients can log in if you've invited them, or they can request access via the Catalog.
Viewing access requests
When someone requests access to your Catalog, a few things will happen:
- the requester will see this message
 the user in your DISCO who created the Catalog will get a notification in-app
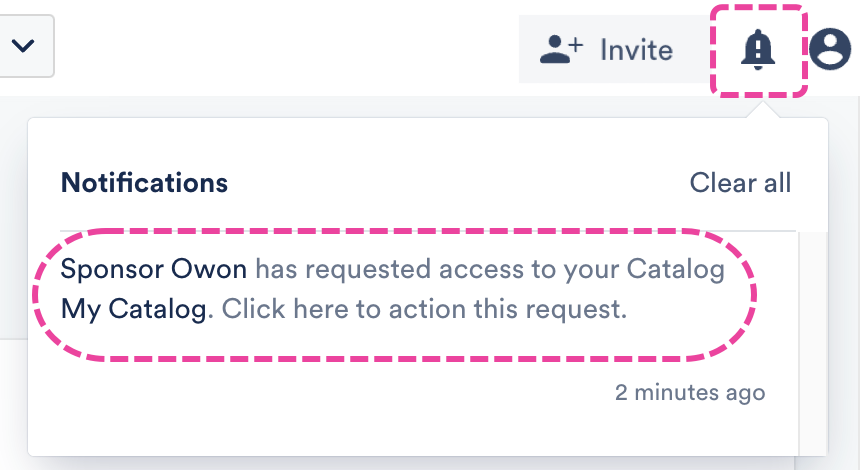
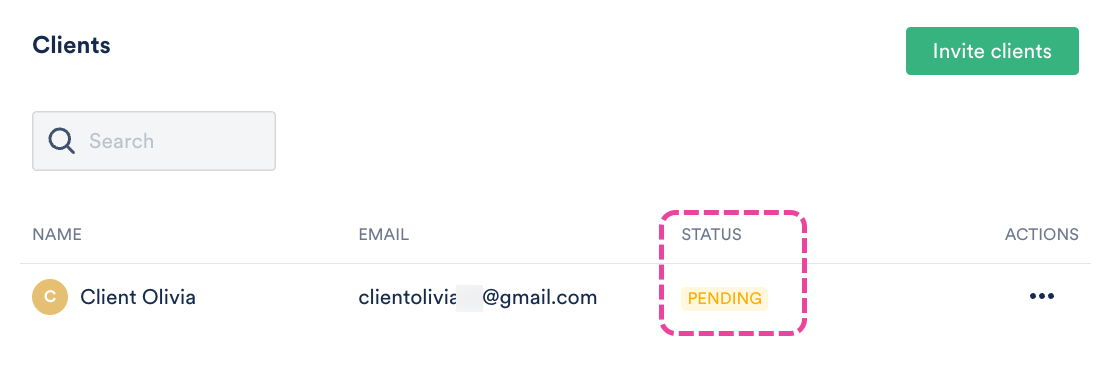
- the requester's name will appear in your Clients list in your Catalog Settings with the status Pending
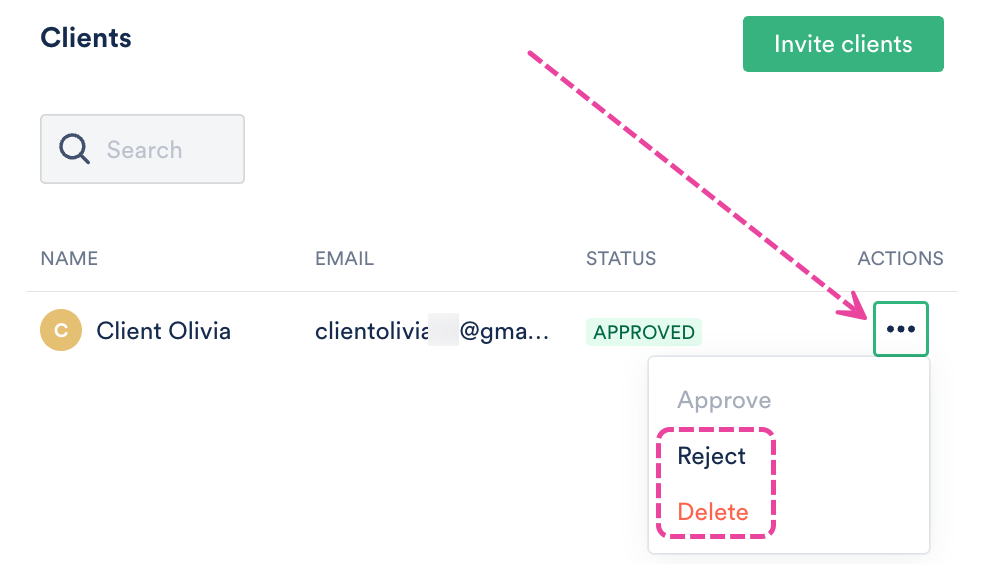
Approving, rejecting, and removing access
To approve or reject access:
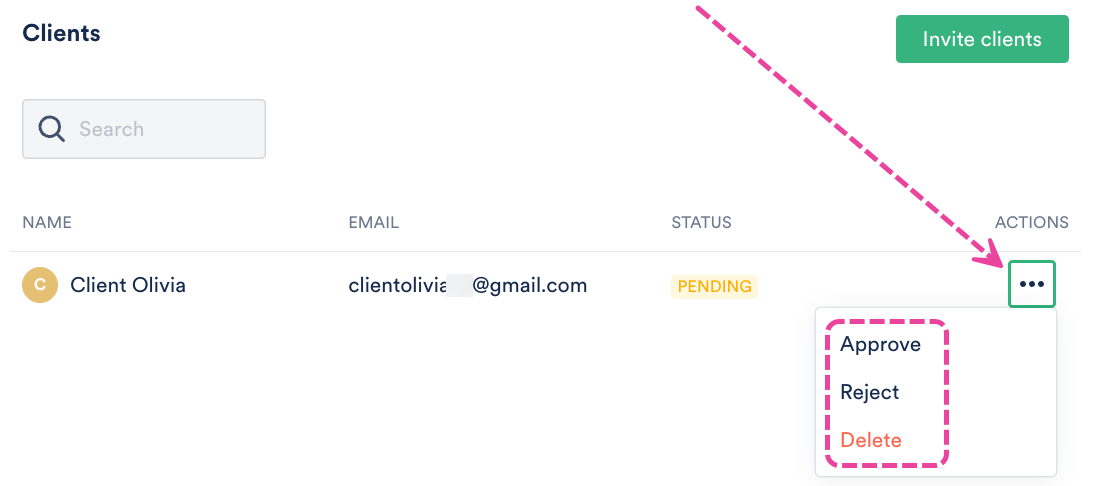
- From the Catalog Settings page, under Clients & Promotion, select Clients.
- From the Clients list, locate the Client with the Pending status.
- Open the Actions menu (…) and select the appropriate option: Approve, Reject, or Delete.
- The Status for that Client will change from Pending to either Approved or Rejected:
To remove previously approved access:
Open the Actions menu (…) and select Reject or Delete.