
Source Audio onboarding process: Transferring your content from Source Audio to DISCO
Users on our Pro and Enterprise plans have the option to transfer their content from Source Audio into their DISCO using the steps below:
Step 1: Contact us to initiate the transfer
- You can contact us via Chat (using the Support menu, which looks like a question mark in the bottom right corner of your DISCO), or by emailing onboarding@disco.ac.
- We will then set up the transfer on our end and provide you with the details you'll need to initiate the transfer (refer to Step 4).
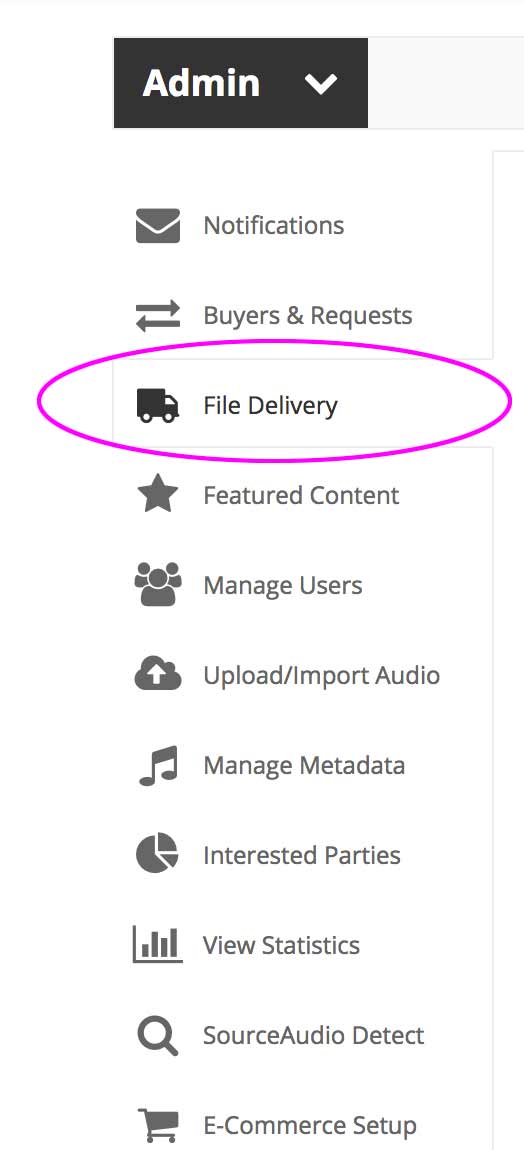
Step 2: Go to the Admin panel in your Source Audio
- Log in to your Source Audio account and go to the Admin panel. From the left sidebar menu, choose File delivery.
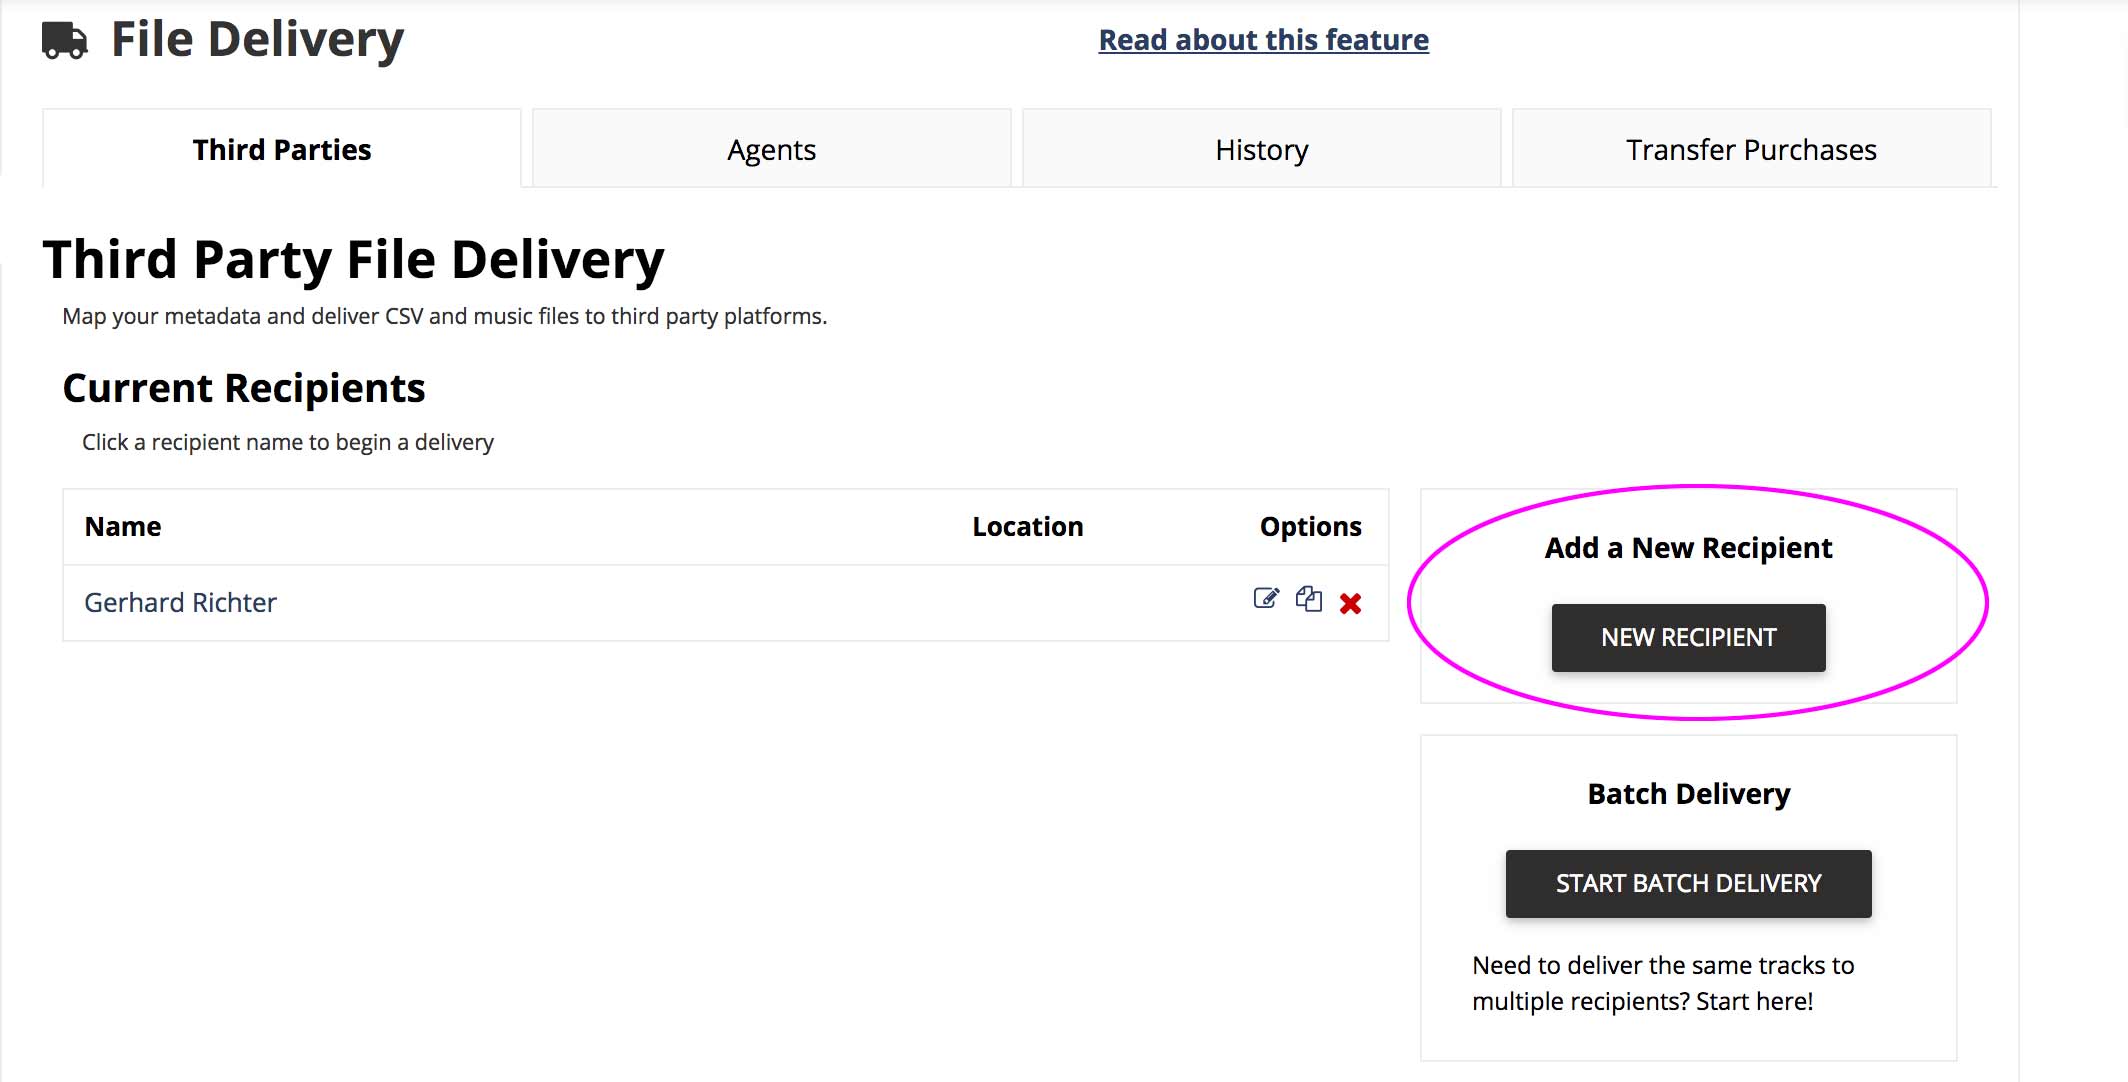
Step 3: Add a New Recipient
- From the File Delivery page, click the Add a New Recipient button on the right side.
Step 4: Enter the transfer details
- From the Create a New Recipientpage, enter the following:
- Preset: Custom
- Name: DISCO
- Email: deliveries@disco.ac
- FTP info: SFTP
- All other SFTP details: Use the details we provided to you when you first contacted us to initiate the transfer (refer to Step 1).
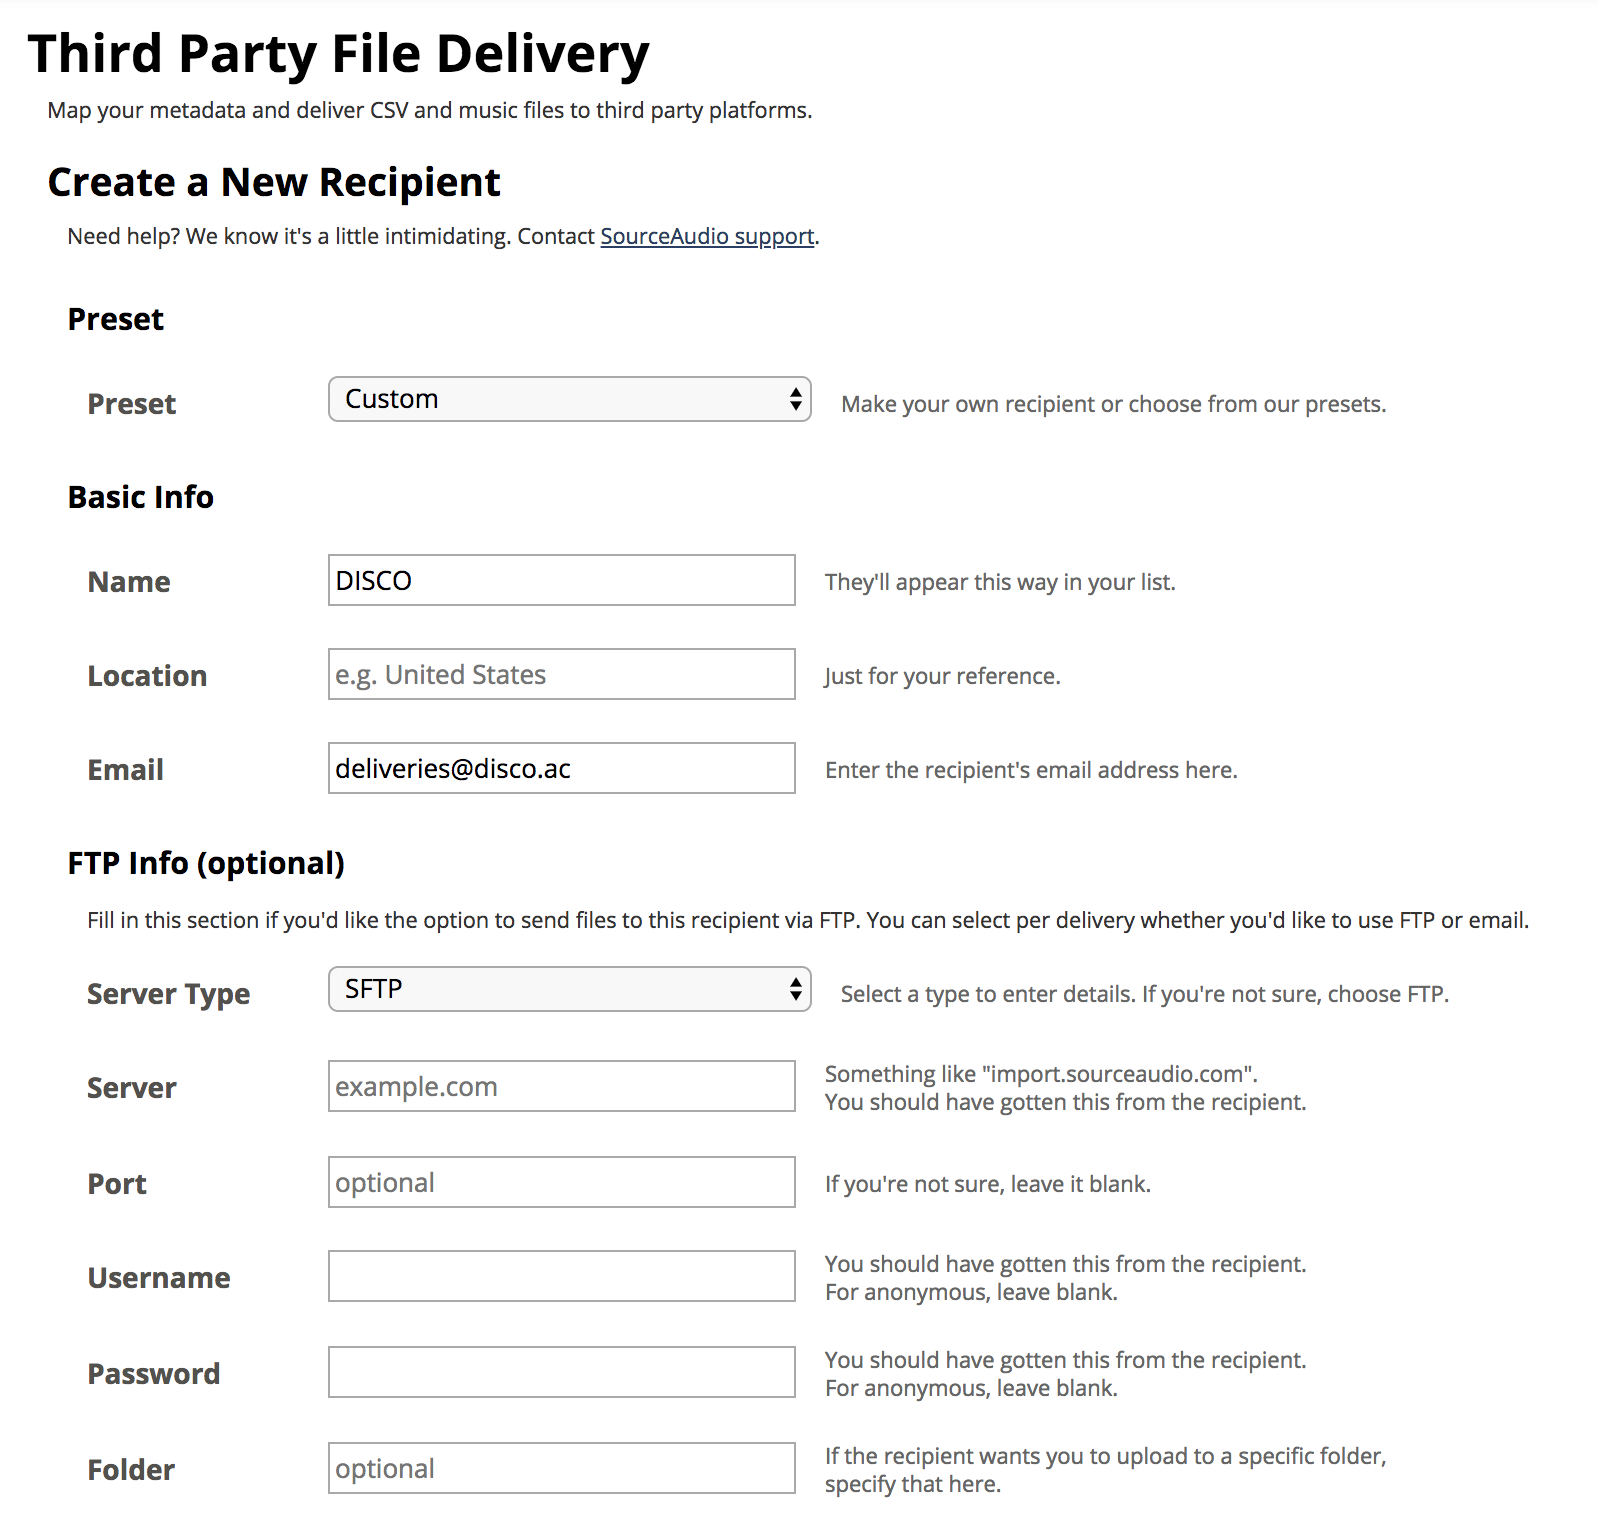
- Once you've entered all the details, click Save and Configure Delivery.
Step 5: Enter the Metadata Delivery details
- From the Configure your Deliveries to DISCO page, fill in the fields under Metadata Delivery. (Generally, the defaults can be used here.)
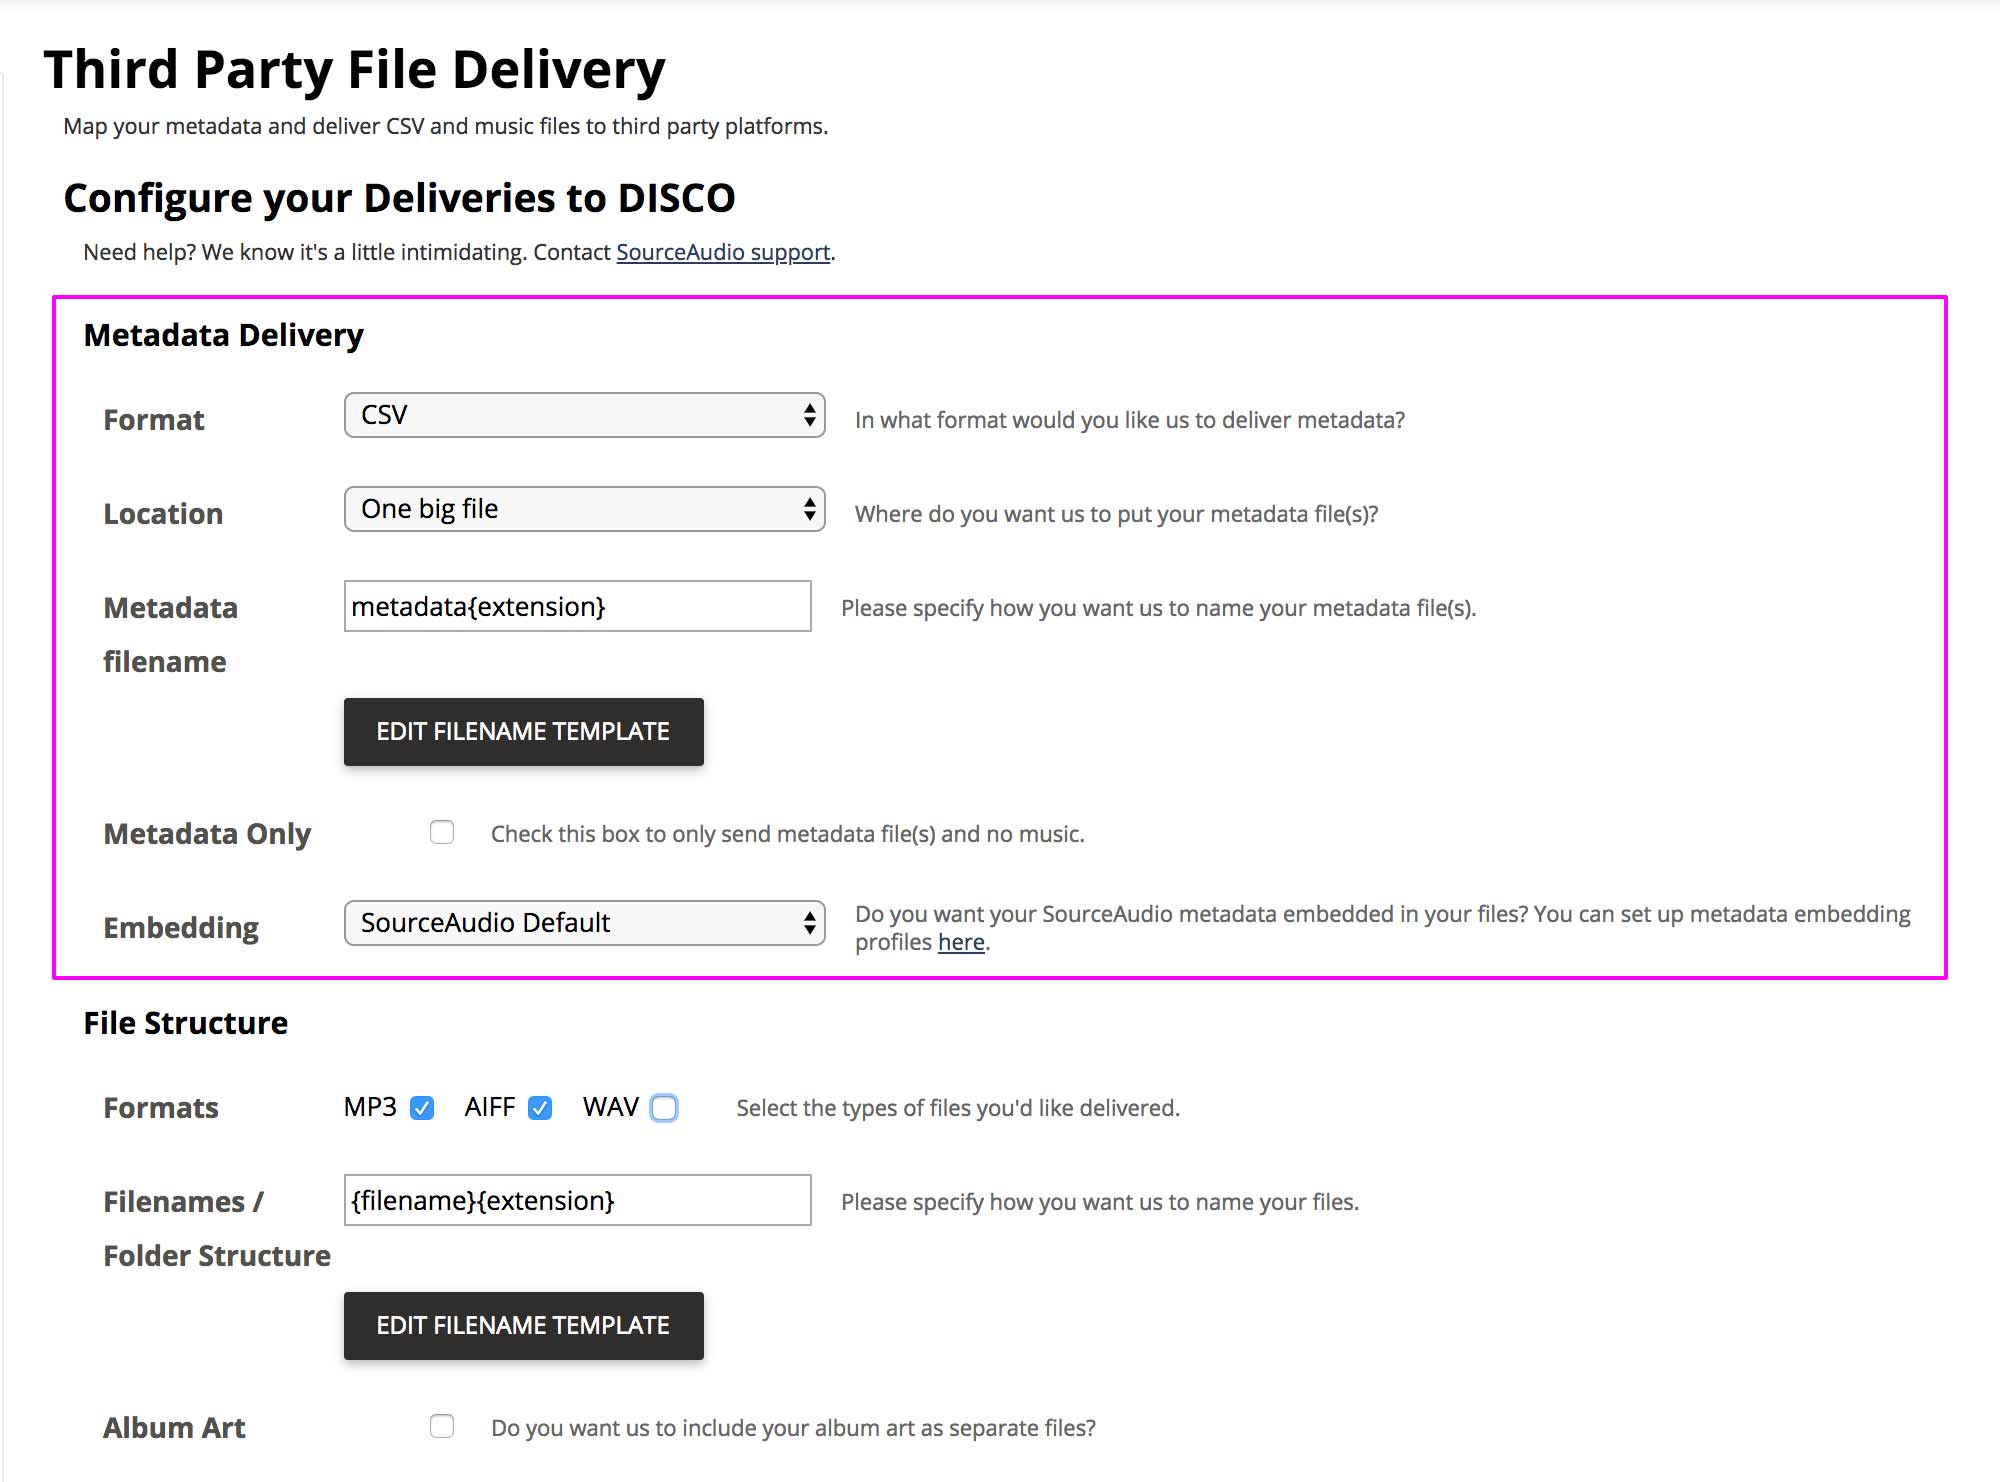
Step 6: Enter the File Structure details
- From the Configure your Deliveries to DISCO page, fill in the fields under File structure to select the formats you'd like delivered.
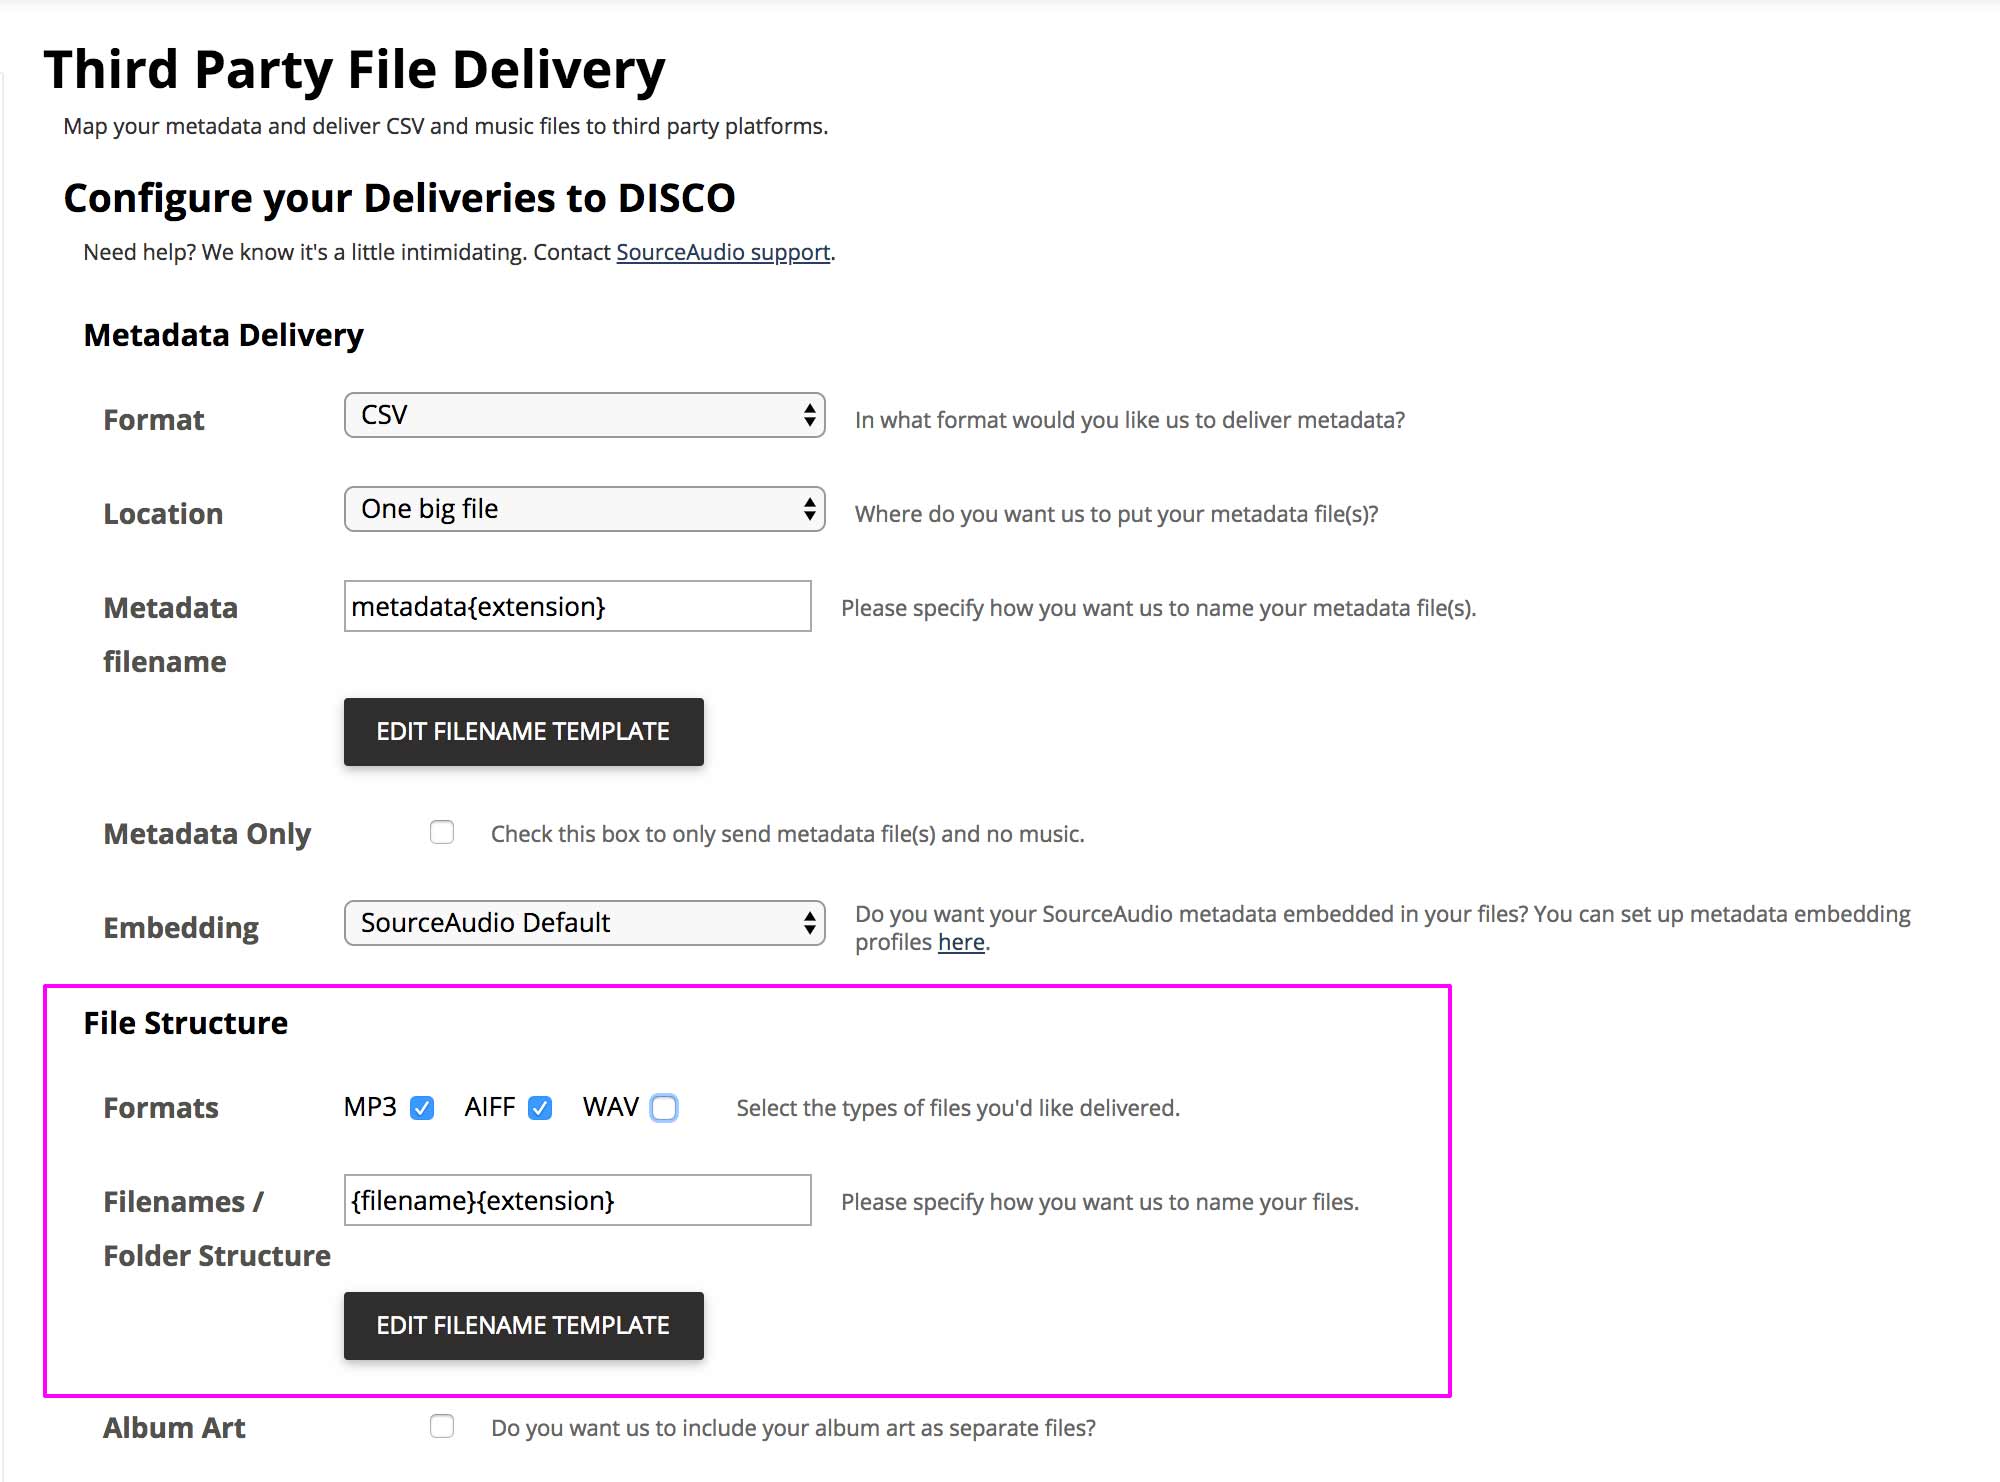
📎 Note: DISCO supports one lossy format (i.e. mp3) and one lossless format (either AIFF or WAV) per Track, so please only send one of each. For lossless formats, we recommend AIFF because metadata can be written to it, unlike WAV. If you don't have AIFFs available, we suggest sending WAVs and MP3s so your artwork can be retained based on what is on the MP3 file. We will merge the WAVs and MP3s on our side. - Click Save and continue.
Step 7: Select the Metadata Fields
- From the Metadata Fields page, choose the metadata fields you want to send to DISCO.
- The first field to add is Filename. Select Filename in the Source data dropdown, and then click + Add field below, at the bottom right of the panel:
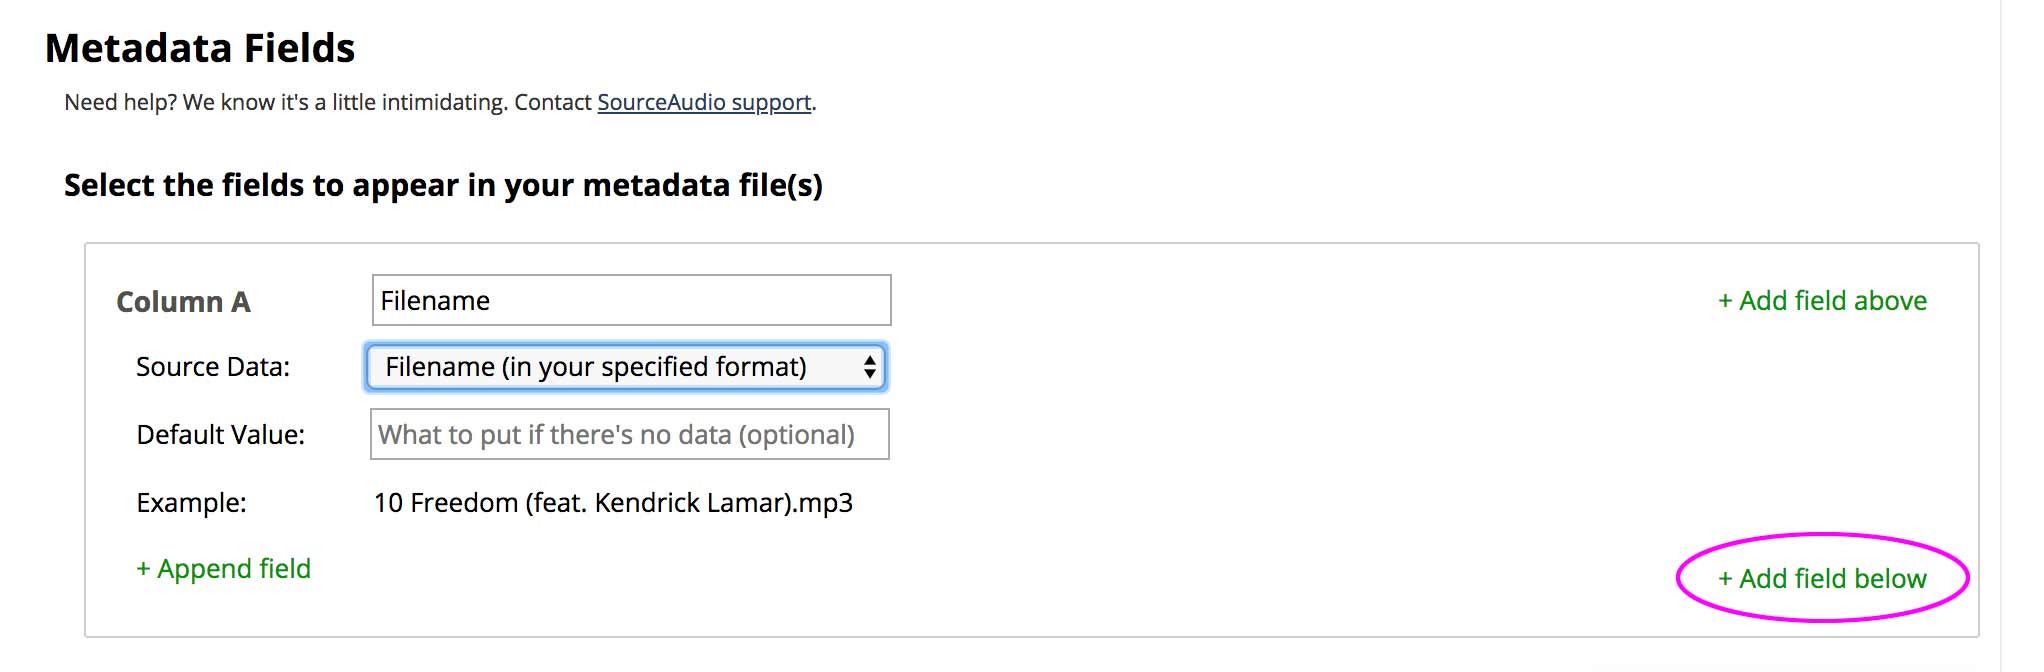
- Repeat this step for all the metadata you'd like to transfer to DISCO. The following fields in Source Audio have a direct match in DISCO:
- Artist
- Album
- Title
- Genre
- Track number
- Composer
- BPM
- ISRC
- Lyrics
- Include any other metadata you'd like to transfer to DISCO, and we'll work with you to import this metadata into other fields within DISCO.
- Click Save.
Step 8: Set up delivery
- After saving your transfer details in the previous step, you'll be taken to the File Delivery index page. From there, click the Start batch delivery button on the right.
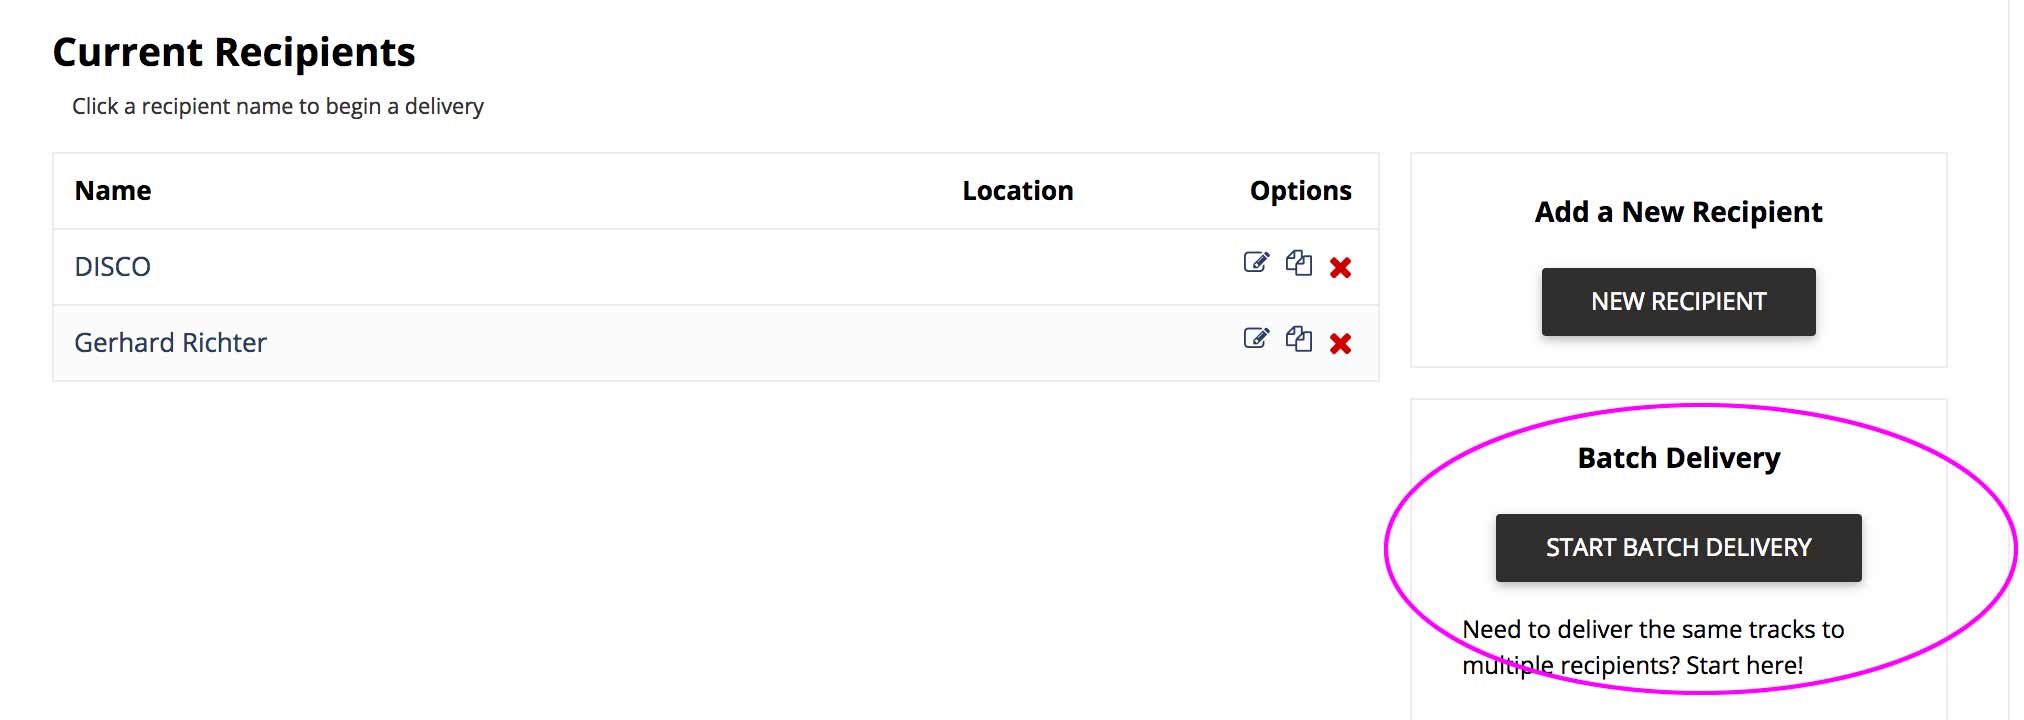
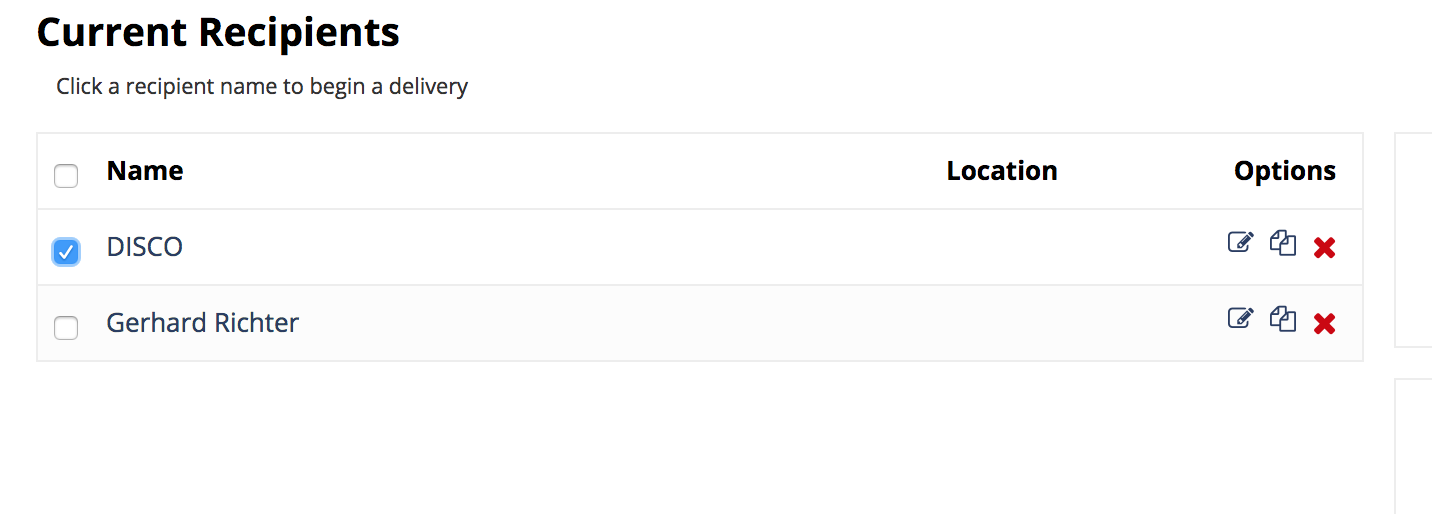
- Checkboxes will appear next to the recipients you've set up. Select the DISCO recipient you just set up and click Create Batch Delivery.
Step 9: Select Files
- From the Select Files to Send page, click Browse All at the top.
- Check the boxes next to the catalogs you want to send.

Step 10: Confirm and send
- You'll now see a confirmation screen, where you can confirm and start the transfer. It will show you a summary of everything you've set up so far.
- Under Total files, you'll see a summary of the total data being sent (Transfer for these deliveries), along with the amount of transfer data you have on your Source account (Transfer on your account).
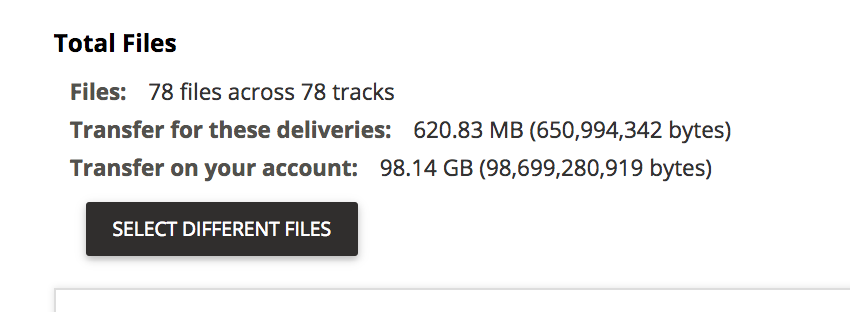
- Make sure the amount of data listed next to Transfer on your account is larger than the amount listed next to Transfer for these deliveries. If it's not, click the Transfer Purchases tab in the File Delivery admin section to purchase sufficient transfer data.
- Once you have enough data for the transfer, review the summary:
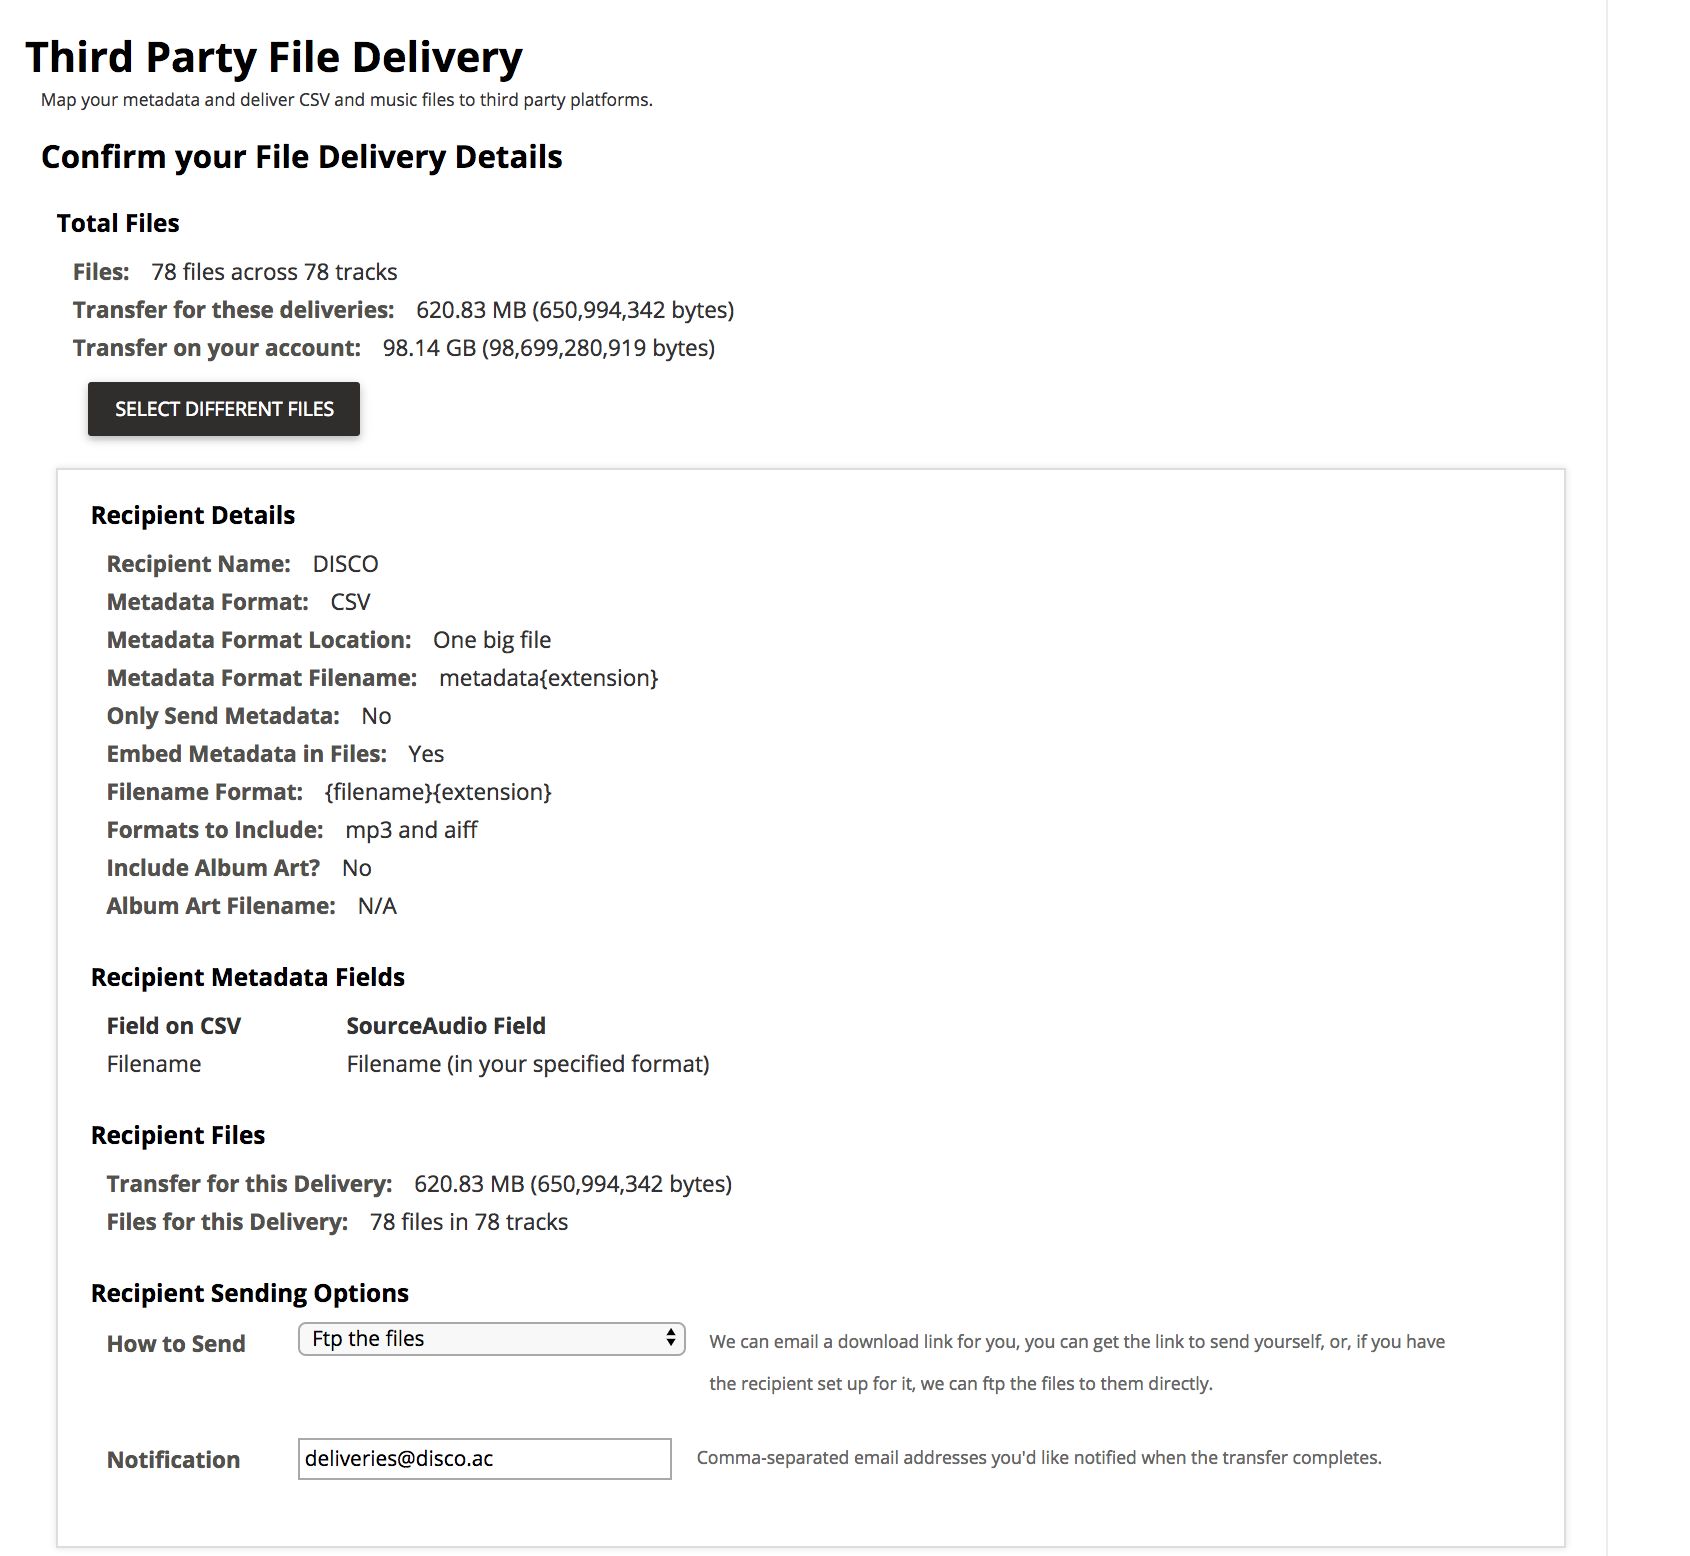
- In the last two fields, under Recipient Sending Options, select:
- How to send: FTP the files
- Notification: deliveries@disco.ac
- To begin the transfer, click Send Files.
Step 11: Contact us again to confirm the transfer is complete
- Email us at onboarding@disco.ac once you have completed the transfer. We'll complete the import and get in touch about the next steps.